An original idea for your next looming project!
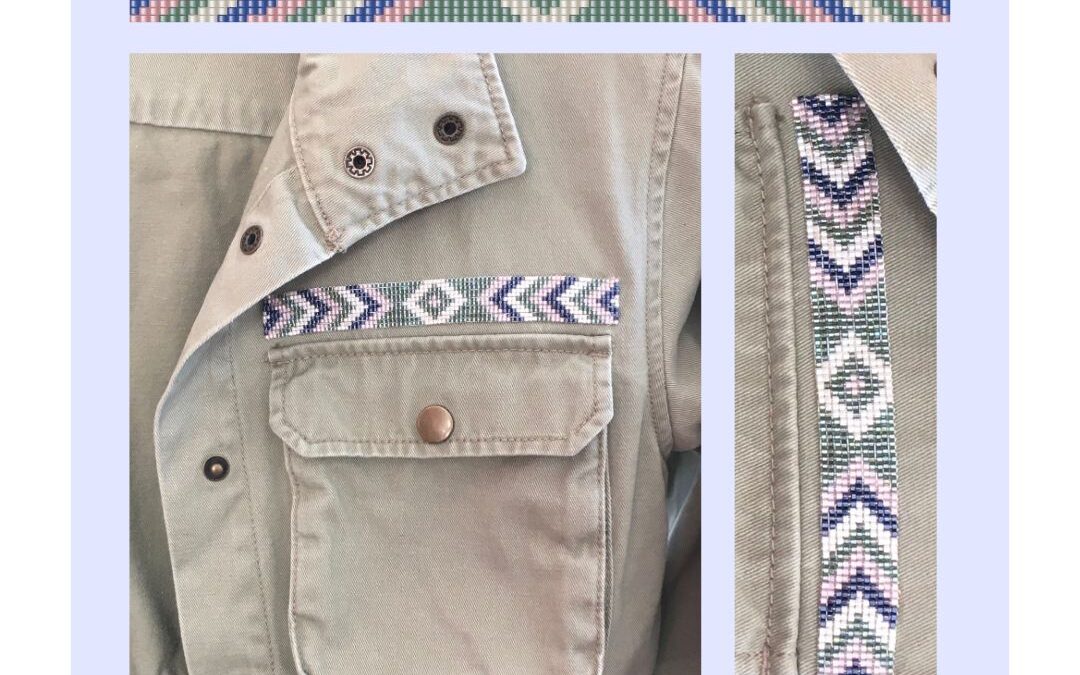
We received this nice photo from Denise where she sewed a piece of woven beads onto a jacket, to give it an extra touch 🤩
The beads are woven into a nice pattern using a loom (beading loom). This can be done with both 11/0 delica’s and seed beads. Delica beads give a more connected and tight effect and with seed beads this will look a little bit more loose and casual. Denise has written out for us the explanation and useful tips for this which you can read here below.
We advise you to use as many ‘opaque’ beads as possible, as they will not lose their color through washing or wearing! Beading thread or a thin fireline is certainly suitable for both: looming the pattern and sewing the loomed pattern on the fabric.
And to inspire you even more, we have made a few color variants and patterns for you that are great for upcycling your clothes!


Instructions for sewing:
It is important to look carefully in advance at the location where you want to attach it. You could already draw a line with a thin pencil, for example. As you can see on my jacket, the pocket curves a bit. It is important that you keep this in mind. I didn’t do that before and it looked a bit strange. I finally had to ‘bend’ it a bit.
I did the attaching itself by attaching the second outermost row of beads to the fabric. This way you won’t see any thread. You work horizontally for the top and bottom row and insert a needle from underneath the garment between the 1st and 2nd row of beads and then skip about 2 to 3 beads at a time and then put the thread back in the piece of clothing. The closer together the tighter, but be careful not to sit too close together because you don’t want to create gaps. Also use a thin needle to avoid holes in the fabric.
Here’s the thing: if you pull the wire tight to secure it, you can ensure that the thread gets stuck just above OR below the bead. Sometimes you have to help the beads a little by moving them back and forth a bit so that the thread falls between them properly. For example (if we are talking about the top row): you go with your needle in the 2nd row of beads and ultimately ensure that the thread ‘disappears’ between rows 1 and 2 (not between rows 2 and 3). This way you get it attached to the fabric as tightly as possible. This applies to the rows above and below. I tied the sides together a little tighter (per 2 beads). If you want to secure it extra well you can make an extra round. Because you pull the thread tightly between the beads, you won’t notice it (if you do it right and pay close attention).
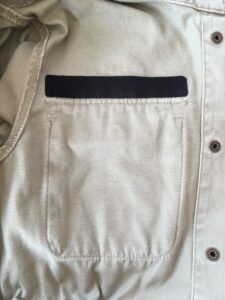
Once you have managed to attach it onto your garment, you naturally want to keep it that way for as long as possible. I therefore chose to secure it extra well by ironing ‘recovery fabric’ on the back. This means the threads will be hidden when I put on or take off my jacket and the threads are also extra well secured (see photo). You may not be able to use this for every sort of fabric, so consider carefully whether you test this first. You can check your local grocery store: they might sell it, even in diffrent colours.
Good luck!