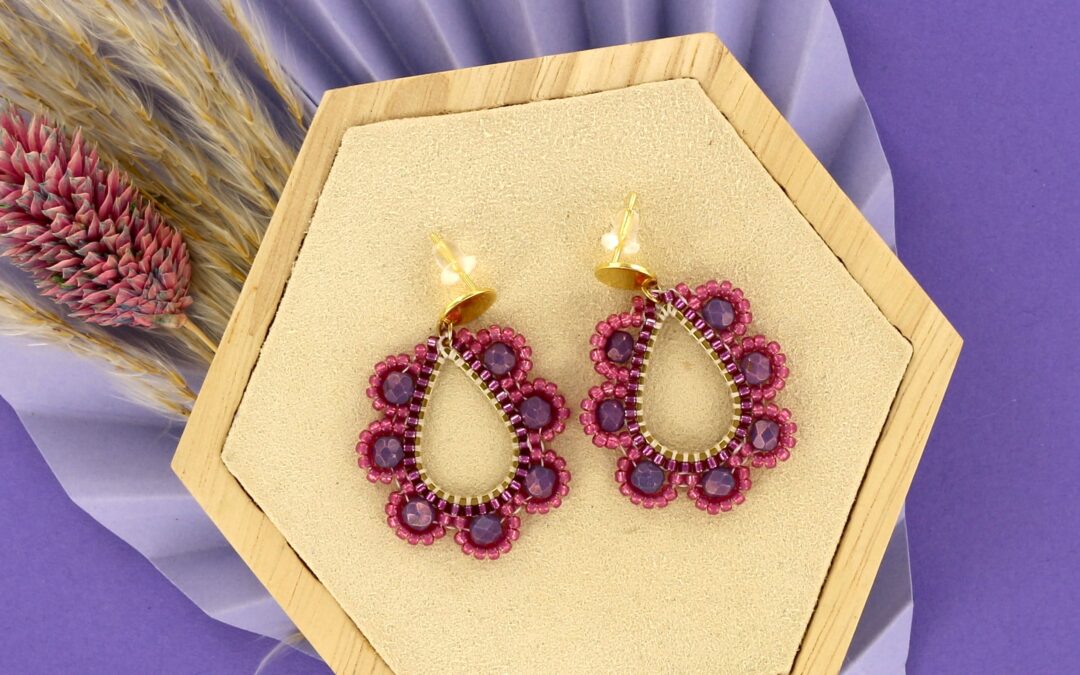
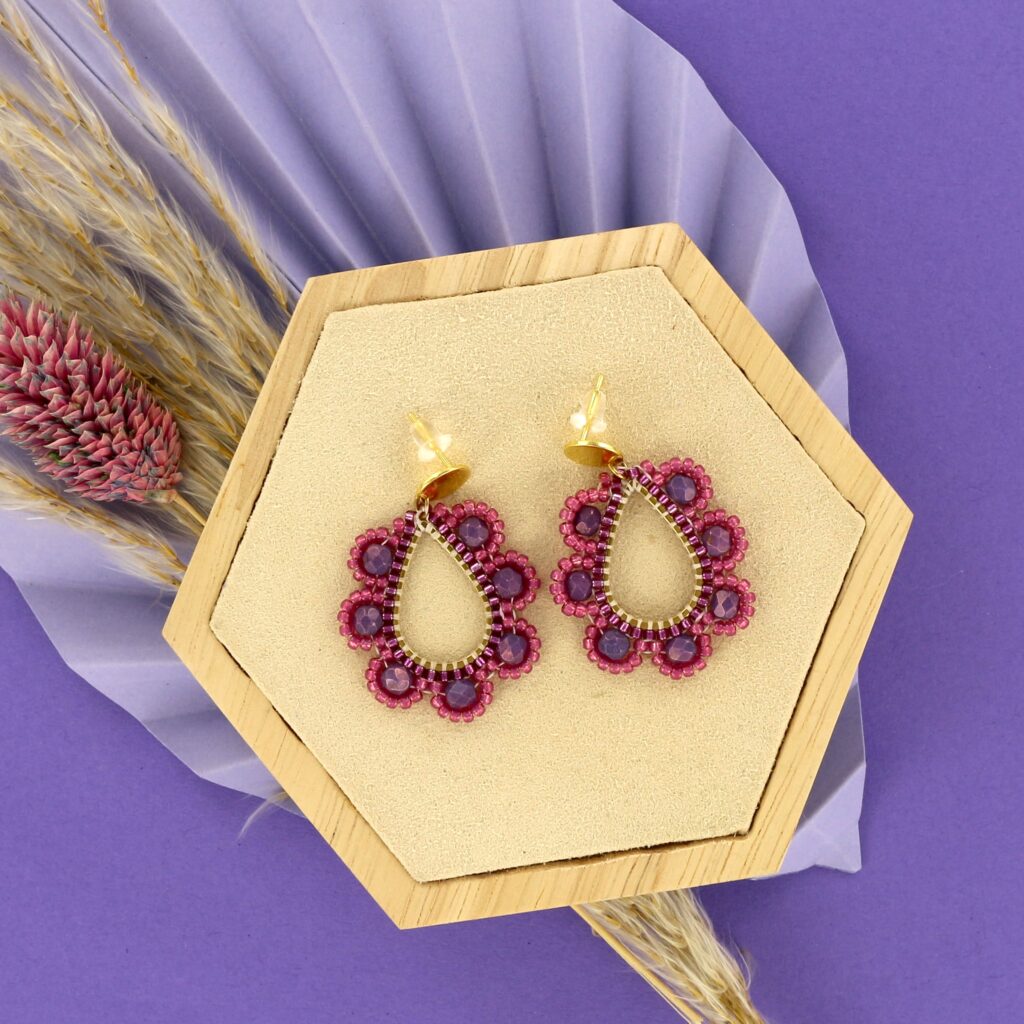
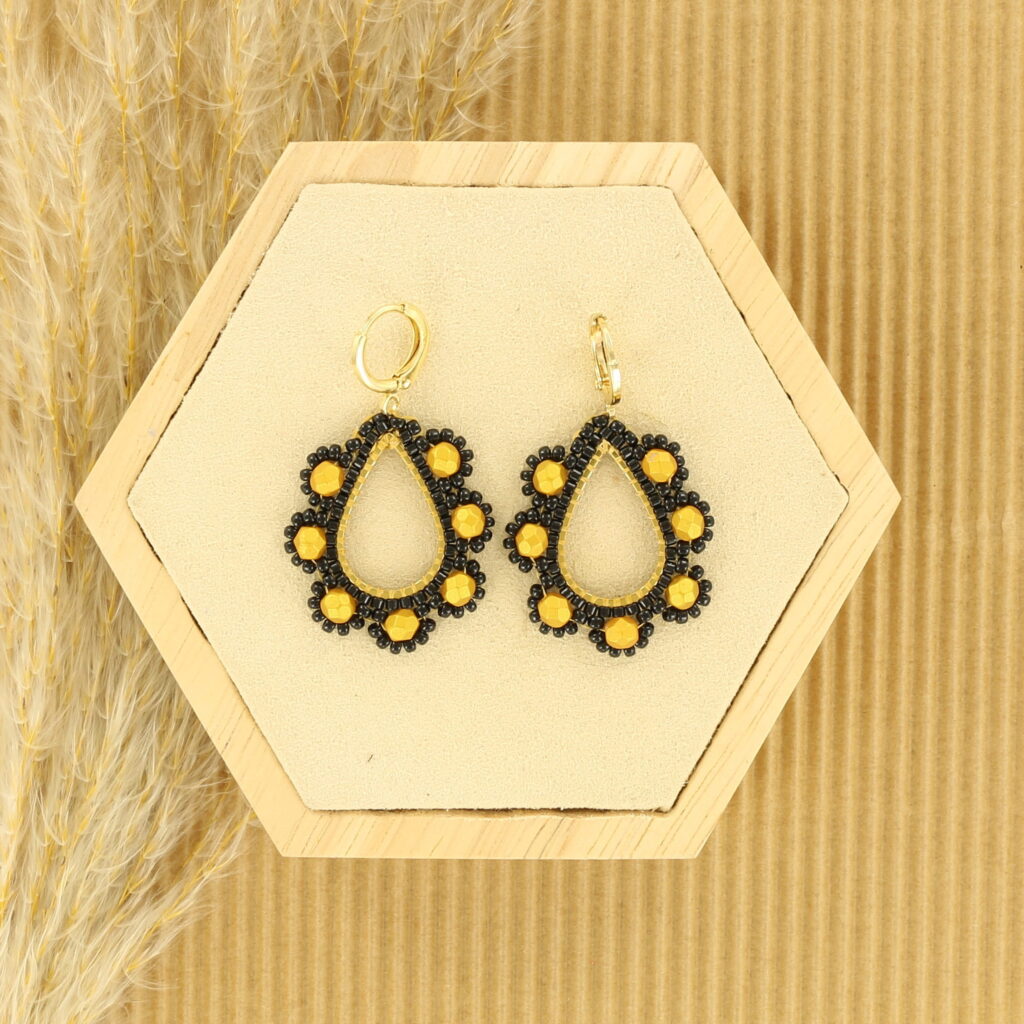
You can make these adorable earrings using the brick stitch technique. If you’re still finding the technique a bit tricky, you can practice with some larger beads first. Once you’ve mastered the technique, the possibilities for creating beautiful brick stitch earrings are endless!
Needed supplies:
- Miyuki beading thread gold (color 20 – champagne gold or color 05 – gold)
- Needle
- Stainless steel golden droplet 26mm
- Stud earrings with stopper
- Open ring 4mm
- Miyuki delica DB-1342 (silverlined dyes raspberry)
- Miyuki seed beads 11-4247 (duracoat silverlined dyes peony pink)
- Czech facet round 4mm color suede purple
Instructions:
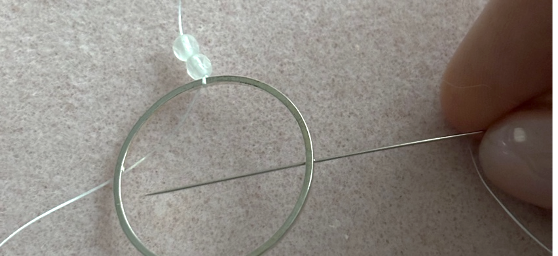
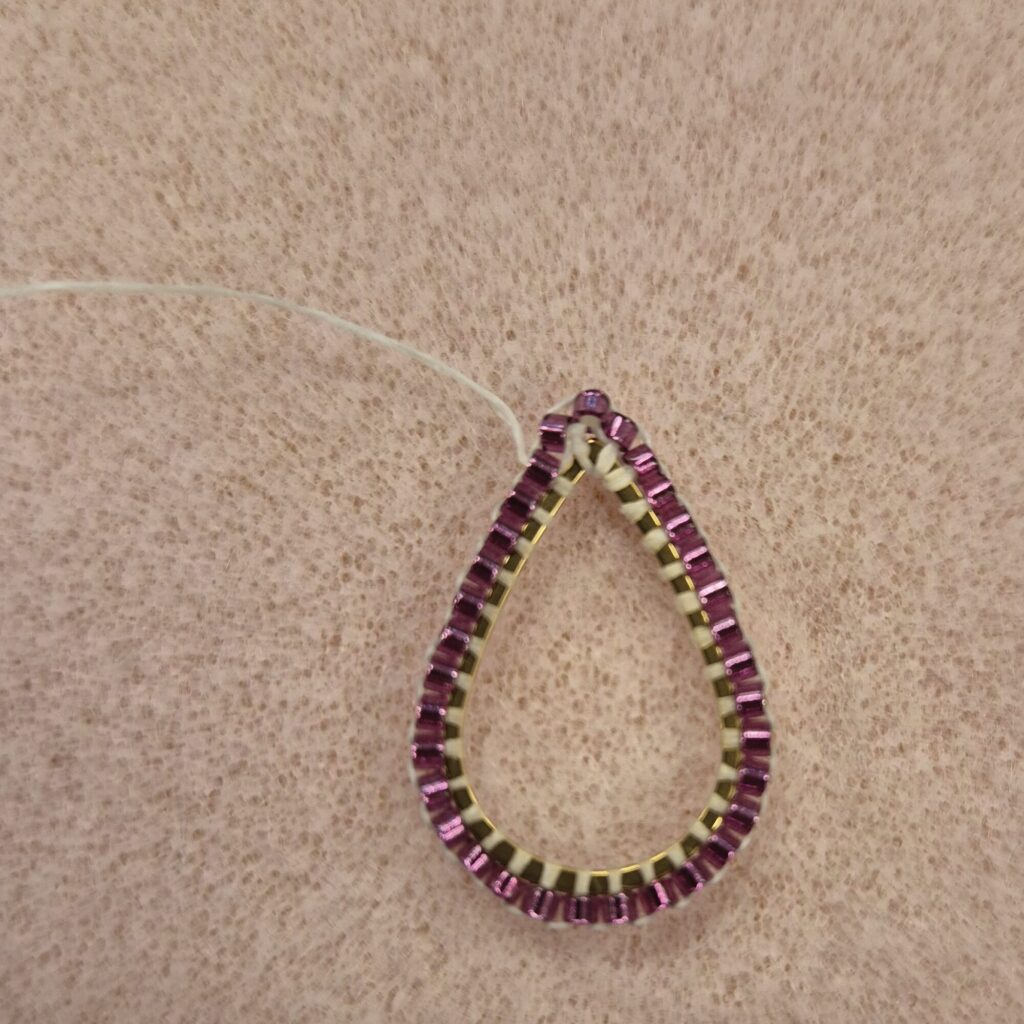
Step 1)
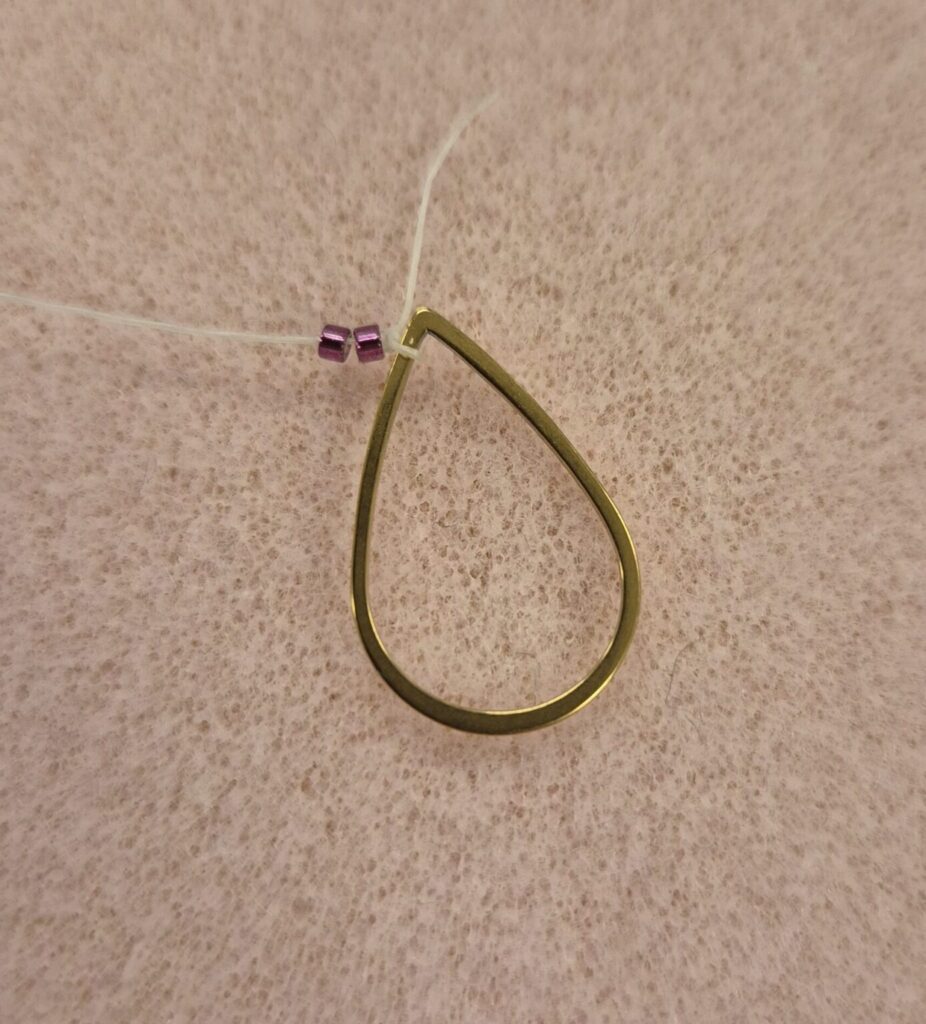
Cut a piece of wire about 80 cm long so you can string the earring in one piece without having to add new wire each time. Tie a secure double knot to secure the wire to your teardrop shape.
Step 2)
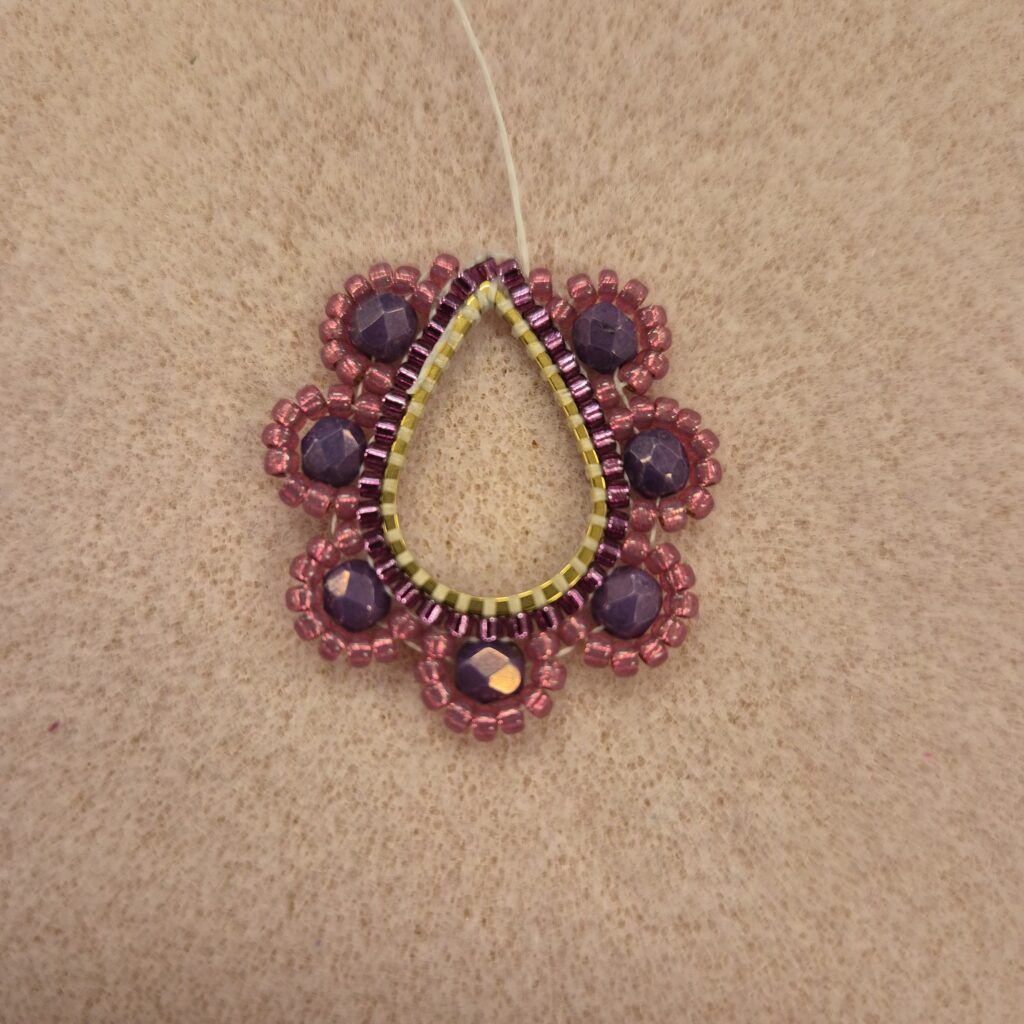
Thread two beads and then pass the needle under the ring. Then thread it back up through the bottom of the bead. This is a clearer example of the brick stitch technique, using larger beads.
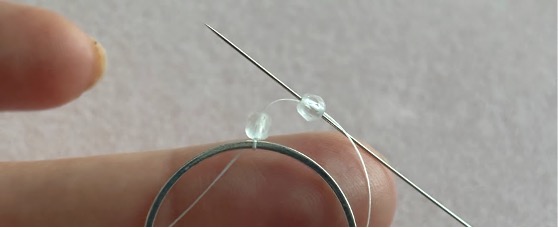
Pull the thread tight so that your beads sit neatly next to each other.

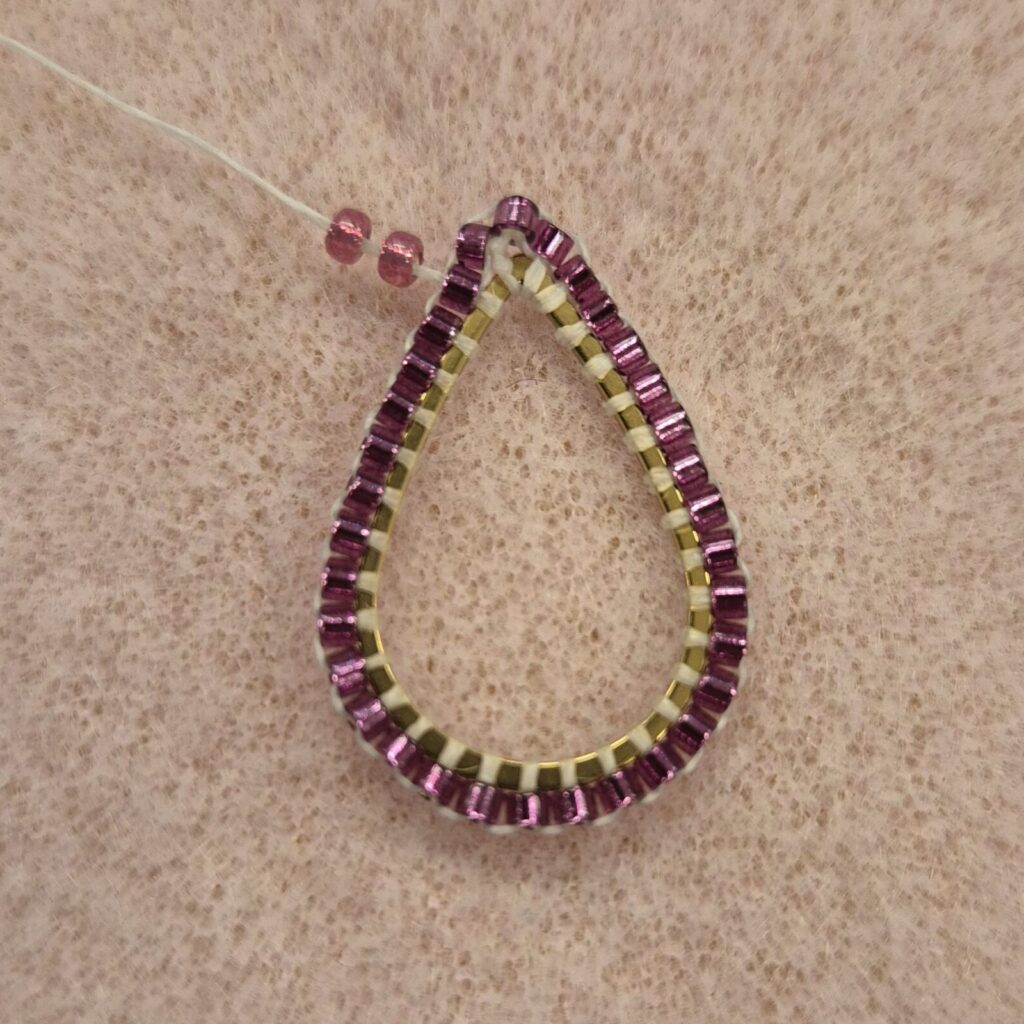
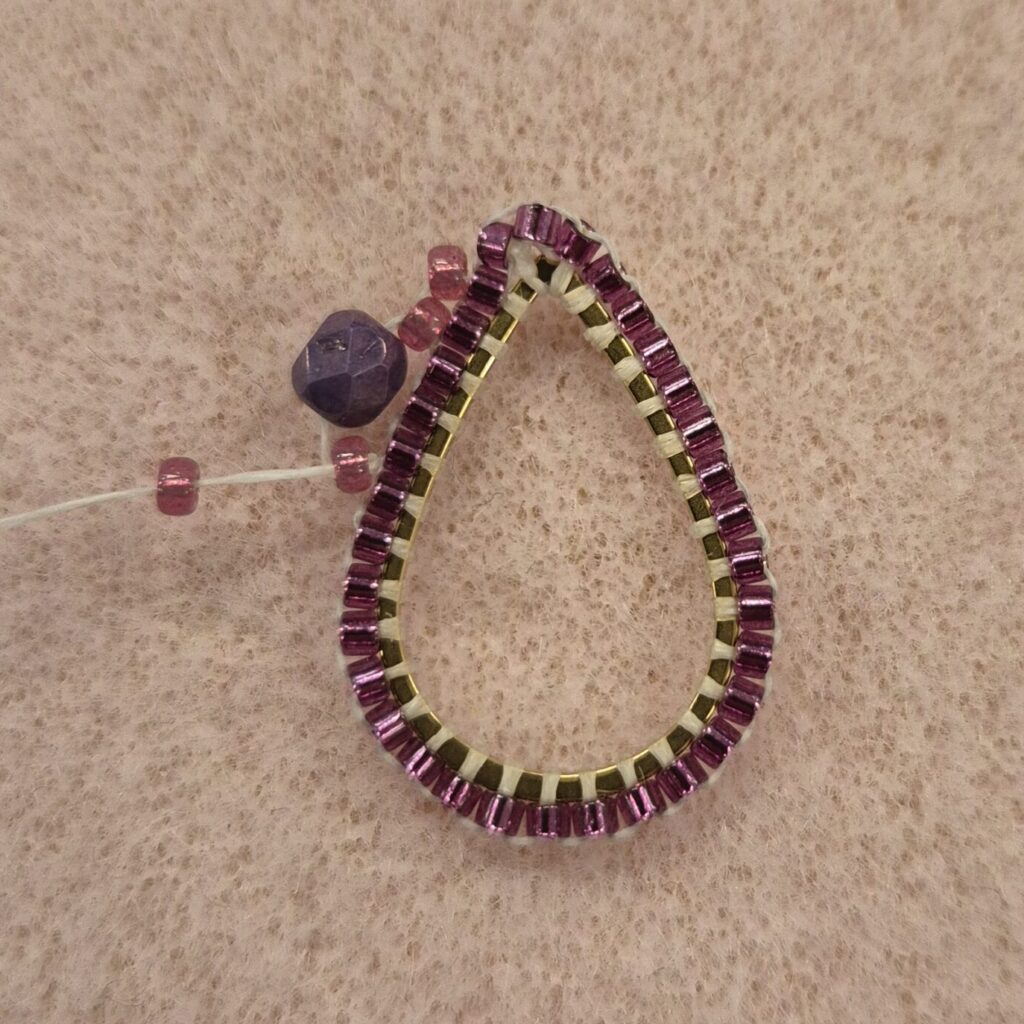
Step 3)
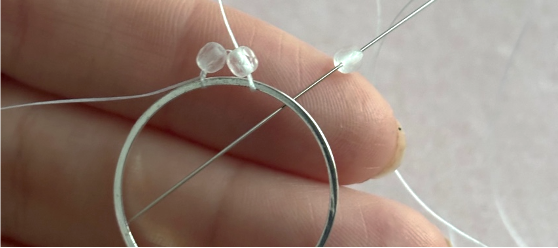
Now string 1 bead and go under the ring again and then through the bottom of the bead back up.
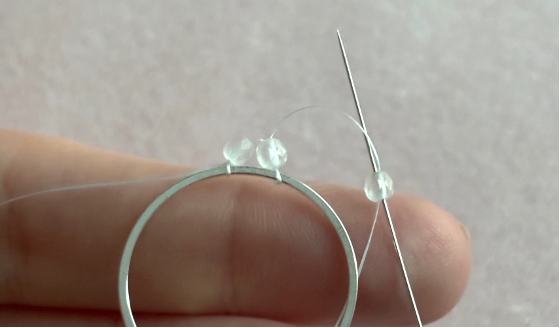
Pull this tight so the beads sit neatly next to each other. Now, pick up one bead at a time and continue this technique until you’ve circled the entire drop.
Once you’ve made it all the way around, thread it through your first delica bead as if it were your next brick stitch bead. This way, they’ll fit together nicely, and you’ll have a perfect finish for your next round.
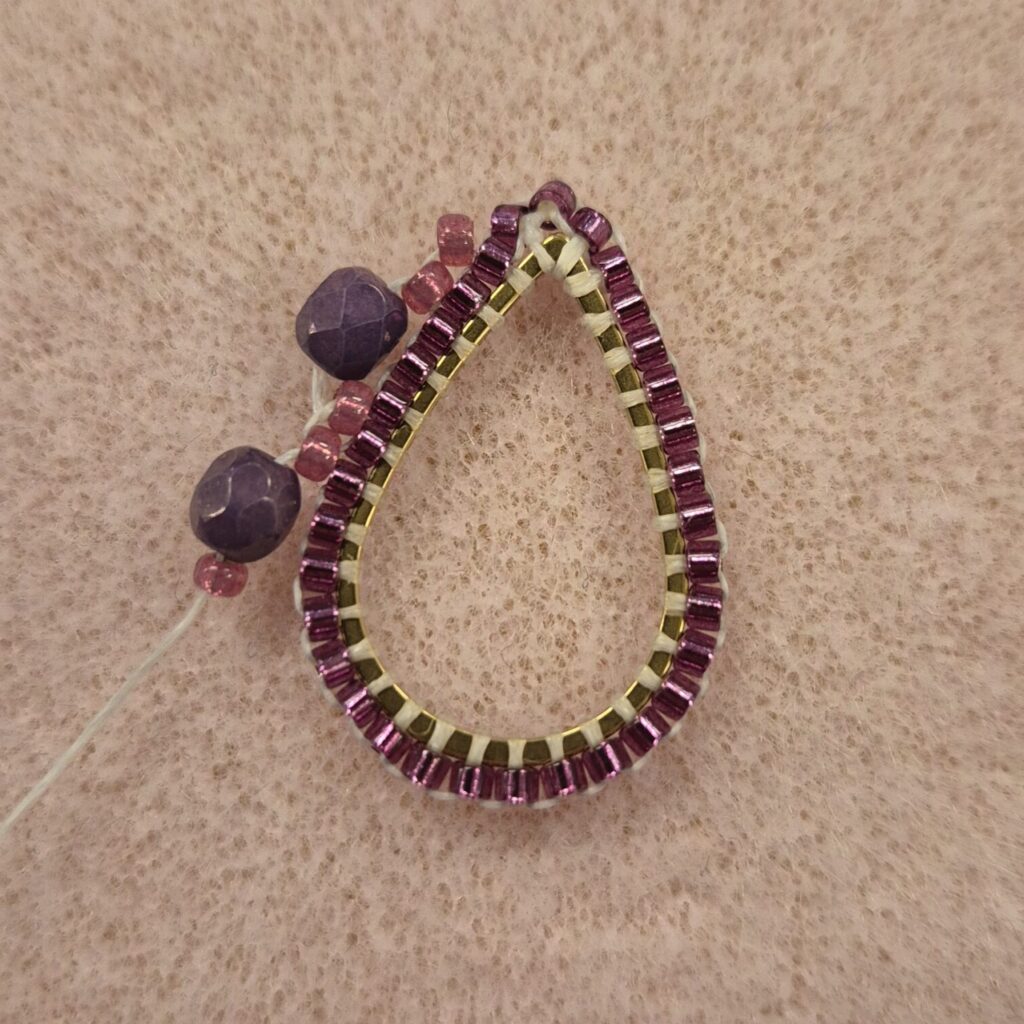
Step 4)
Now string two beads to begin the brick stitch again. To secure the beads, don’t thread them through the ring anymore, but under the outermost strands of your previous round, in the second “loop.”
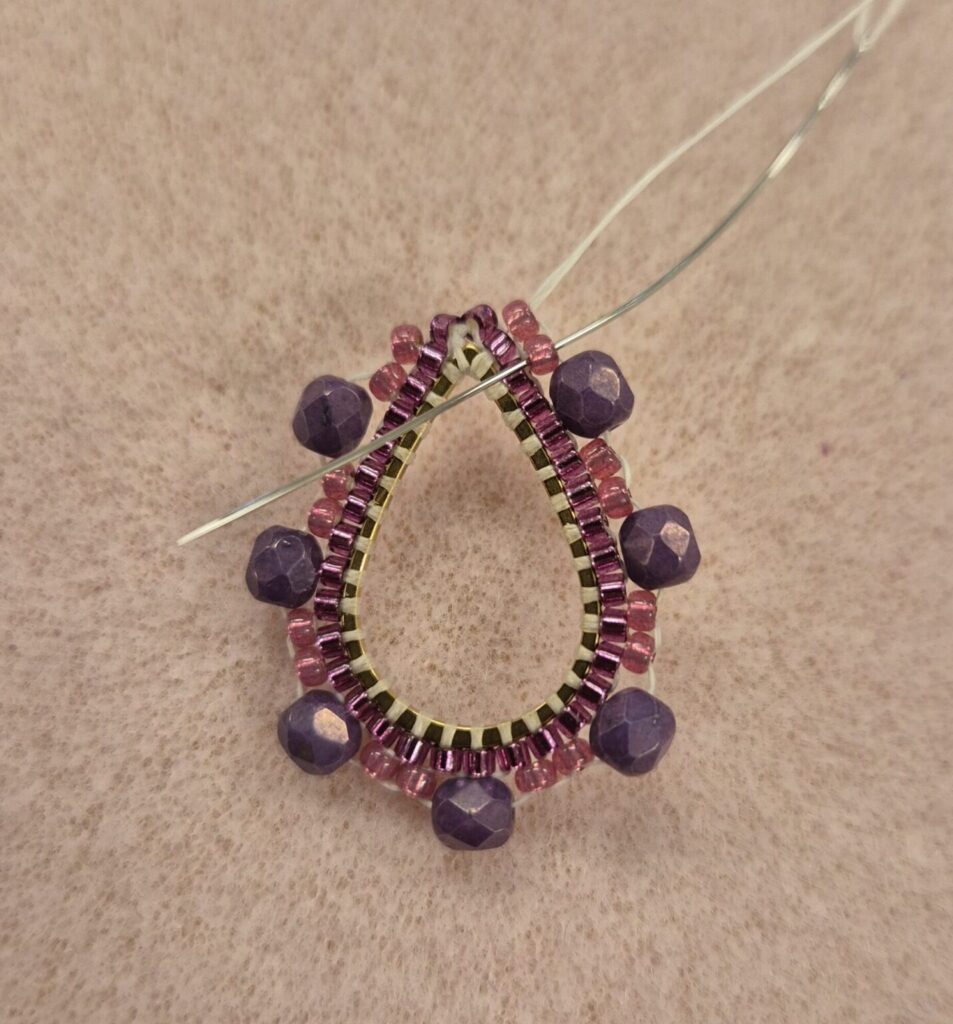
Step 5)
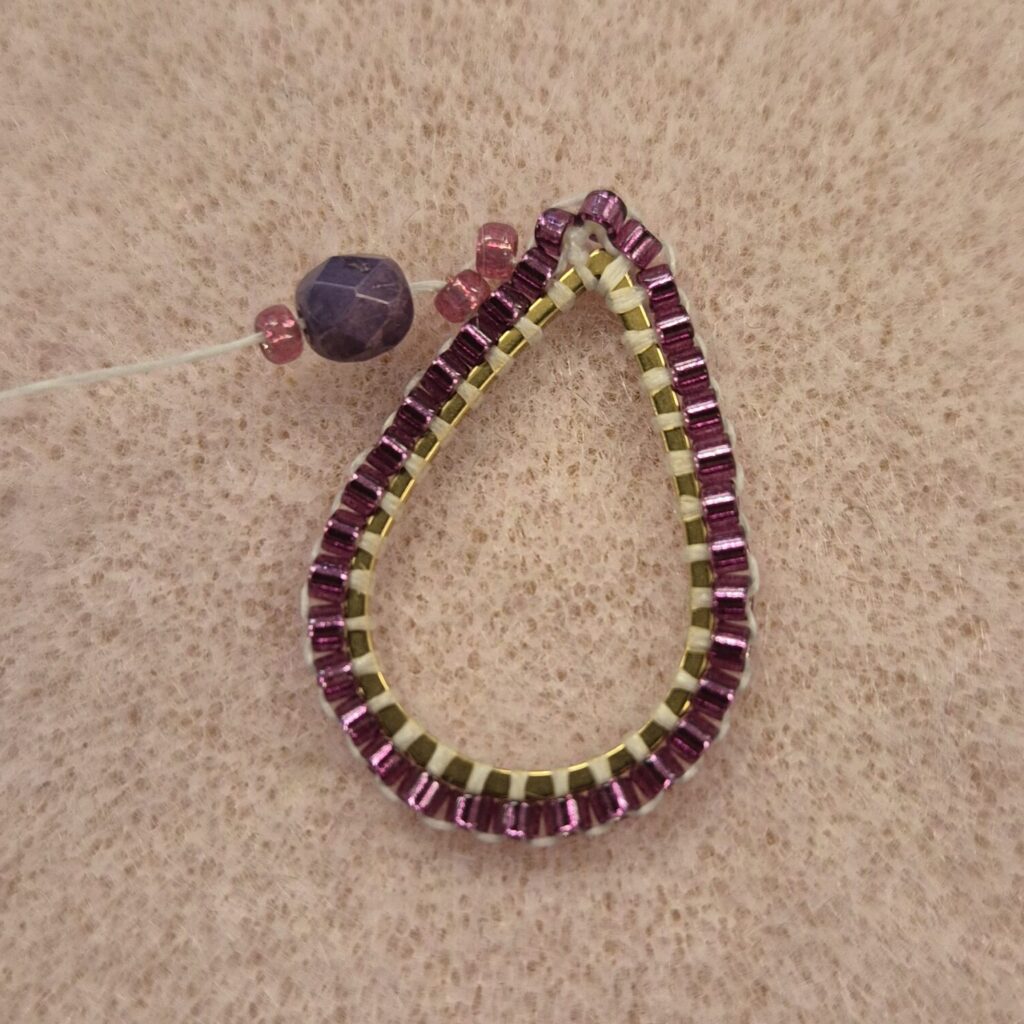
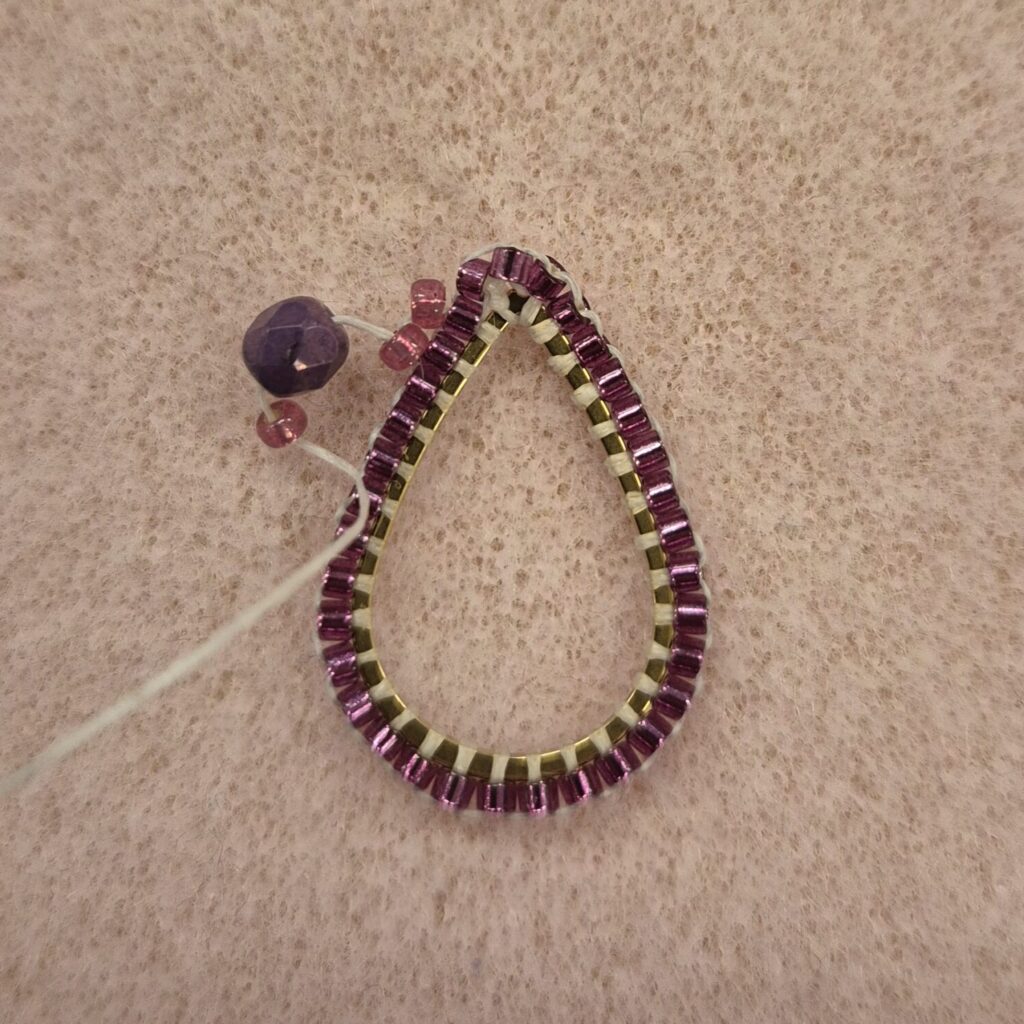
Now thread a faceted bead and a Miyuki seed bead onto the wire. Then, feel where to attach the seed bead. Hold the beads against the earring and see where you can thread them through the loop.
Step 6)
Add another bead using the brick stitch, so that you have two seed beads neatly next to each other.
Continue until you’ve gone all the way around. Leave the top of the earring free so it’s easier to attach a stud later.
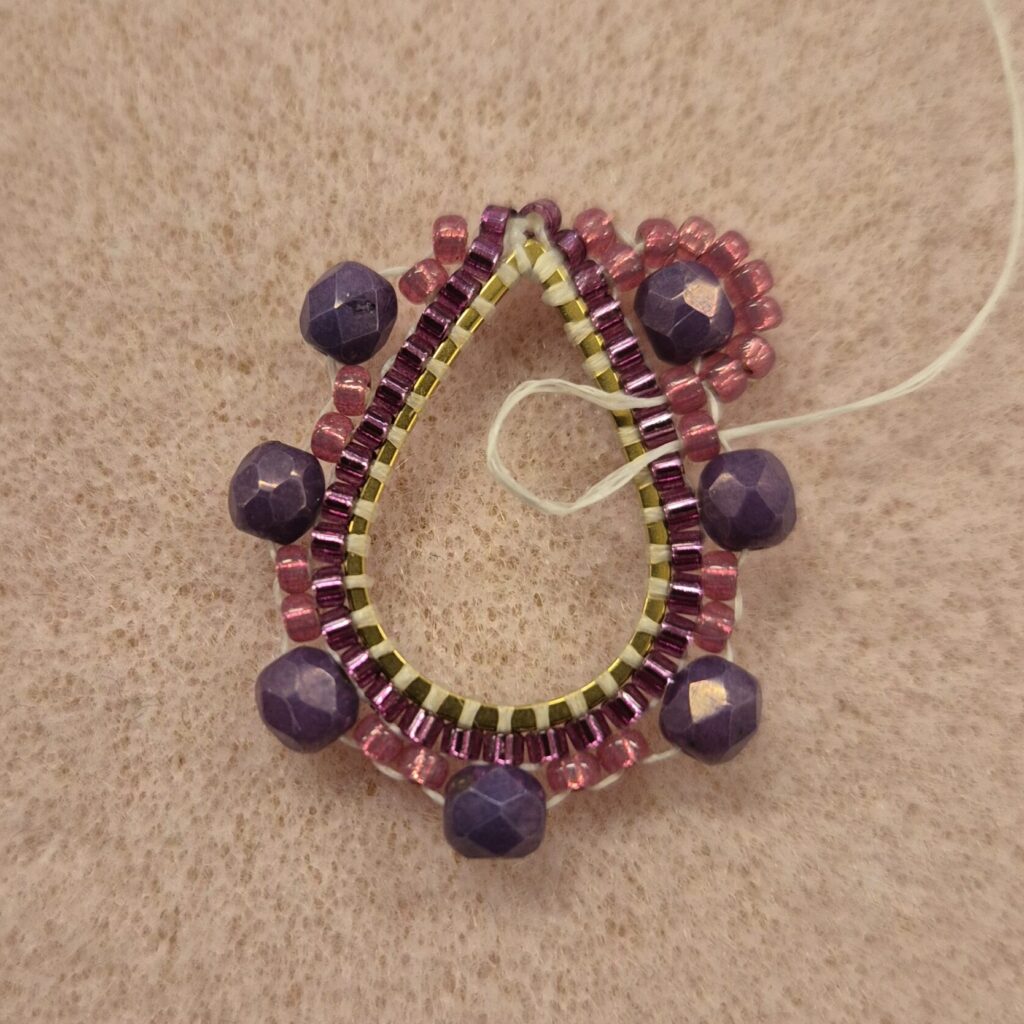
Step 7)
Now thread a bead back. Then, go under the bead again through the loop and thread upwards/outwards again to be ready for the next step. TIP! If the faceted beads don’t line up nicely against each other, you can slide them over the drop ring a bit. (This isn’t easy, but it’s certainly possible.)
Step 8)

String 7 beads and then thread the needle through the first seed bead on the other side of the facet bead.
Now thread the bead next to it back up and string another 7 beads to create the next arch. Continue this until all the faceted beads have a nice arch.
Step 9)
Attach the stud earring by bending open an open ring, hanging the stud earring on it and pinching them together again.
Now your earring is ready. You just have to make the second one.
Tip!
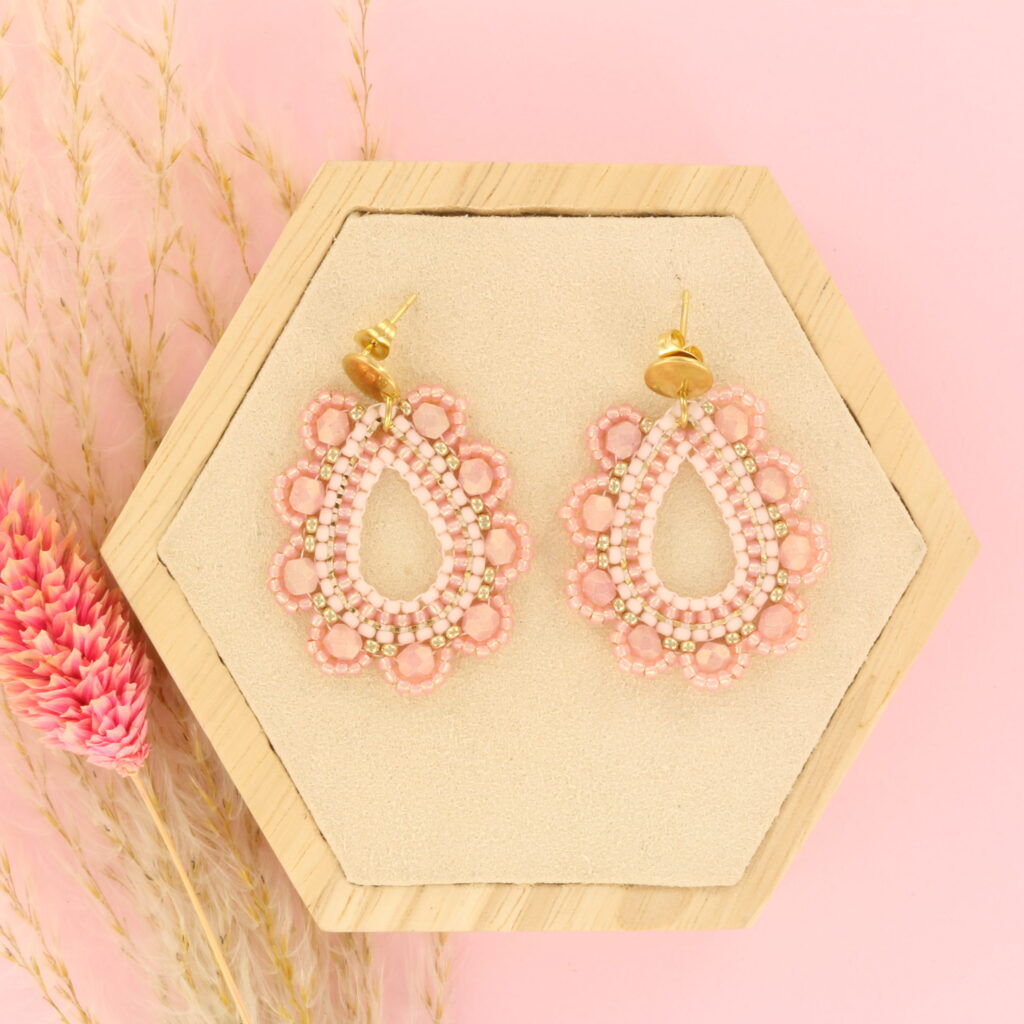
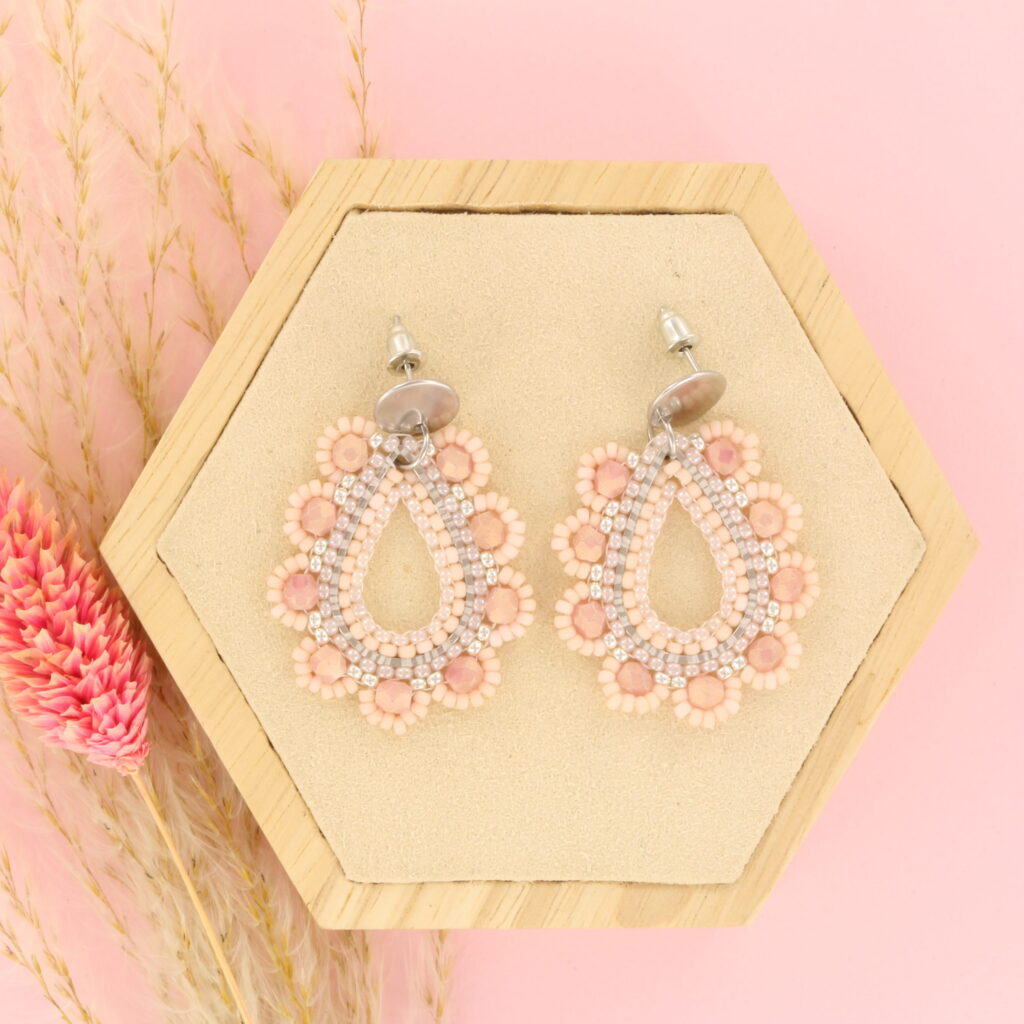
The versions below have two circles of delica beads 11/0 strung on the inside of the drop ring to make the earring slightly fuller.