
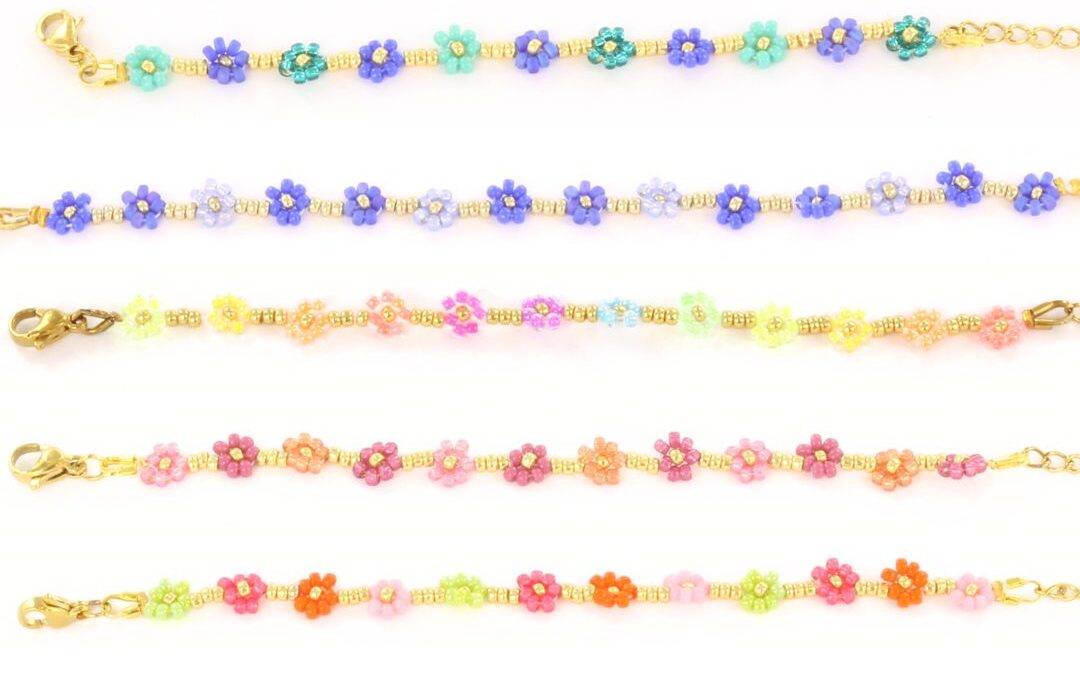
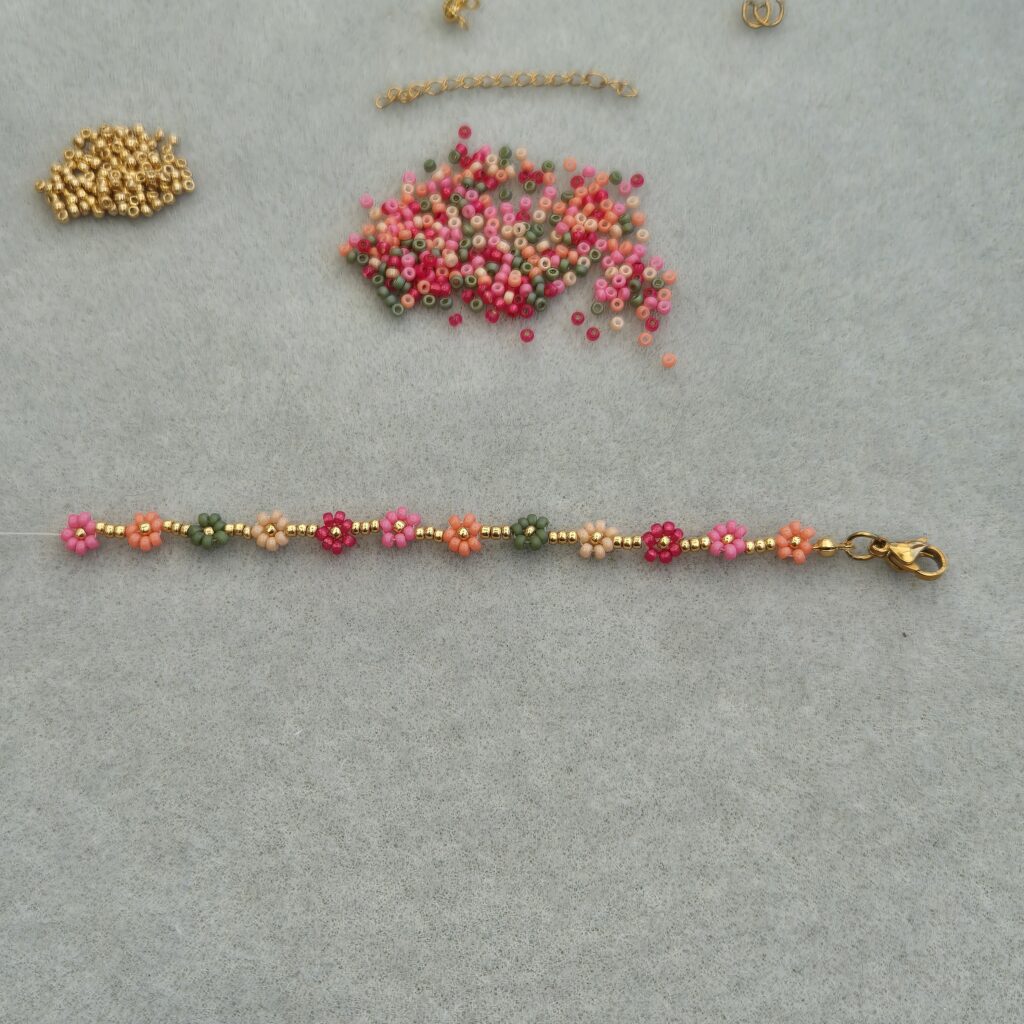
Making a flower bracelet is a fun and creative activity that creates a cheerful and vibrant effect! In this blog we’ll explain how to make these colorfun flower bracelets with lobster clasp.
Needed supplies:
- Fireline wire 0.15mm
- Miyuki seed beads in the colors and sizes (8/0 or 11/0) you like. You can combine the diffrent sizes of beads.
- Lobster clasp
- Open ring
- Skullcap
- Extension chain
- Crimp beads
Instructions:

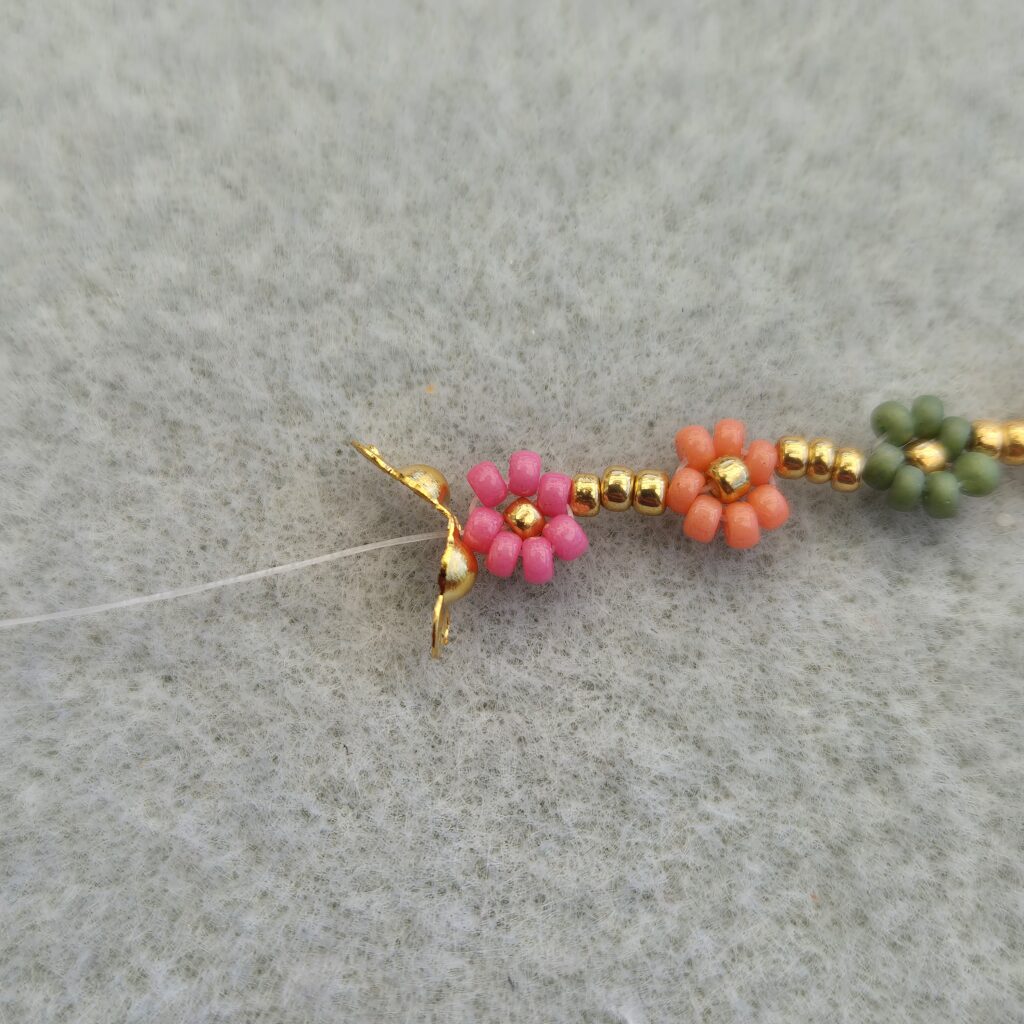
Step 1)
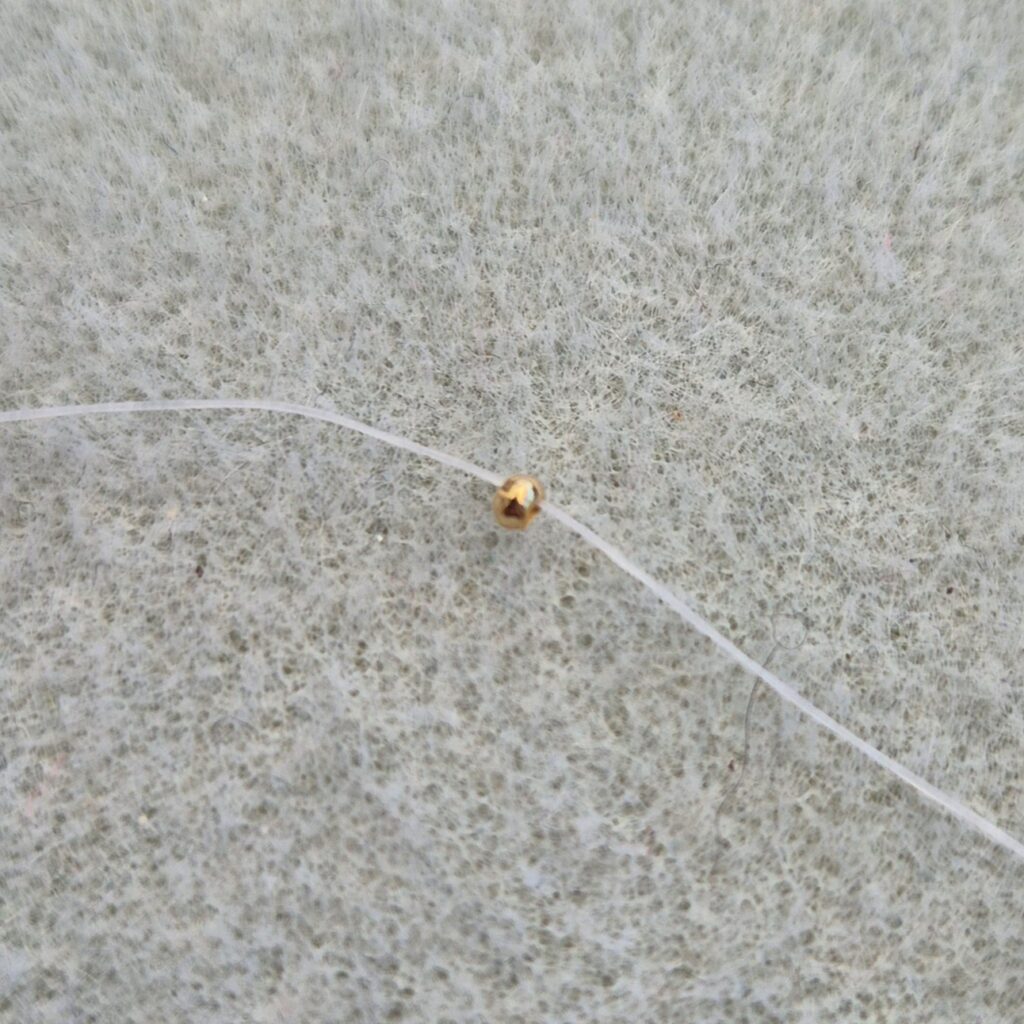
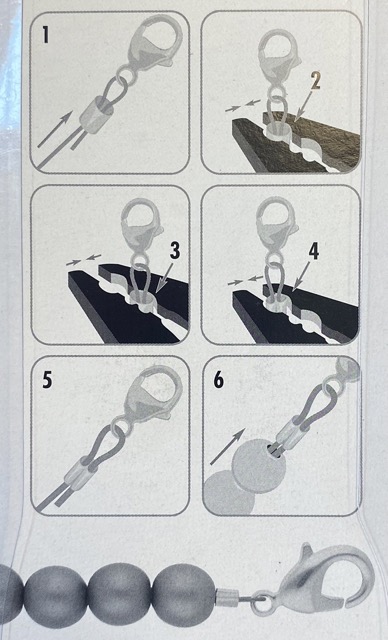
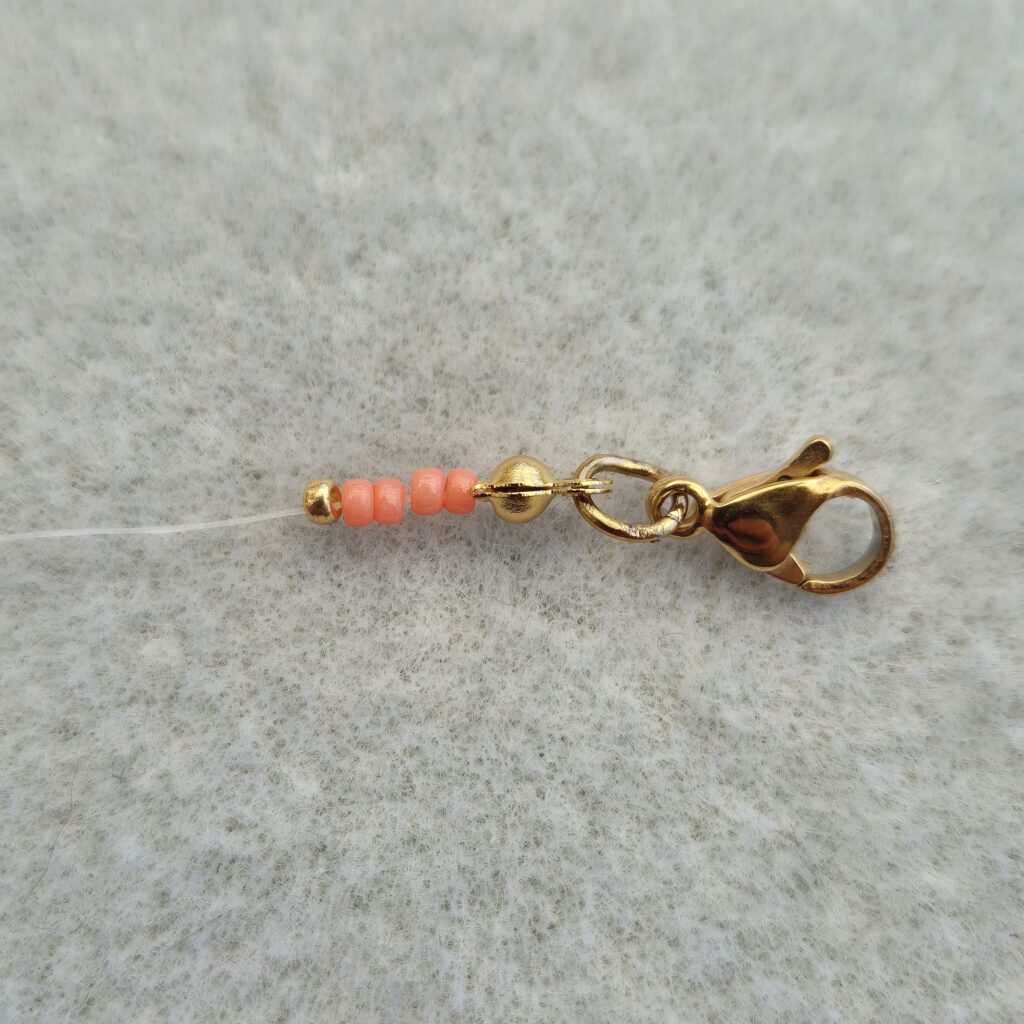
Cut a piece of Fireline wire about 60cm long. Thread one crimp bead onto the very end of the wire. We’ll start by applying the first part of the clasp on one end of the bracelet.
Step 2)
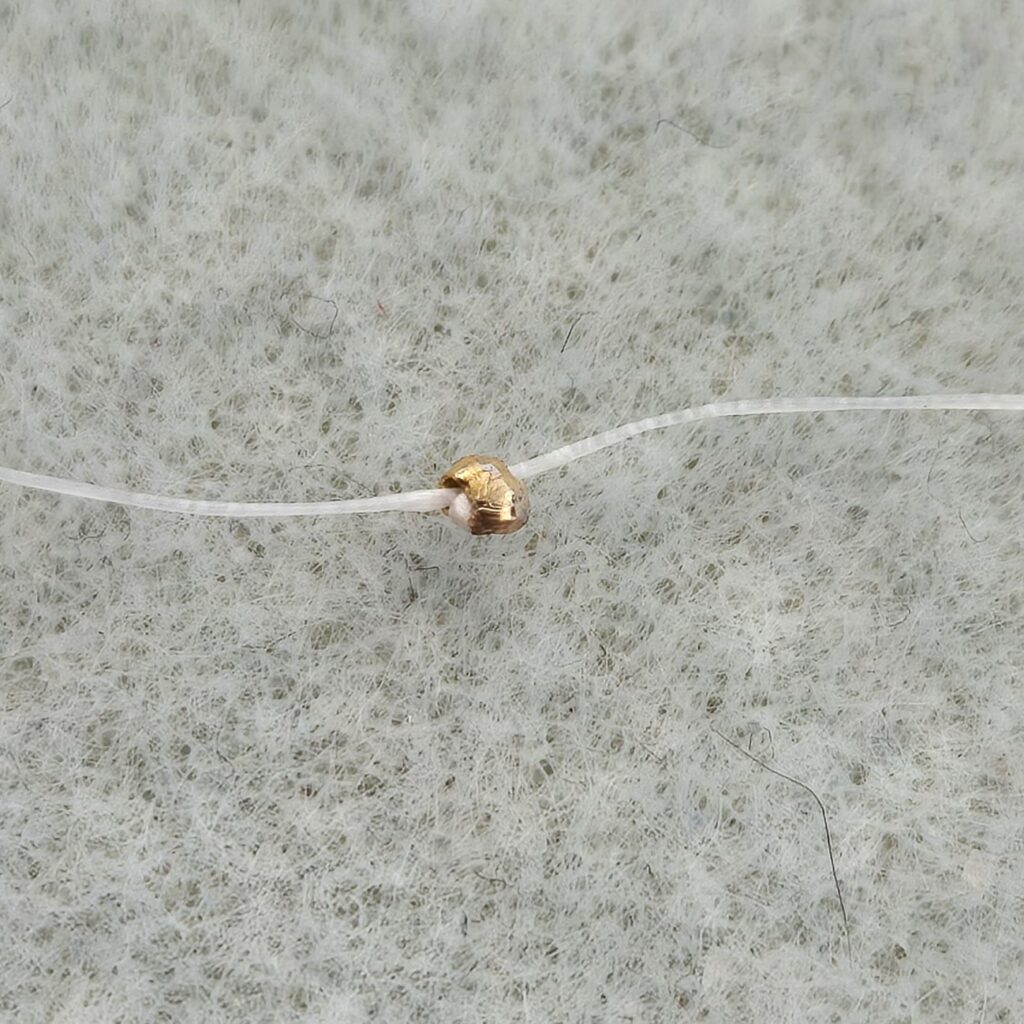
Crimp the bead closed. Use crimp bead pliers to firmly close the bead. These pliers are specifically designed for 2mm crimp beads. Below, you’ll see how to crimp the bead closed with these pliers. Note: We’ll attach the lobster clasp later; for now, just focus on securing the bead.
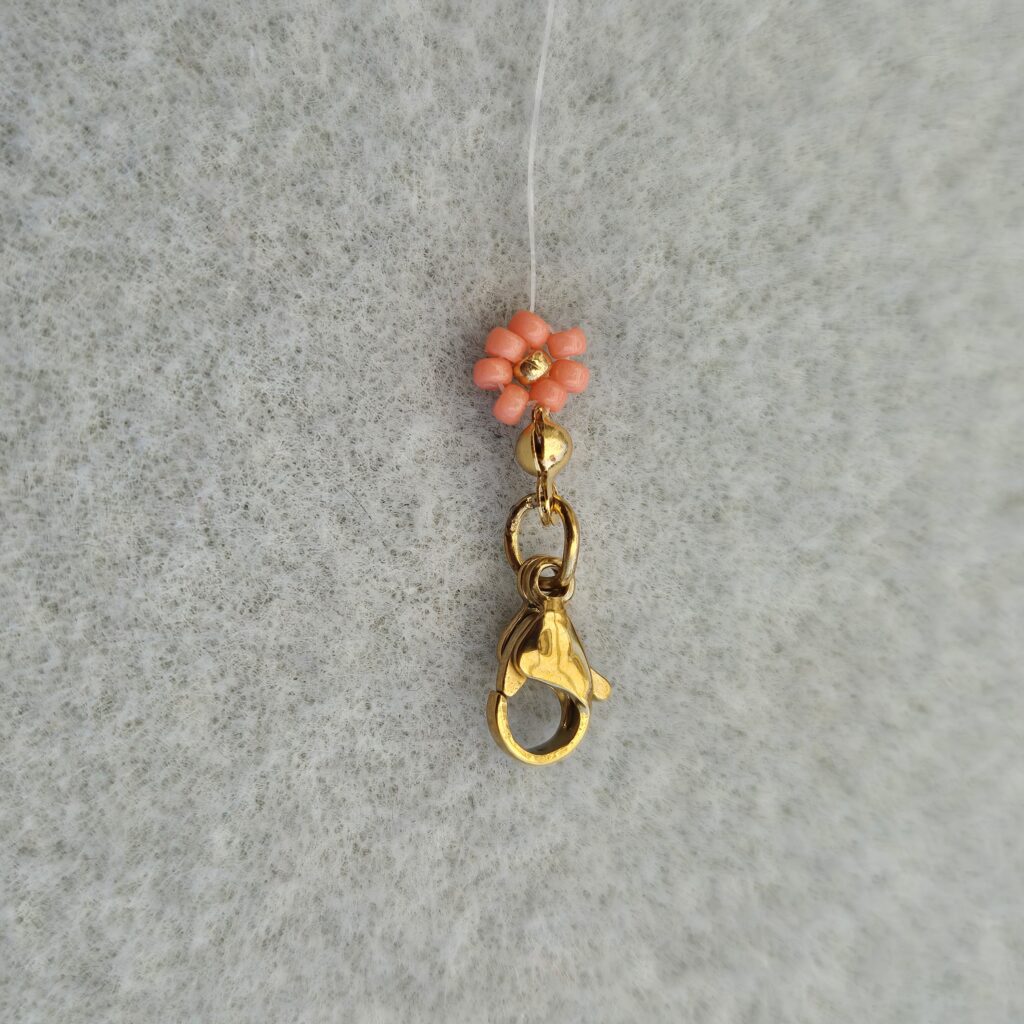
Step 3)
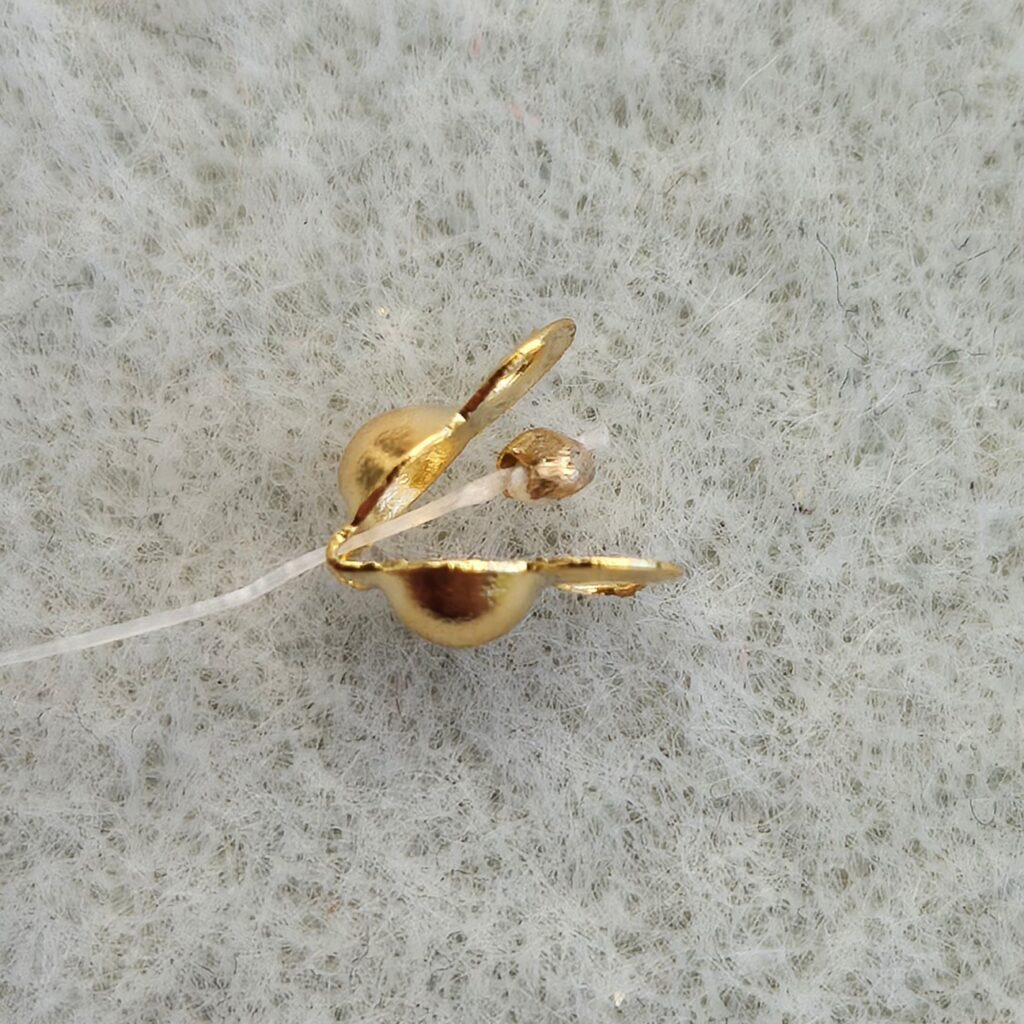
Once your bead is securely attached to the wire, trim the end. Then, thread the cap, ensuring it fits neatly over the crimp bead. Make sure the cap’s ring is positioned at the end of the wire.
Step 4)
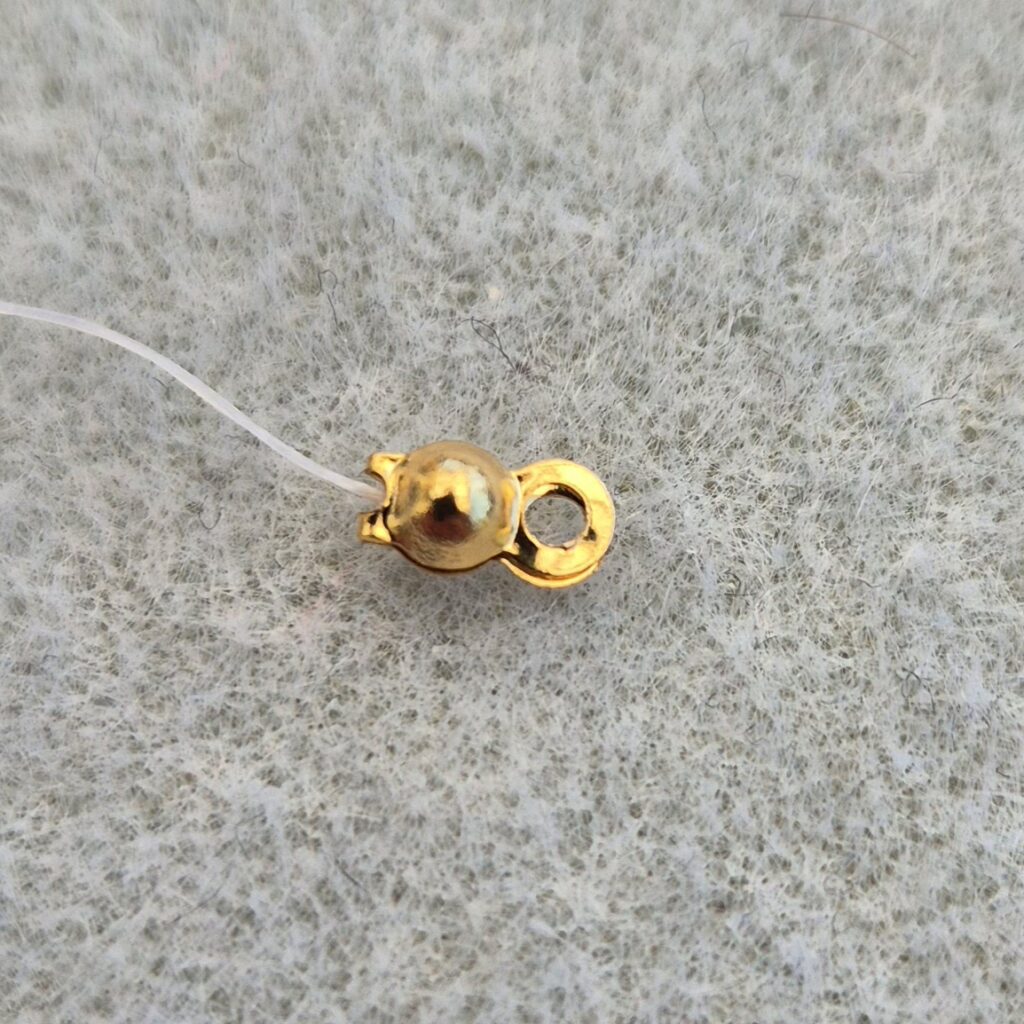
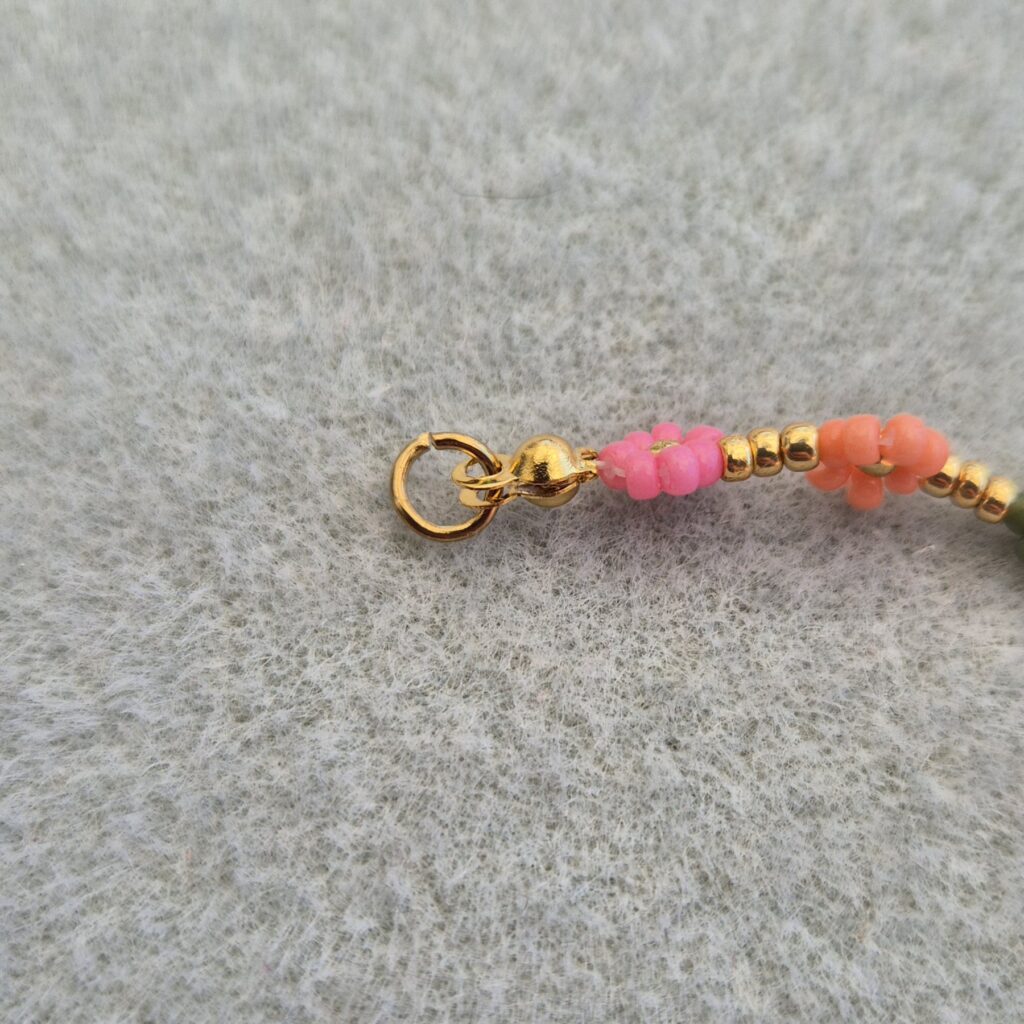
Attach the open ring to the cap. The cap may remain slightly open, but that’s no problem.
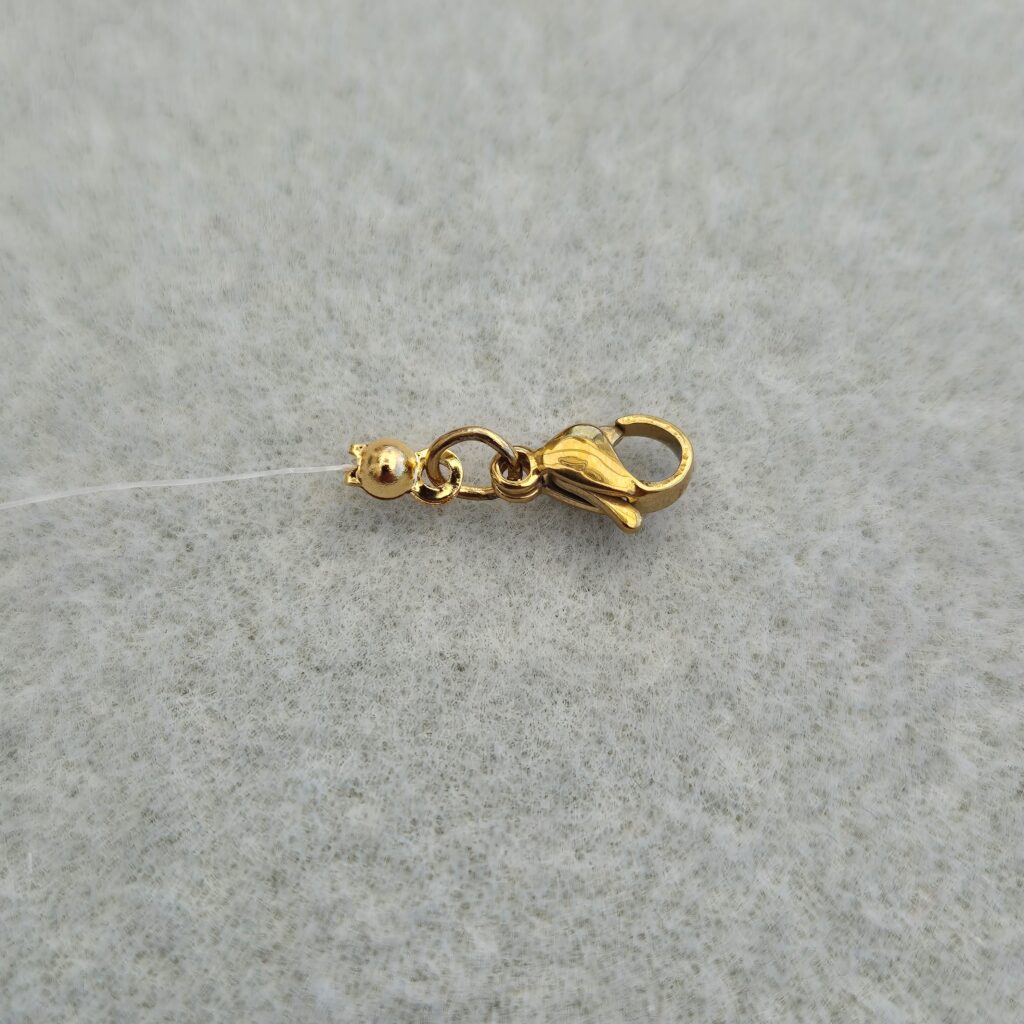
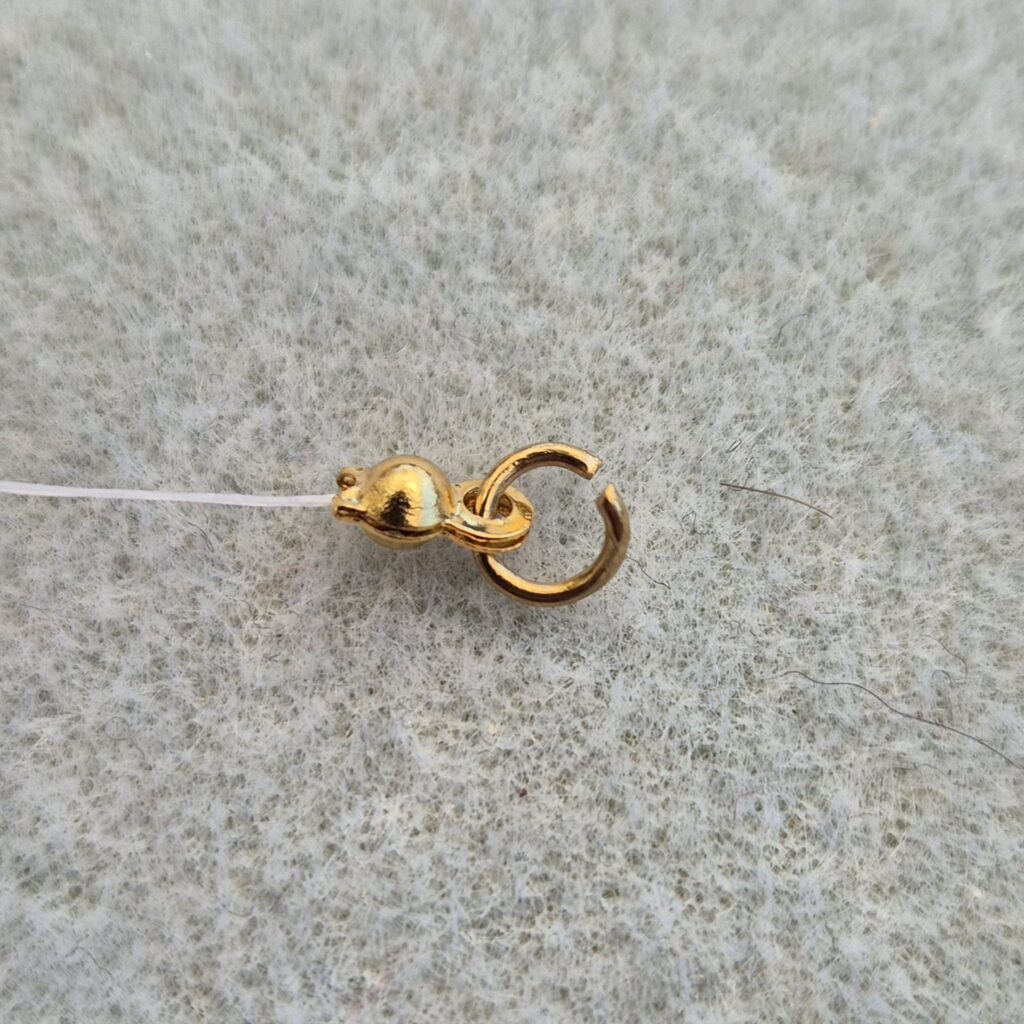
Step 5)
Attach the carabiner to the open ring, making sure the ends of the open ring fit together properly when you squeeze it closed. If the ends don’t fit together properly, the ring can easily open again.
Step 6)
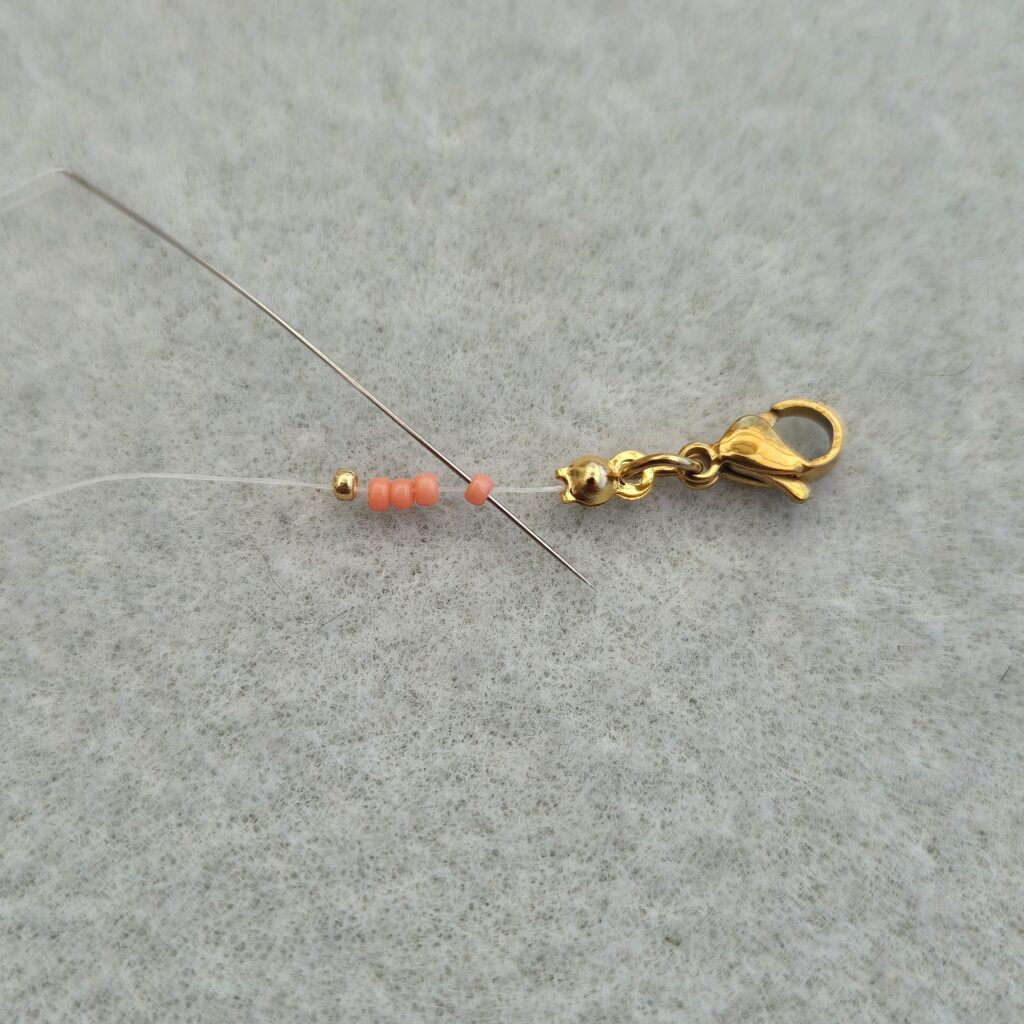
String four colored beads and one gold bead. The gold bead will form the inside of your flower.

Step 7)
Thread your needle back into the first bead and tighten your thread.
Step 8)
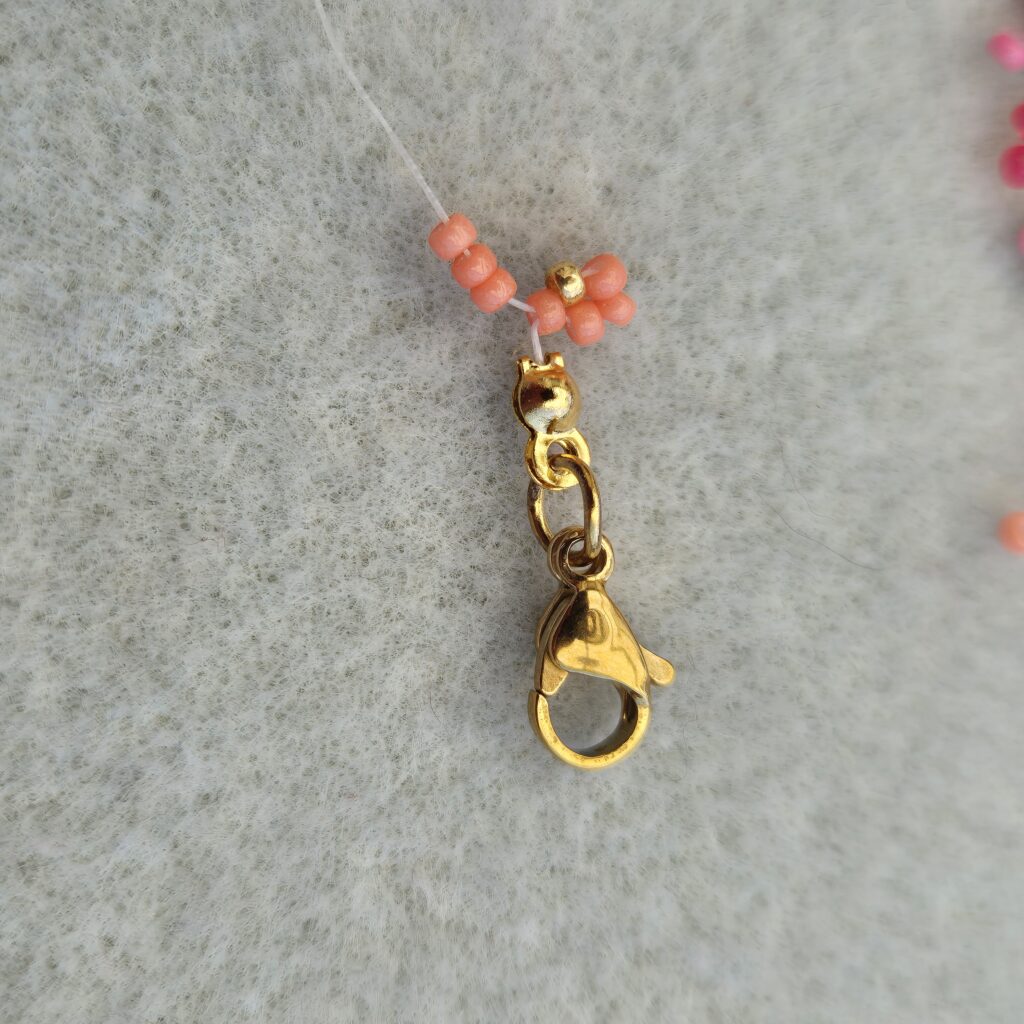
String 3 beads.
Step 9)
Now thread the wire through the top colored bead to complete the circle and pull the wire tight.

Step 10)
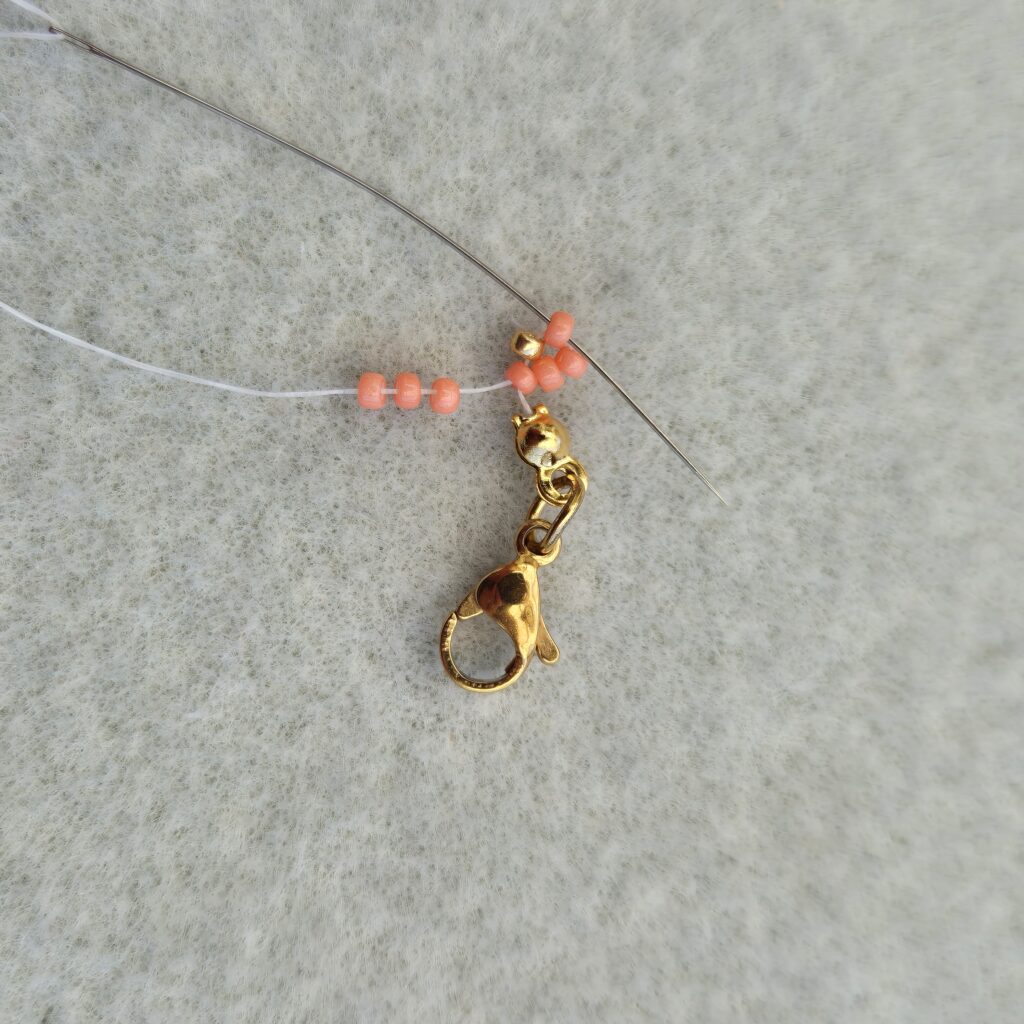
Thread three gold beads onto the wire. This completes the first flower! Repeat this process until you have the desired length of the bracelet. For a child, 12 flowers using Miyuki 11/0 seed beads is a good length, and for adults, approximately 14 flowers.
Repeat step 6 -10 until you reach the desired lenght of your bracelet. You can string some beads between the flowers or you can directly start a new flower once you completed one.
When you made the flowers it’s time to add the skullcap, crimp bead, open ring and extension chain on the other end of your bracelet.
Step 11)
First string a skullcap and then a crimp bead.
Step 12)
Use the crimp pliers to crimp the bead closed again, as you did in step 2. Once the bead is securely fastened, trim off any excess thread. It may be a little harder to crimp the bead closed now, as the bead’s base plate may be in the way. Try to crimp the bead as close to the base plate as possible, otherwise the clasp won’t fit properly on the bracelet.
Step 13)
Confirm the open ring.
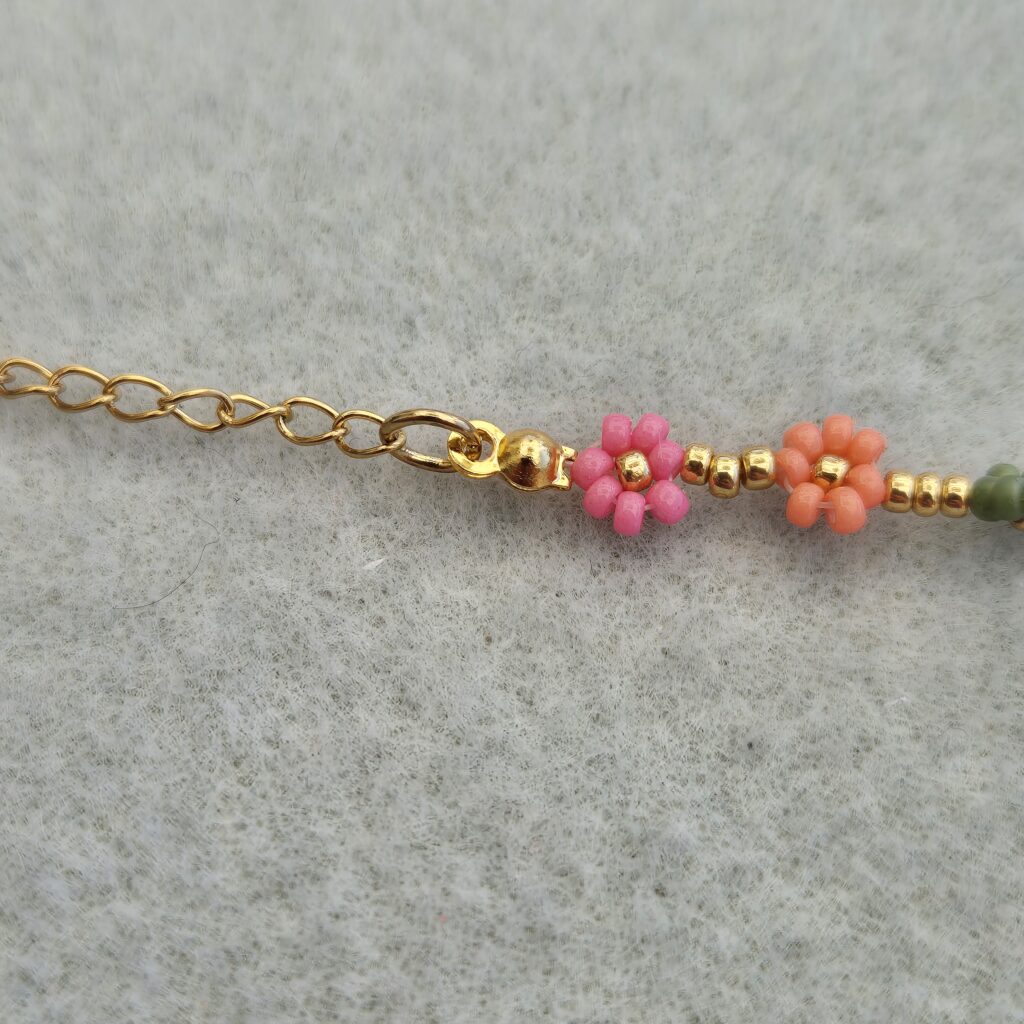
Step 14)
Attach the extension chain and squeeze the open ring closed again neatly and securely.
Now your flower bracelet with a beautifully finished clasp is ready!