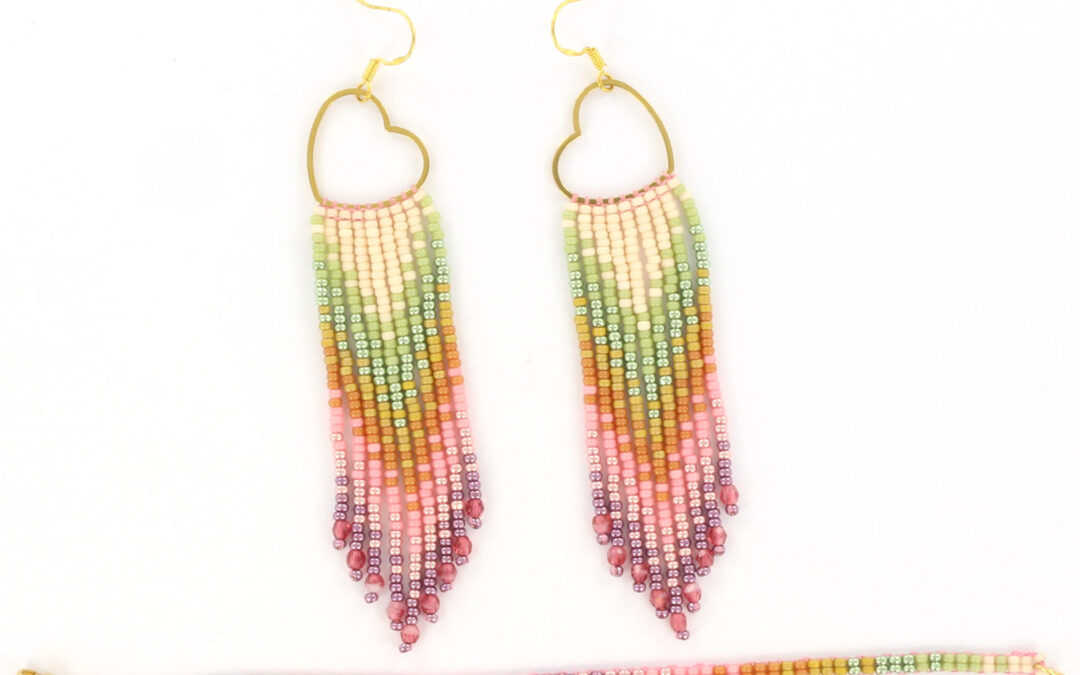
How fun is it to make these earrings yourself! The technique is relatively simple and produces a fantastic result. You don’t need much material, and once you’ve mastered the technique, you’ll have them made quite quickly.
Needed supplies:
- Miyuki seed beads 11-4220 (duracoat galvanized eggplant)
- Miyuki seed beads 11-4693 (opaque matte ab galzed honey bee)
- Miyuki seed beads 11-4463 (duracoat opaque lychee)
- Miyuki seed beads 11-4473 (duracoat opaque dyed fennel)
- Miyuki seed beads 11-4215 (duracoat galvanized sea green)
- Miyuki seed beads 11-4209 (duracoat galvanized dark coral)
- Miyuki seed beads 11-4457 (duracoat opaque cedar)
- Miyuki seed beads 11-2022 (opaque matte antique beige)
- Stainless steel hearts 20mm
- Earhooks
Instructions:
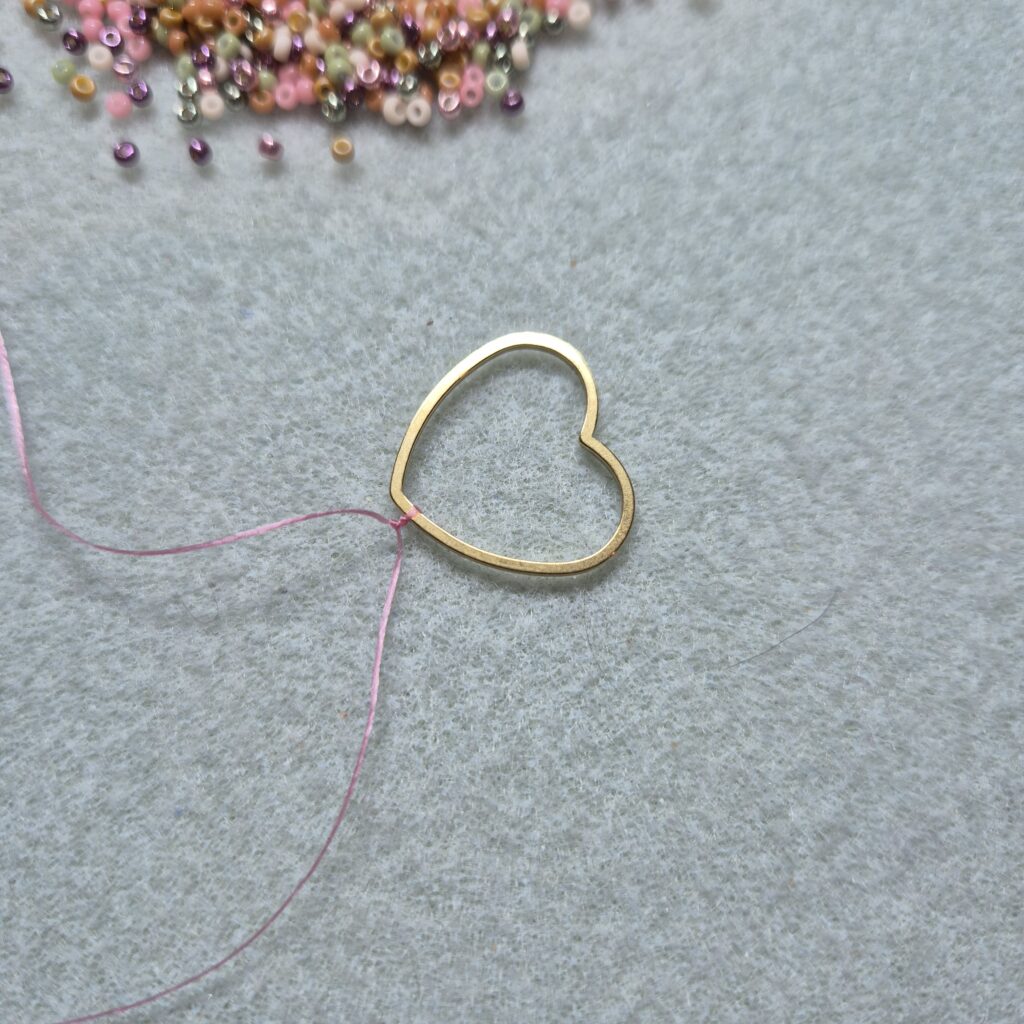
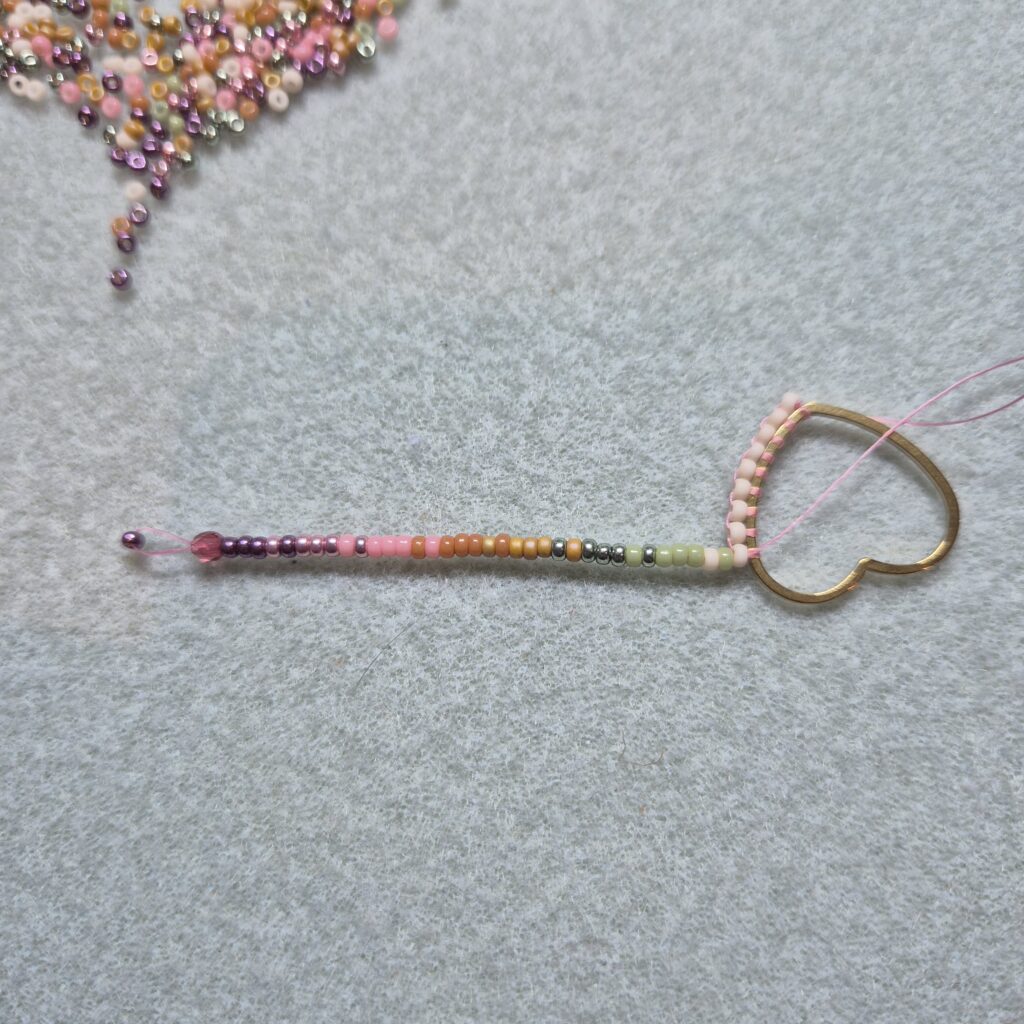
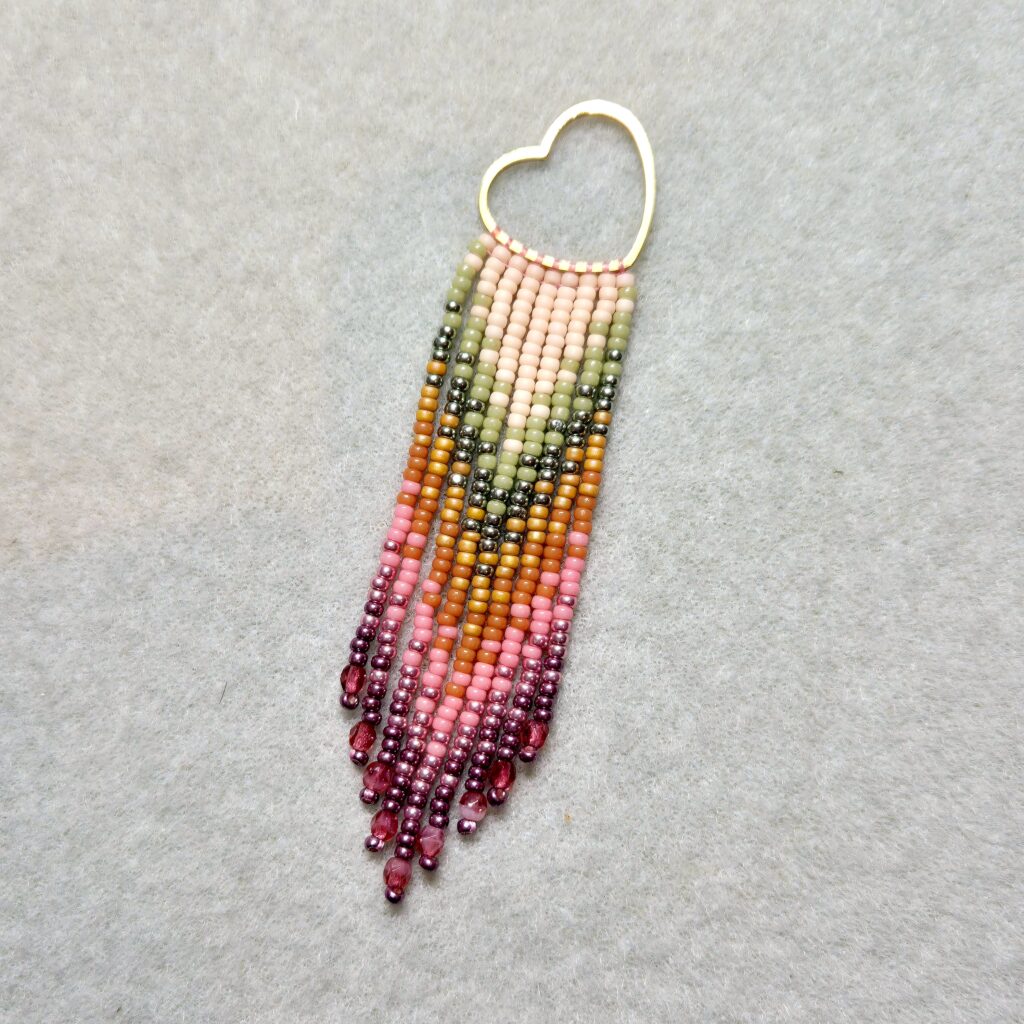
To create a sturdy base for the fringe, begin with a row of nine beads secured using the brick stitch technique. The following photos show how to apply the brick stitch technique to the heart. Begin with a secure double knot to secure the (approximately 150cm) wire and string the beads as follows:
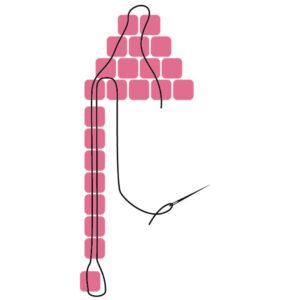
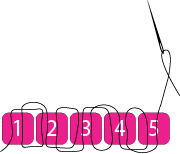
String 2 beads and then pass the needle under the ring and thread it back up through the bottom of the bead.
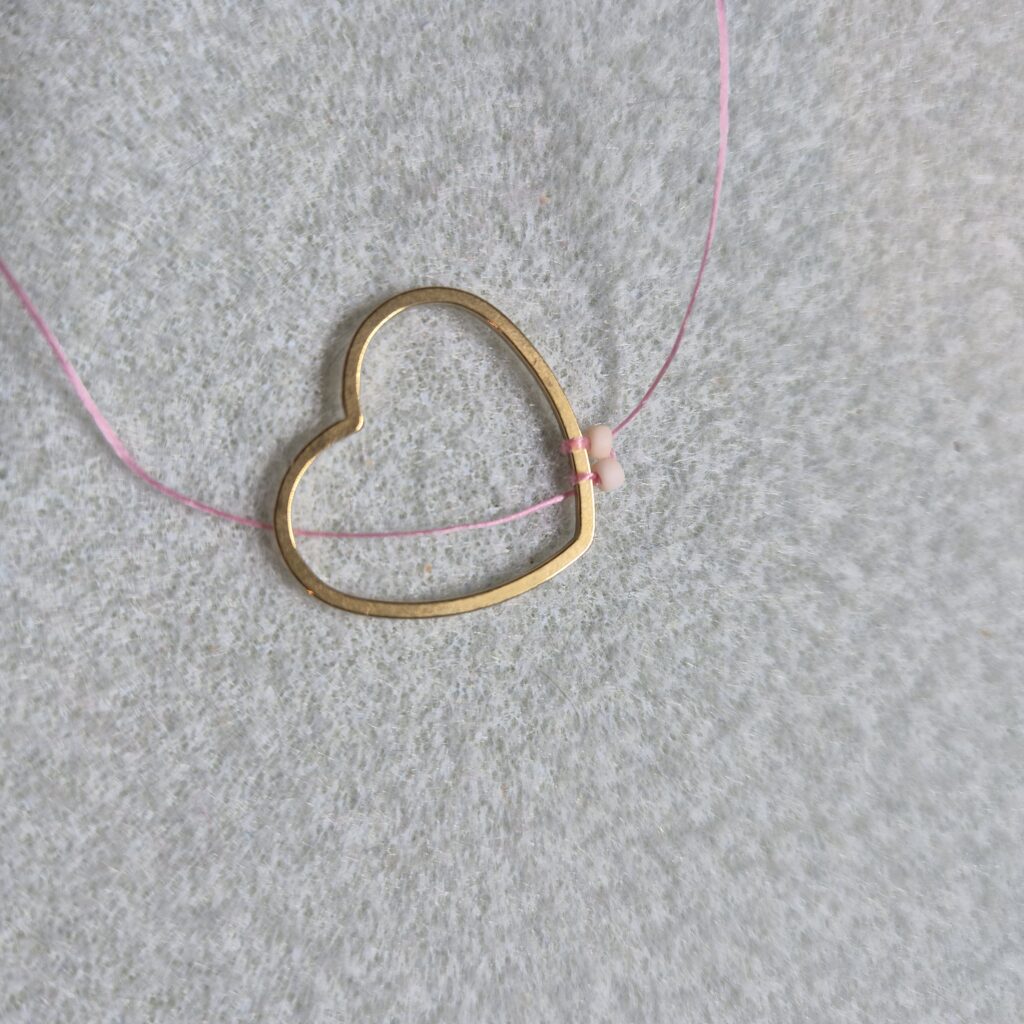
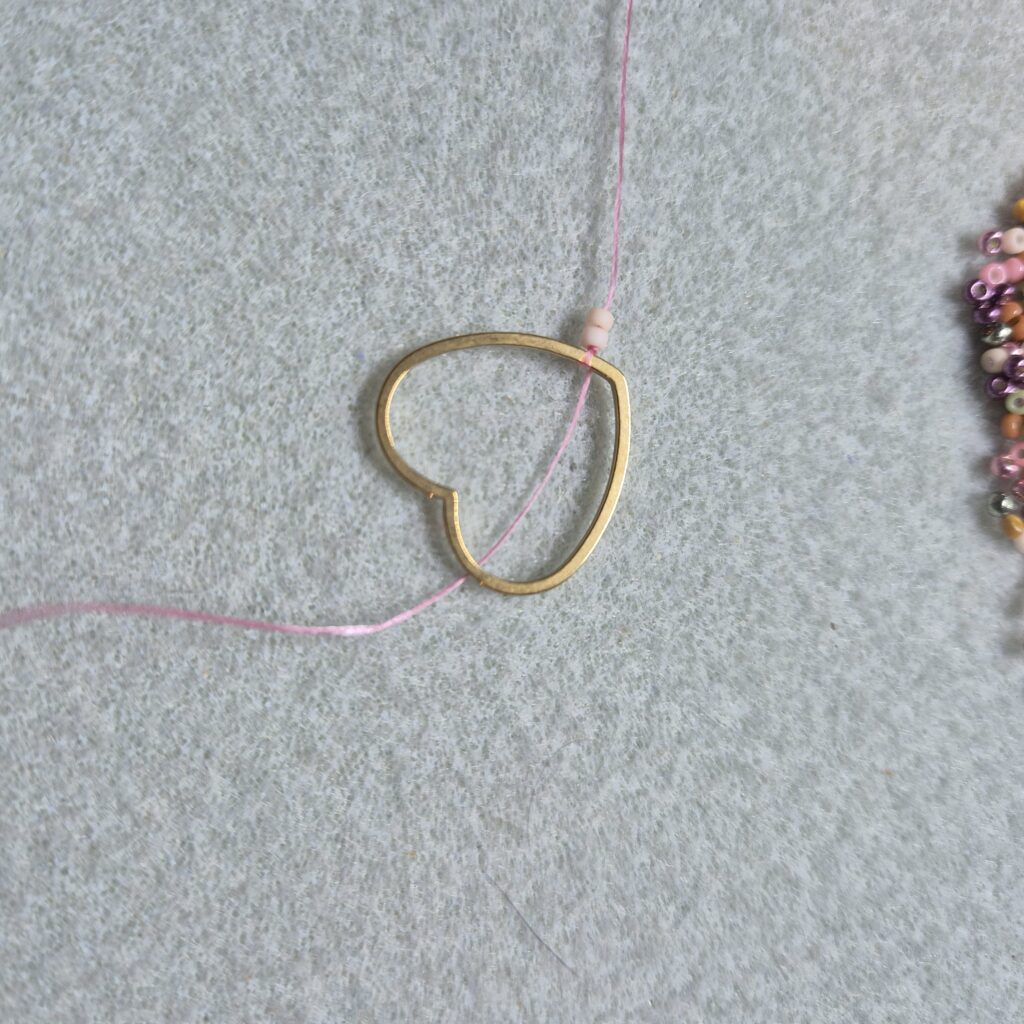
Pull the thread tight so that the two beads sit neatly next to each other.
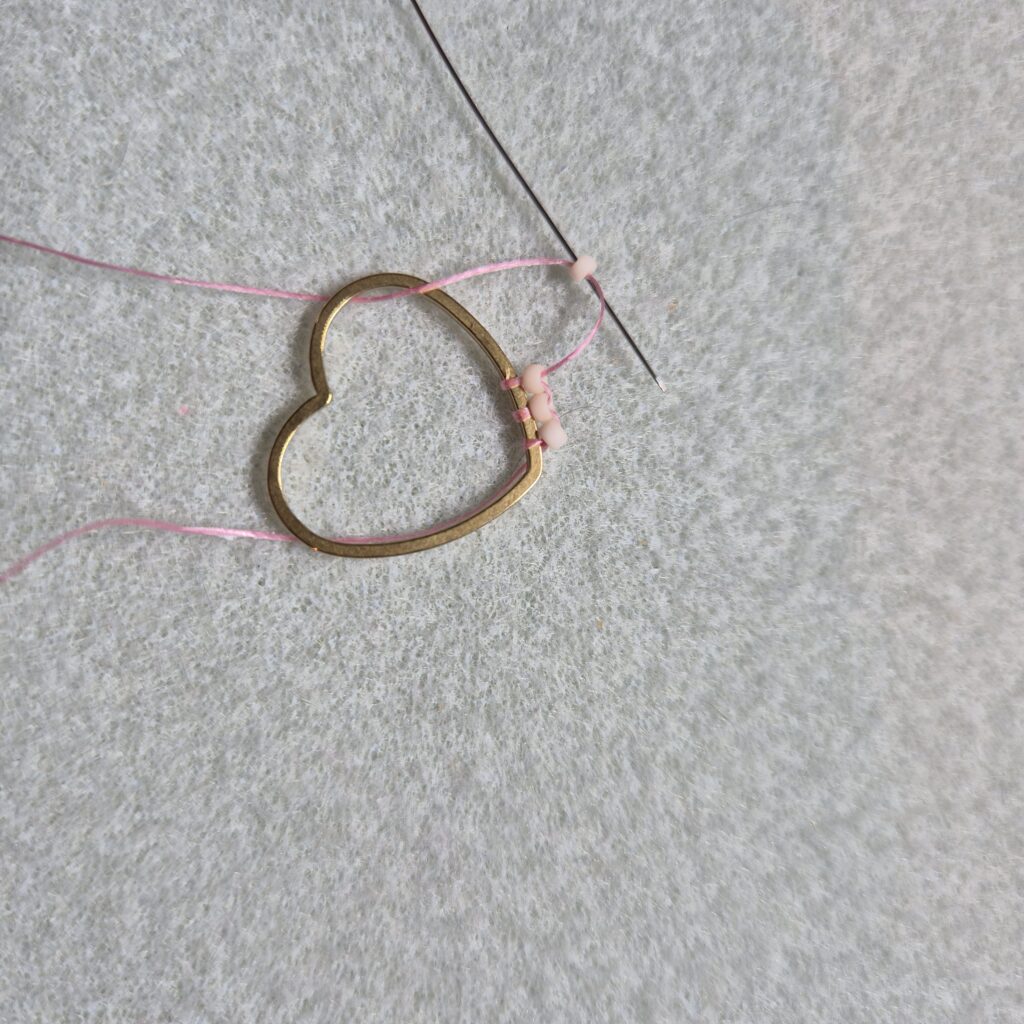
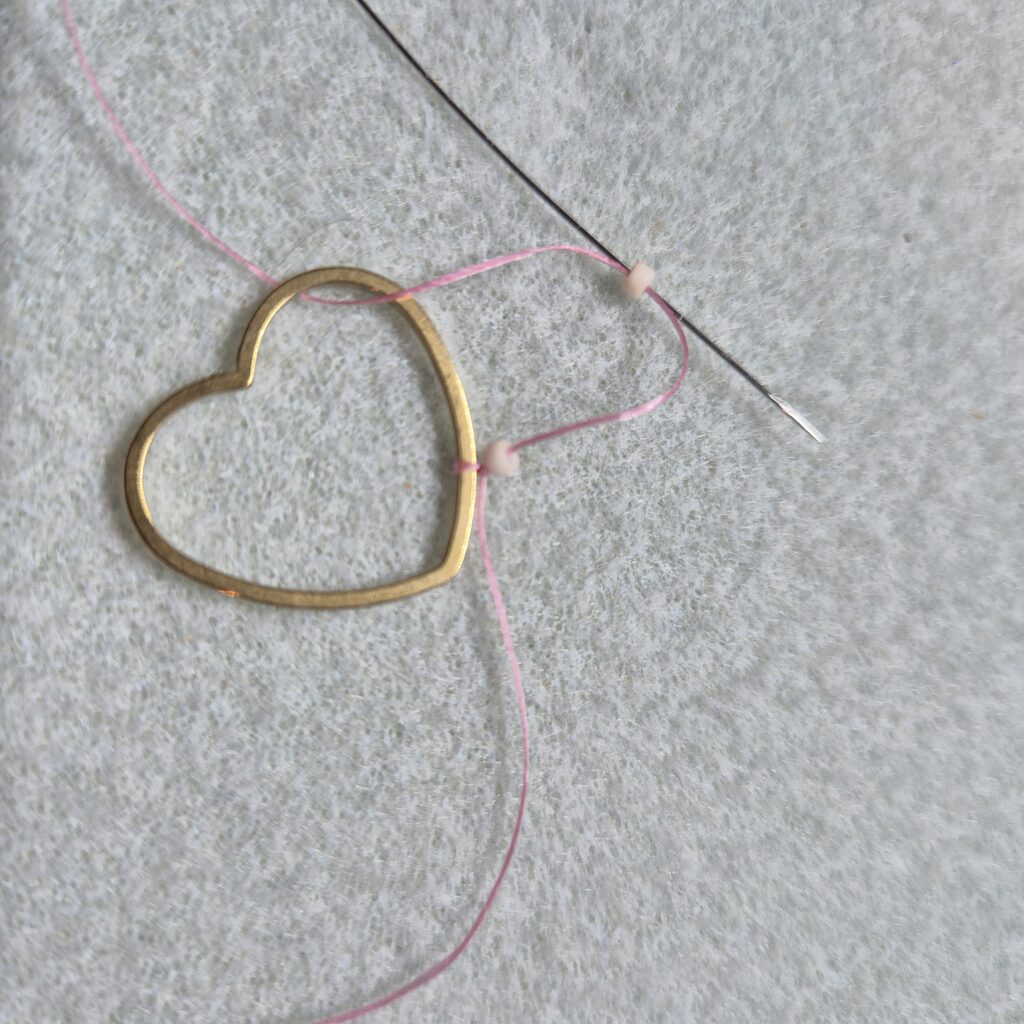
Now thread 1 bead and go under the ring again and then up through the bottom of the bead again.
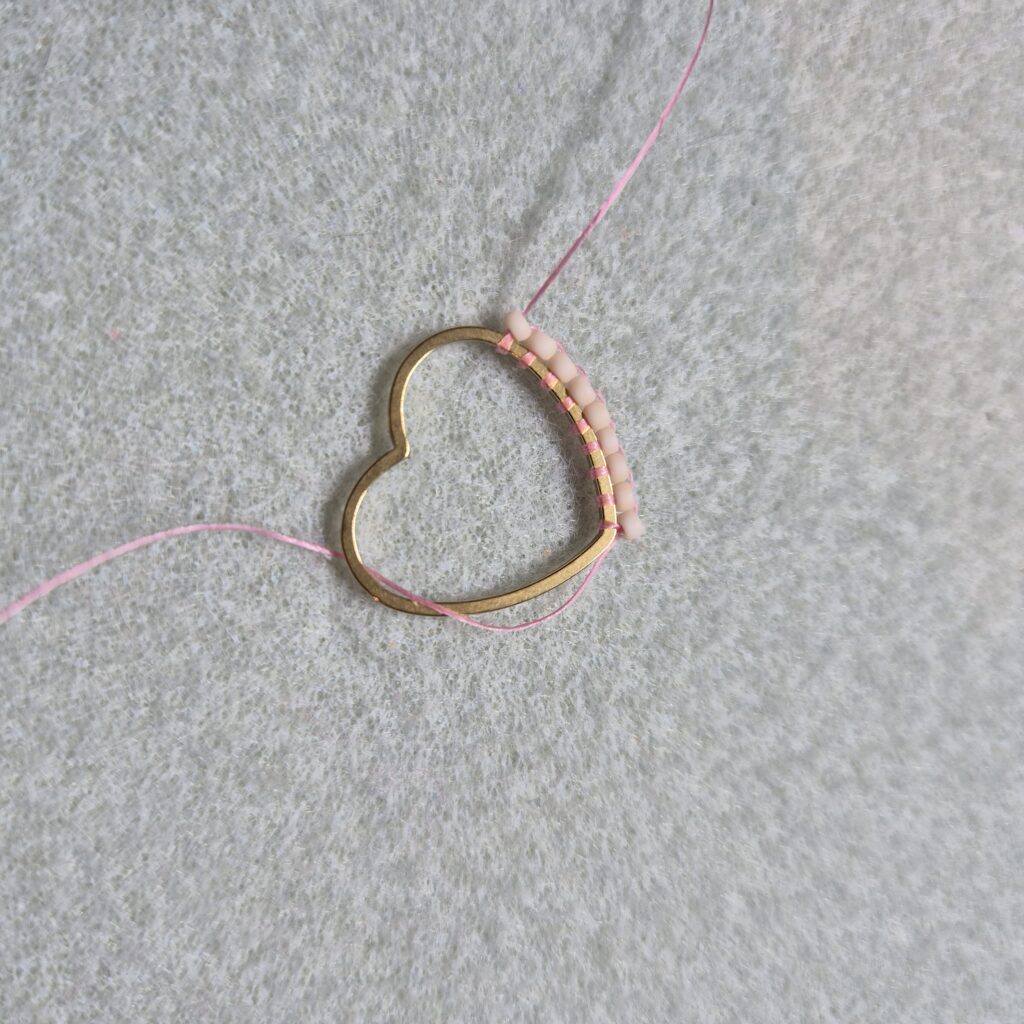
Once you have 9 beads in a row, you can begin the fringe pattern. I always start with the outer edges so I can string the entire earring with one strand.
The pattern:
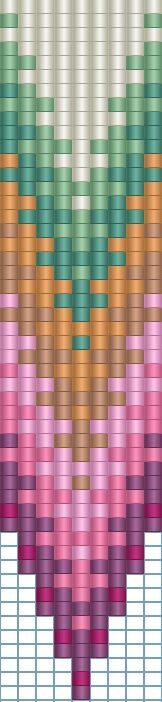
String all the beads of the first fringe as indicated in the pattern. To string back up through the beads, skip the first bead. This way, your fringe will hang nicely.
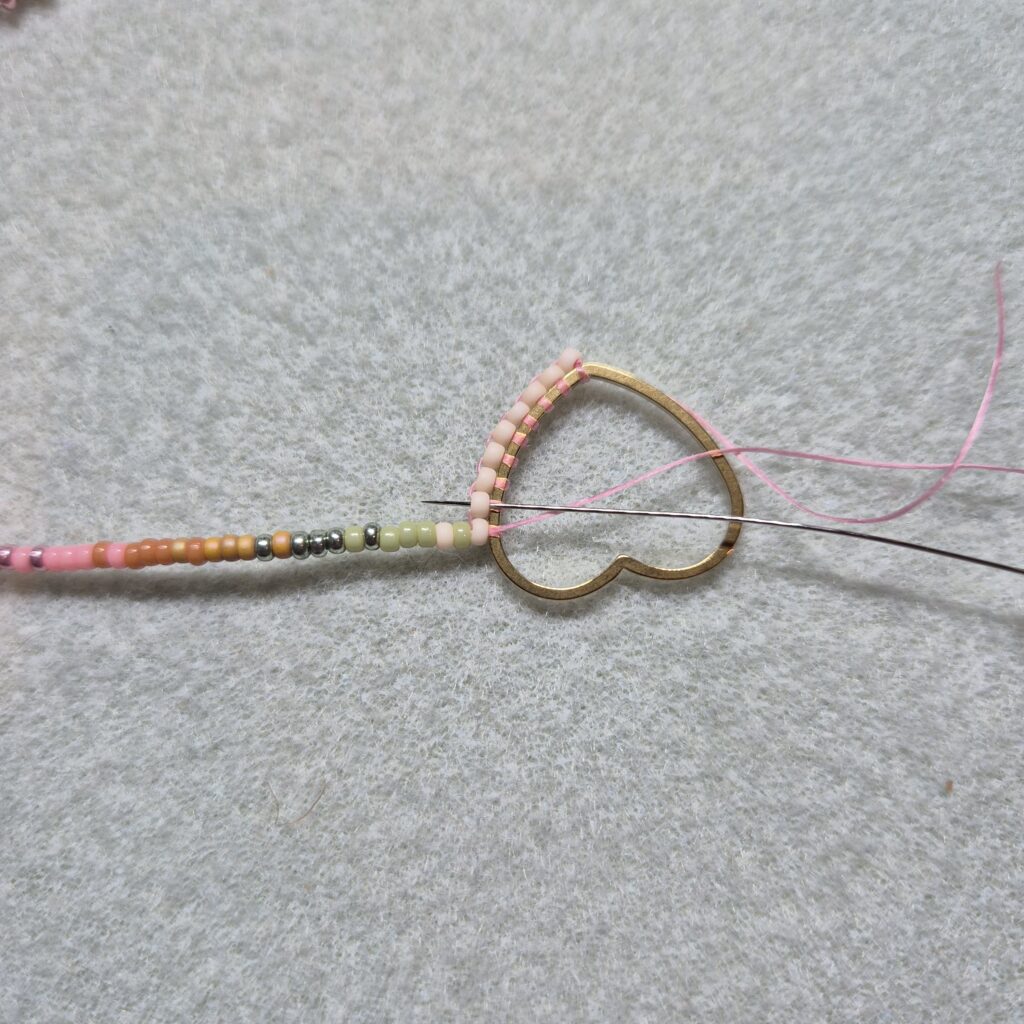
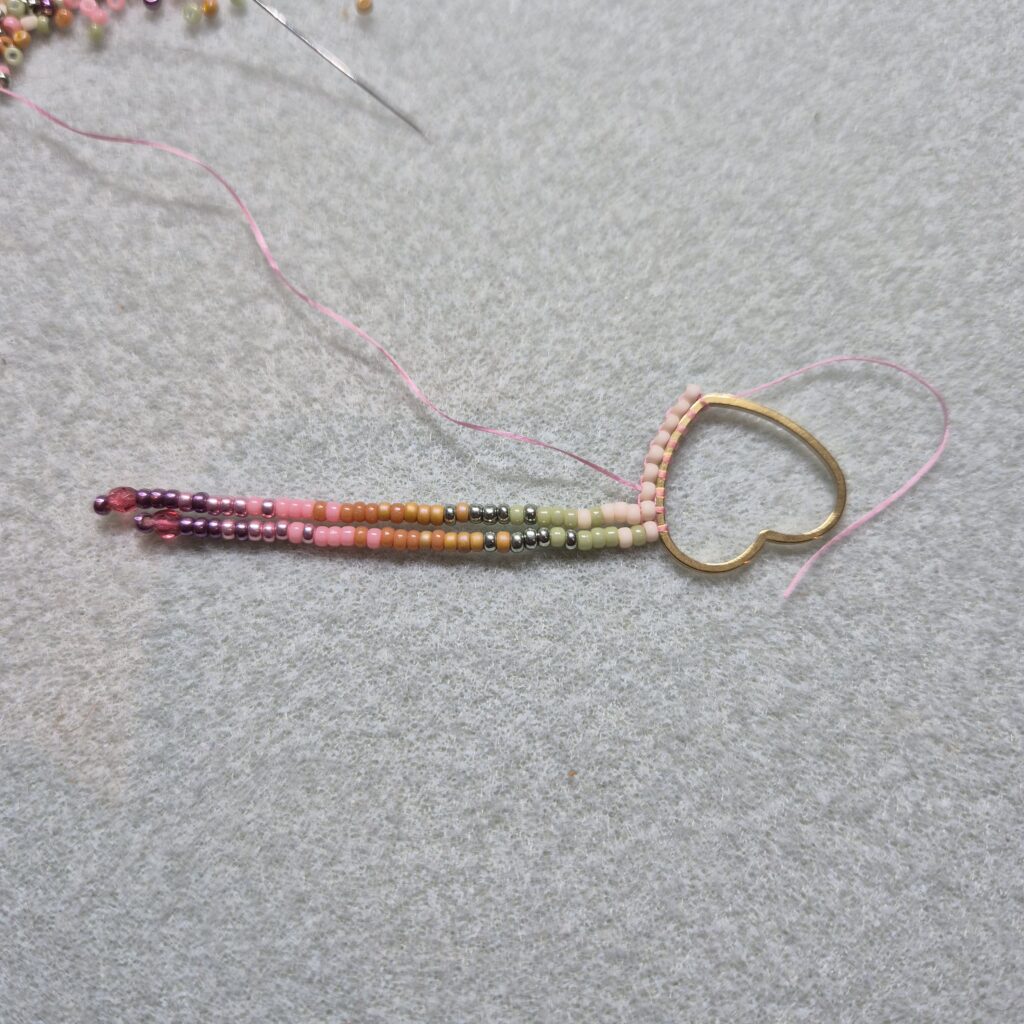
To continue with your second fringe, first thread it through the second brick stitch bead. You don’t need to tie it off; you can simply keep threading. Now thread the pattern of the second fringe and complete the rest of the fringe pattern in this way until the earring is finished.
Your pattern is now finished, and it’s time to attach the earhook. Carefully open the ring on the earhook and hang the earring from it. Now carefully bend the ring back.
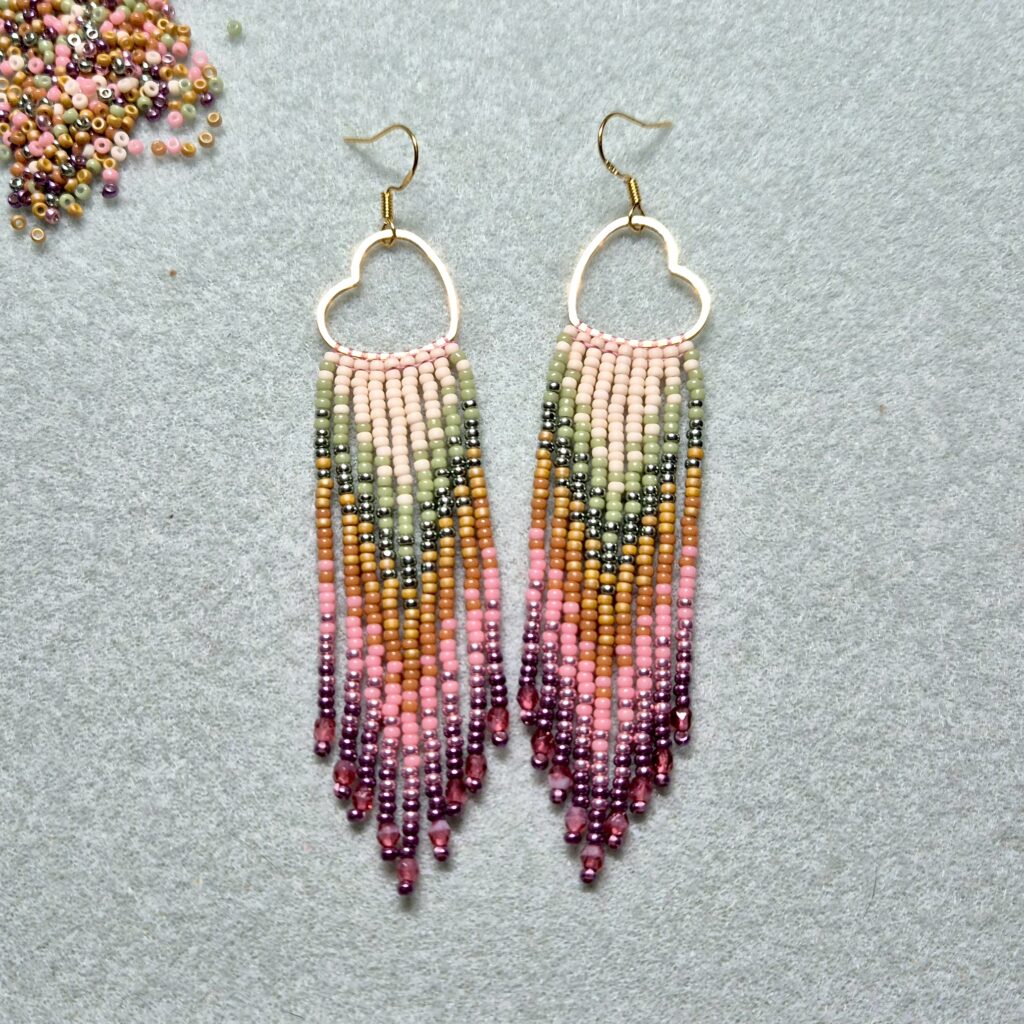
This is the final result!
If you’d also like to make a matching bracelet, we have another great option for you here!

We made this bracelet using the ladder stitch method. You use the same threading thread you used for the earrings. You can choose your own clasp, but we added a lobster clasp and a jump ring. If it fits, you can thread the jump ring through the beads; otherwise, you can hang it on the thread between the two beads.
Watch out! This example is only for the ladder stitch technique with one bead; the bracelet uses two beads next to each other, so you’ll always string two beads instead of one.
This is the ladder stitch technique. You string the beads in a circle around two beads, then pick up two more beads and string them in another circle around them. To make the bracelet sturdier, we threaded a new thread through the beads again after the bracelet was finished; otherwise, there would be some gaps between the beads.
Fun variation, made with other colors seed beads: