

Fringe earrings are super fun to make. And how cute is this Halloween pattern! It’s important to take a good look at the pattern before you start, so you know which color bead to use and when. For these earrings Miyuki seed beads 11/0 were used. You can find the pattern at the bottom of this blog.
Supplies:
Rocaille 11-401F opaque matte black
Rocaille 11-4488 duracoat opaque columbine
Rocaille 11-4476 opaque dyed fiji green
Rocaille 11-406 opaque orange
Rocaille 11-402 opaque white
Rocaille 11-6 silverlined yellow
Miyuki beading thread color black
Miyuki beading needle
Wire protector
Ear hooks
Instructions:
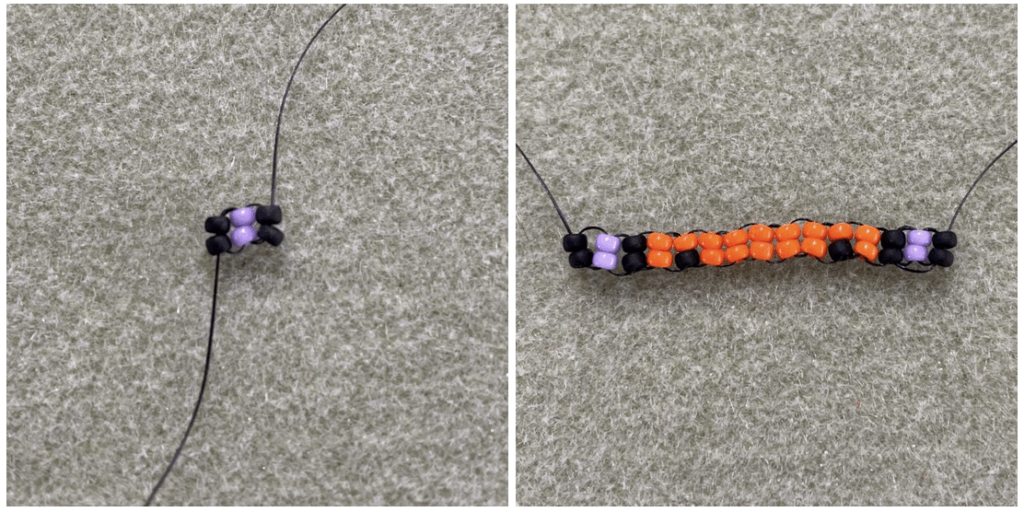
You’ll need a fair amount of wire for these earrings: about 1.5 meters. You can also do the brickstitching first and then the fringe with a different piece of thread if that’s convenient for you. You start with making a ladder stitch base: start by stringing four beads, two black and two purple. Then, you string them through the two black beads and then through the two purple beads, creating a circle. After that, string two more black beads and then through the purple beads, then through the two black beads. Continue this process, stringing two beads, then through the two previous beads, and back again, creating a kind of circle. Pay close attention to the pattern for which beads to use. If you follow the pattern below, combine row 14 and row 1.
Now you’ll continue the brickstitch at the top. String on two beads, one black and one purple. Pass the thread under the second loop of the previous row, thread the thread up through the purple bead, and pull slightly tight. Now string on a black bead and pass it through the next loop of the row below. Pass the thread up through the black bead and pull tight. Repeat this process, threading one bead at a time through the loop in the row below. Continue until the end of the row; pay close attention to the color of beads you should use according to the pattern.
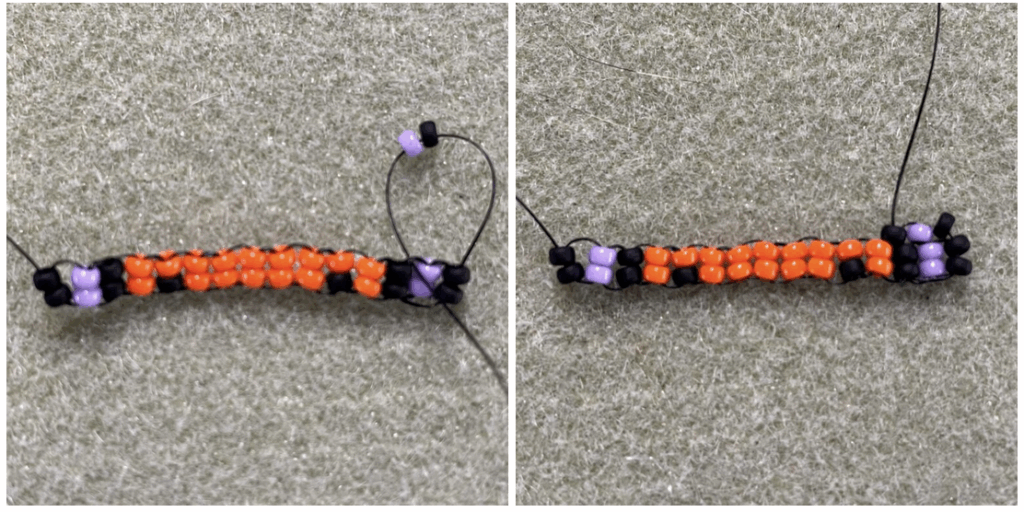
You’ve now reached the end of the row. I prefer to work from right to left because I’m right-handed. So I rotated my work, which is easy in this case because the pattern is symmetrical. If you’re working with a different pattern, always be sure to keep the pattern straight when rotating. Now we’re going to string two more beads, black and purple, and thread them under the second loop of the next row. Pass them up through the purple bead and tighten. Now string one black bead, pass it through the next loop in the row below, pass it up through the black bead again and tighten. Keep repeating this, using the correct color bead, until you reach the end of the row.
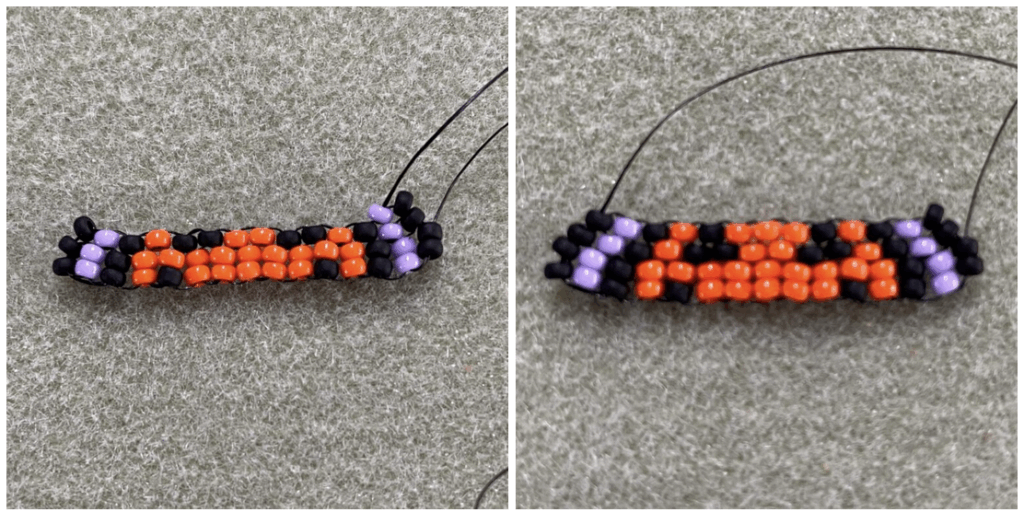
You can keep repeating these steps until you’ve finished the entire top piece. Now we’ll add the thread protector. Go through the thread protector on one side and back through the other. Now go all the way down through the slanted side (black beads).
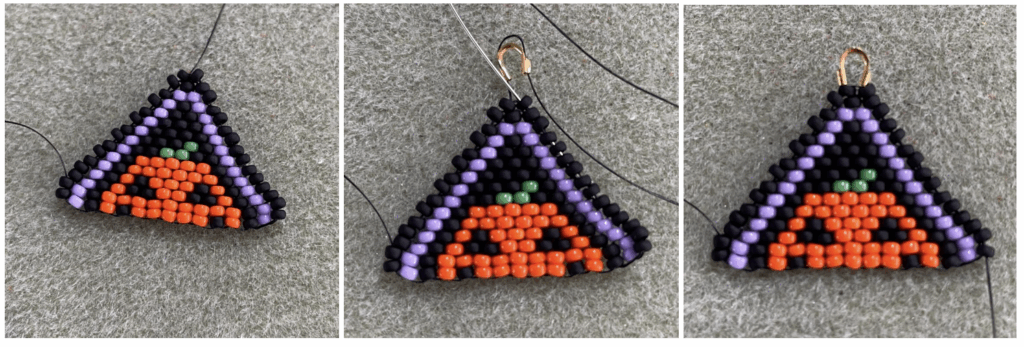
Your thread will now come out of a black bead at the bottom right. We’re going to start the fringe. String the beads according to the pattern. If you started with two beads (row 14 and 1) at the ladder stitch, you’ve already completed the first row, so you don’t need to count it when stringing. So, start with two.
Skip the bottom bead and string all the way back up through the beads. Go up through the first two beads and then insert the needle back down through the two purple beads. Now you can string another fringe. Keep repeating this until you’re completely finished.

Your earring is almost finished. For extra strenght go through the outside of the brickstitch again, the slanted part. This will help the beads fall into place more beautifully. Tie a small knot in it and go through the first fringe again, carefully trimming the thread. Your first earring is now finished.
Repeat this entire process one more time, and your beautiful Halloween fringe earrings are ready! Wishing you a very happy and spooky Halloween!
