
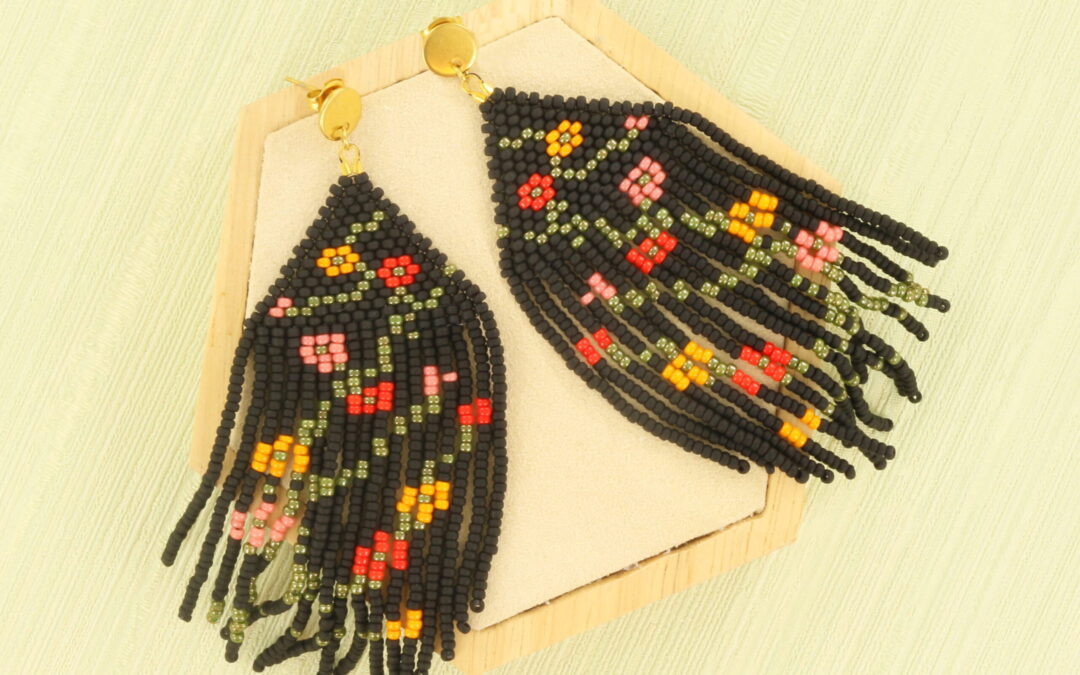
Do you want to create these stunning fringe earrings yourself? Then keep on reading! These beauties are the perfect match for the “Meadow Flower” crocheted bracelet, making them a fantastic addition if you love a coordinated look. Whether you’re an experienced beader or just starting out, this project is a joy to make.
Needed supplies:
- Miyuki seed beads:
11-401F (opaque matte black)
11-2539L (opaque luster kaki)
11-4454 (duracoat opaque kumquat)
11-407 (opaque vermilion red)
11-4464 (duracoat opaque light watermelon) - Thread: black Miyuki
- Tools: a beading needle
- Findings: earring studs, earring backs (stoppers), wire protectors and open jump rings.
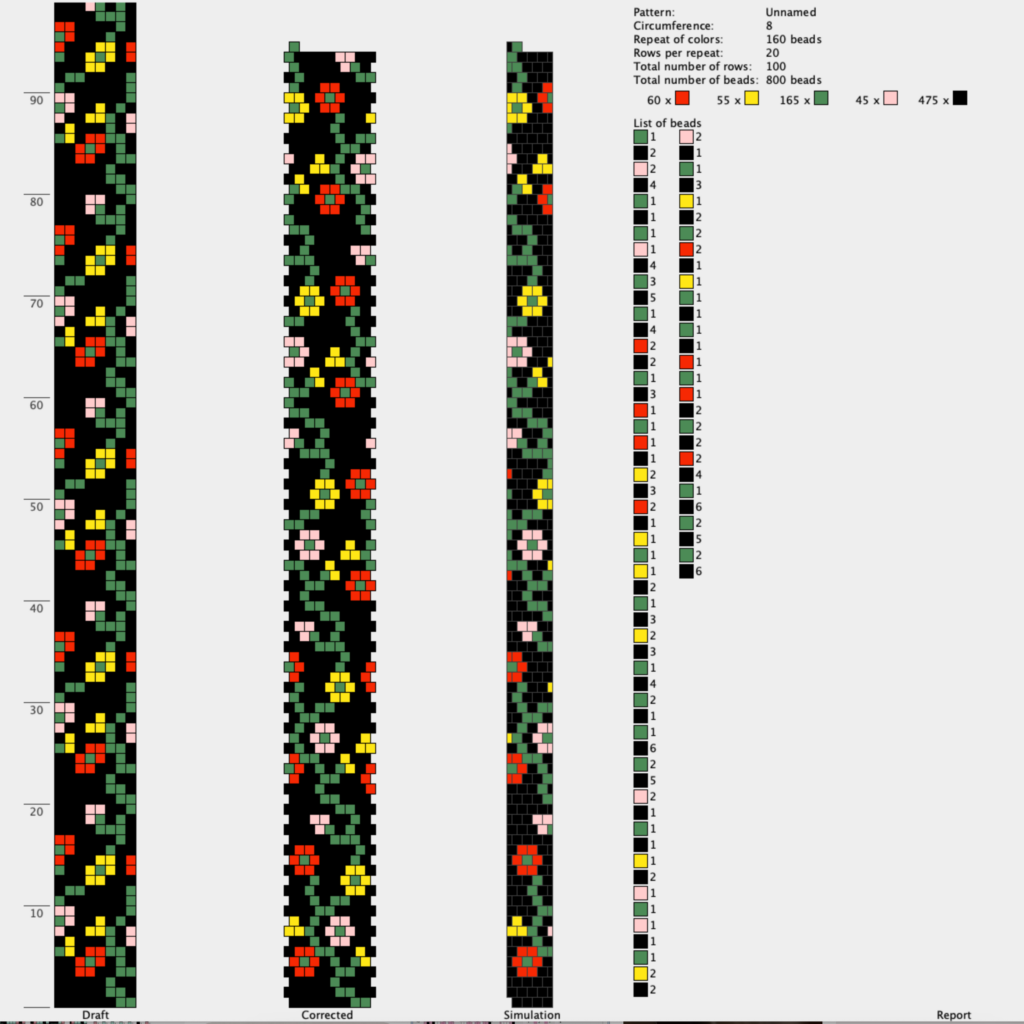
You can find the full pattern at the bottom of the blog.
Instructions:
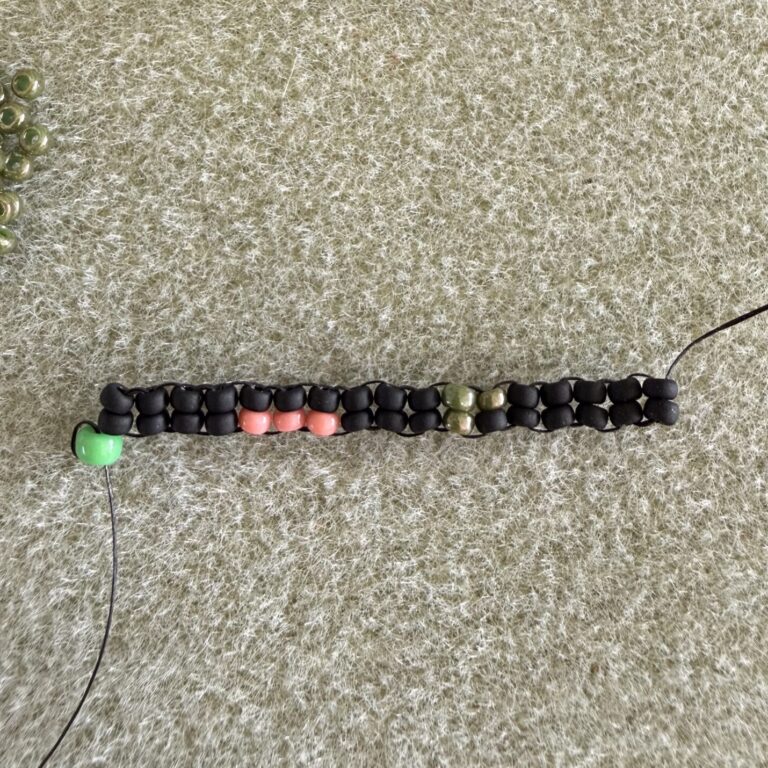
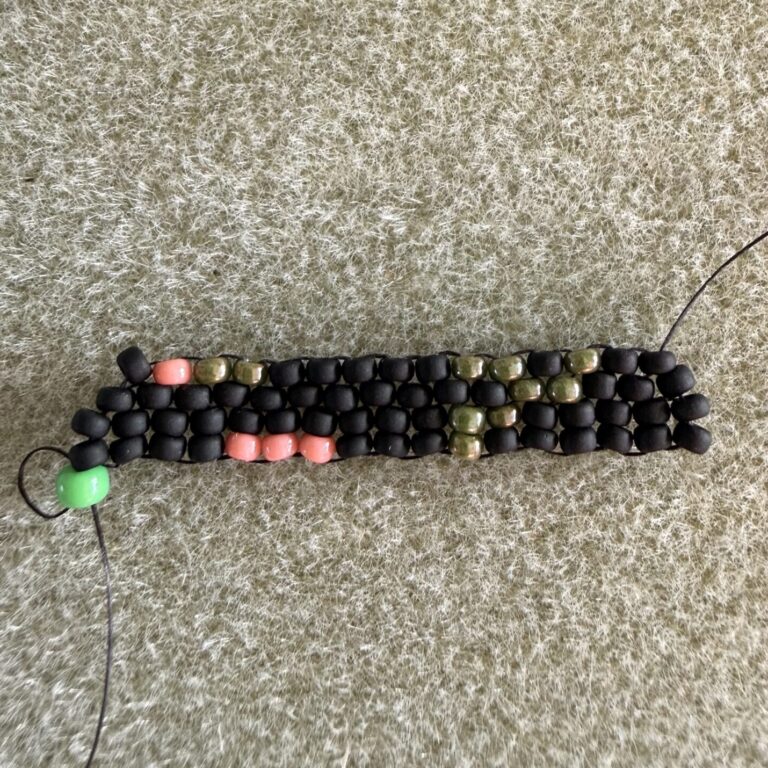
Step 1: The Base (Ladder Stitch)
Start by cutting a piece of beading thread of about 1 meter. We’ll begin by creating the top triangle of the earring using the brick stitch technique. To create a solid base for your brick stitch, we start with a ladder stitch.
Pro-tip: I always find it helpful to start with a “stop bead.” This is just a slightly larger bead that you thread through once to prevent your beads from sliding off. You can easily remove it later.
Thread 4 black beads and go back through all four to create a small loop. From here, continue by adding 2 beads at a time, going through the previous 2 beads and back through the last 2. Follow the pattern closely—this step covers row 40 and row 1.
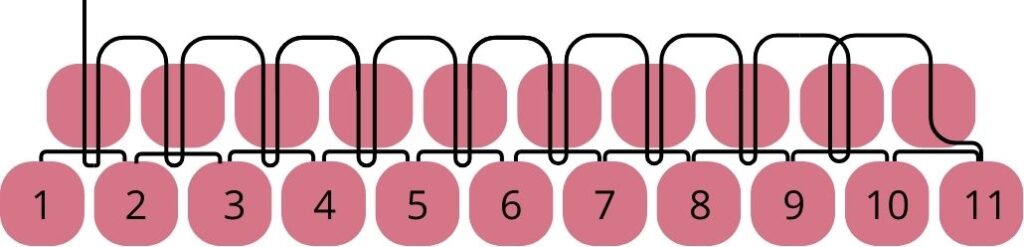
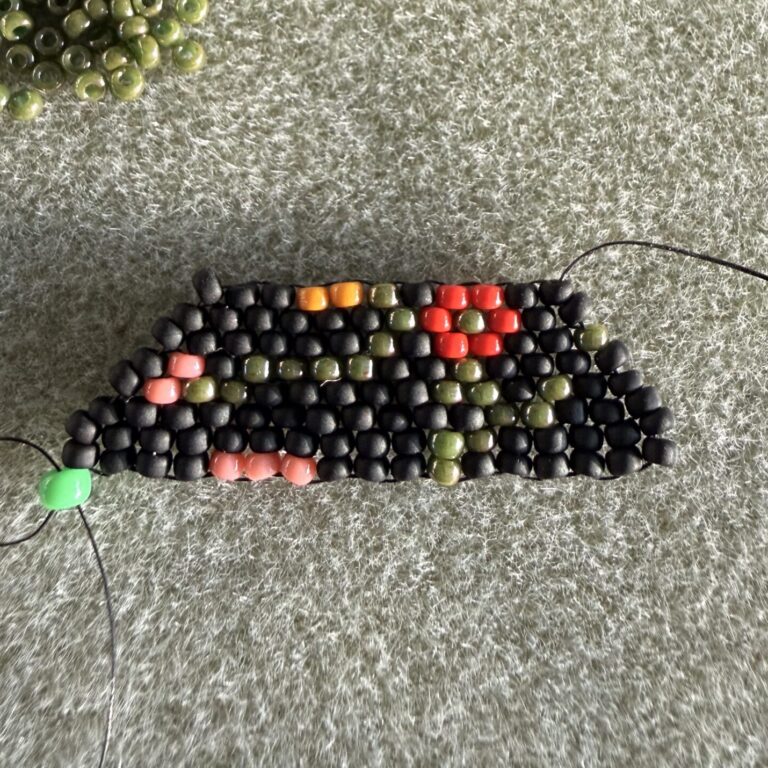
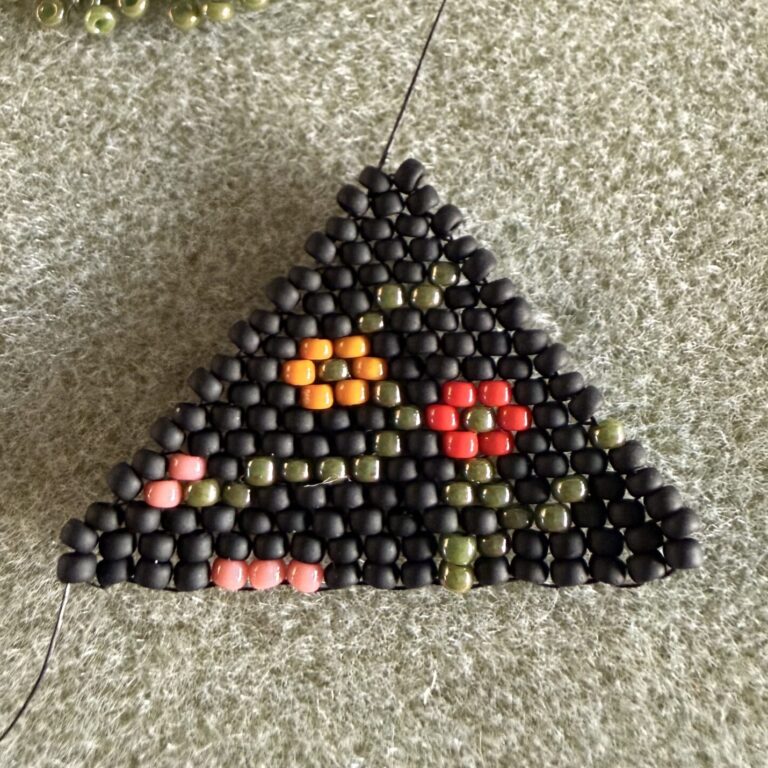
Step 2: Building the Triangle (Brick Stitch)
Once your ladder stitch is finished, continue with the brick stitch technique until the top triangle is complete.
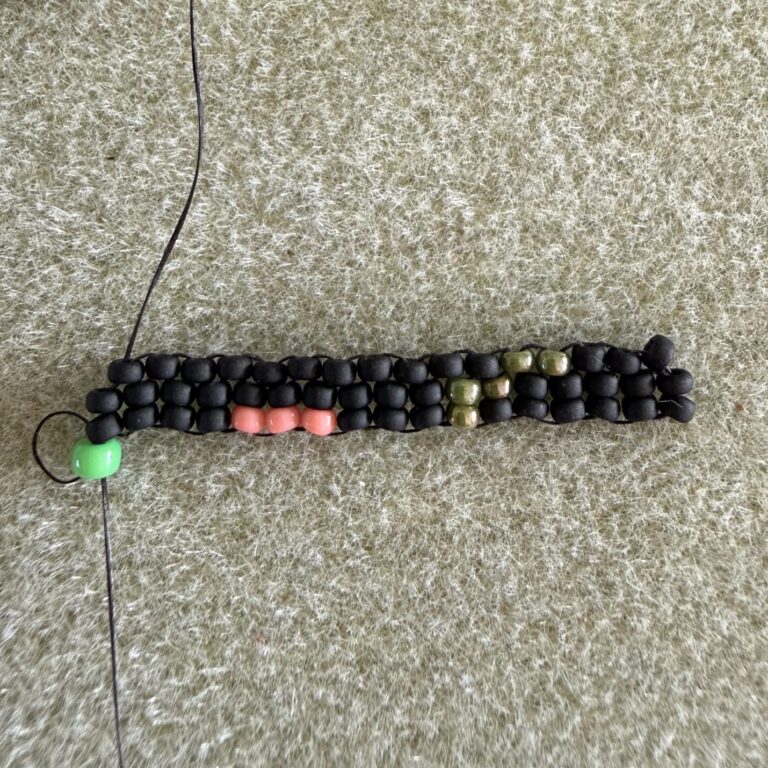
- Start each new row by picking up 2 beads and passing your needle under the second thread bridge of the row below.
- Continue the row by picking up 1 bead at a time and anchoring it under the next thread bridge.
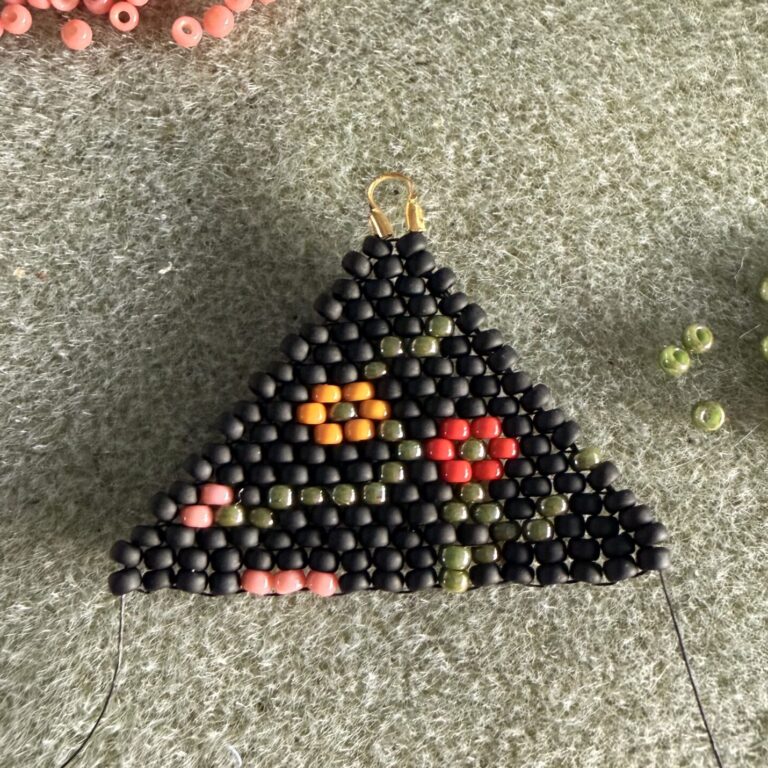
Repeat this process, following the pattern carefully. Finish the top by attaching a wire protector to the top two beads—this is where your earring stud will eventually go.

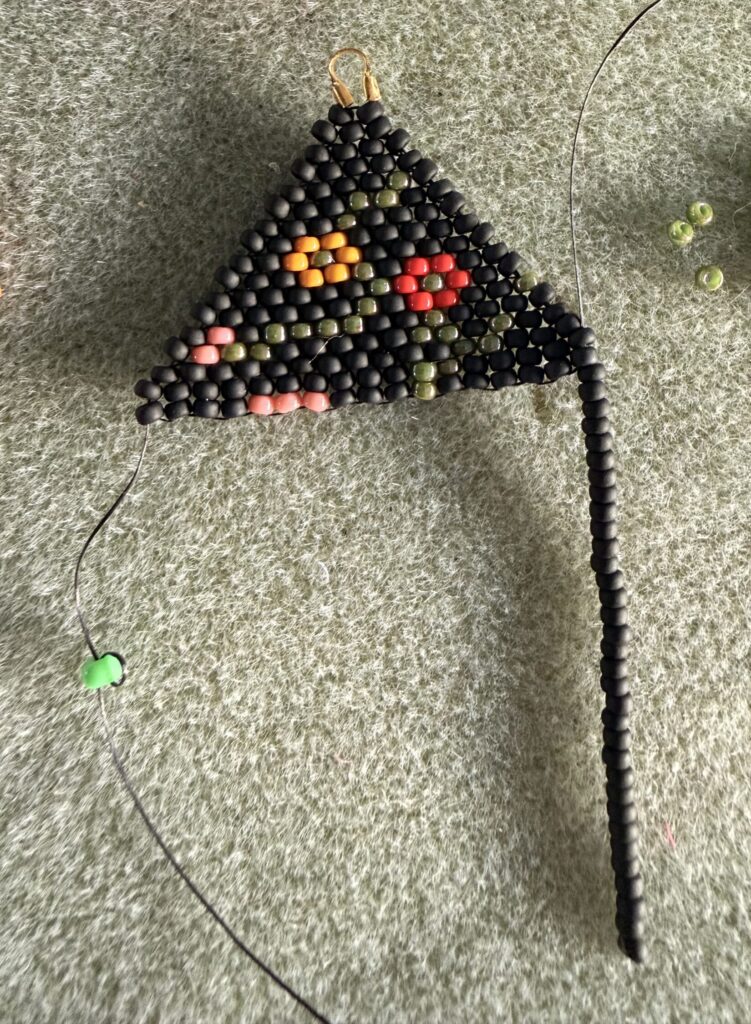
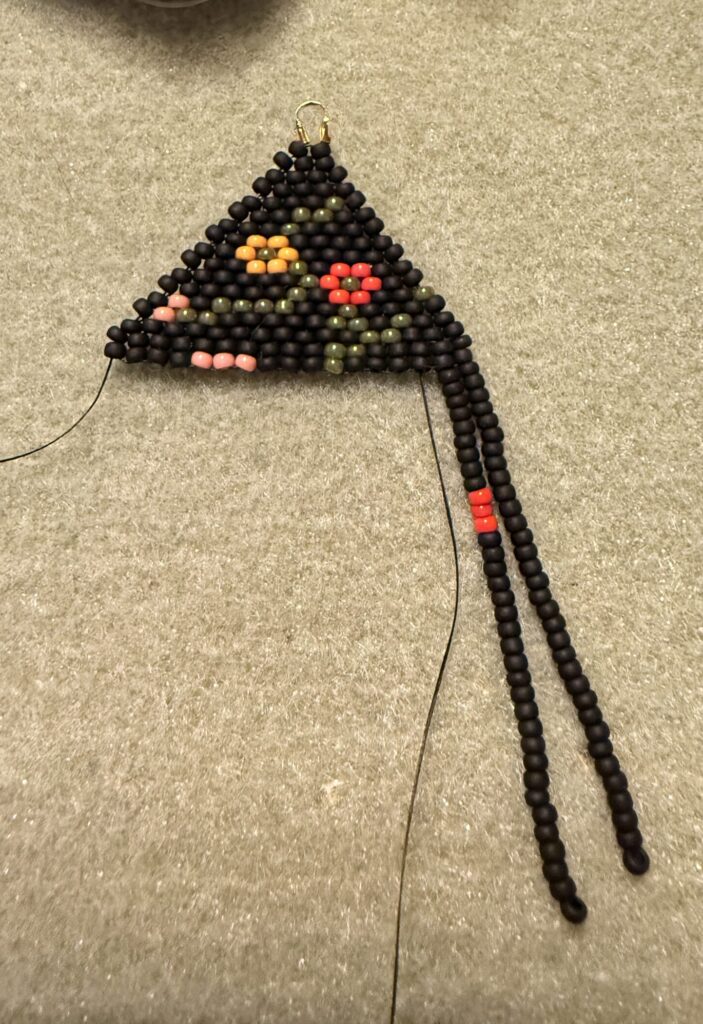
Step 3: Adding the Fringes
Now that the top is ready, it’s time for the best part: the fringes! You can continue with your remaining thread by moving from the top down, or start with a fresh piece of thread if needed.
The fringes give these earrings that lovely “Meadow Flower” movement and flow. Simply follow the color sequence in the pattern for each individual strand.

Finishing touches
Once all the fringes are attached and your threads are secured and tucked away, attach your earring studs using the jump rings and wire protectors.
And you’re done! You now have a gorgeous pair of handmade statement earrings.
Pro-tips for a perfect result:
To make sure your earrings look professional and last a long time, keep these extra tips in mind:
- Watch the Tension: This is the most important tip for fringes! Do not pull your thread too tight. If the tension is too high, the fringes will be stiff. You want them to have a lovely, elegant “swing” when you move.
- No Knots Needed: Instead of tying knots to finish your thread (which can be bulky and visible), simply weave your thread back through the brick stitch section. It’s much more secure and gives a cleaner finish.
- Fresh Thread: If you run out of thread while making the fringes, don’t worry. Just weave in the old thread, start a new one in the brick stitch section, and continue where you left off.
Complete the look: The Meadow Flower bracelet
Can’t get enough of this floral style? We’ve got you covered! To create the ultimate jewelry set, we’ve included the pattern for the matching Meadow Flower Bracelet below.
This crocheted bracelet uses the exact same color palette, making it the perfect partner for your new fringe earrings. Just save the image below, grab your crochet hook, and start beading your way to a complete “Meadow Flower” collection!
You can find everything you need to know before you start crocheting with beads on this blog.
Happy beading!