
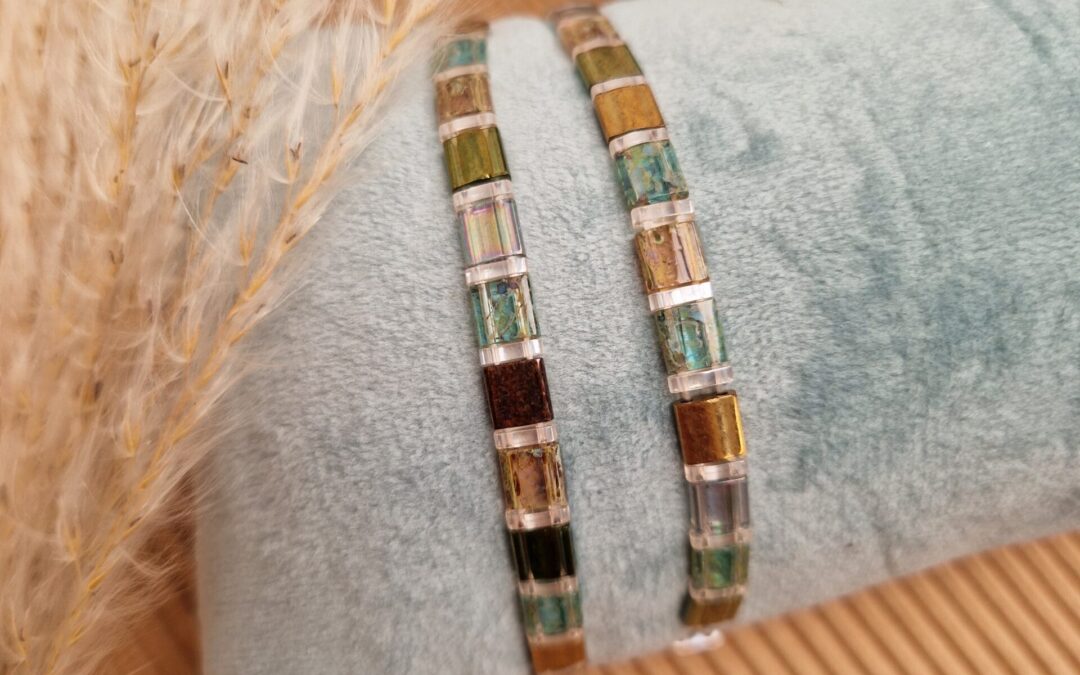
Bracelets with Miyuki Tila beads are quick and easy to make, and the results are truly beautiful.
By stringing the beads onto elastic, you don’t need to attach a clasp, making them a great gift!
Create endless color combinations with whole, half, and quarter Tila beads, or choose one of our beautiful mixes where the colors are already pre-assembled.
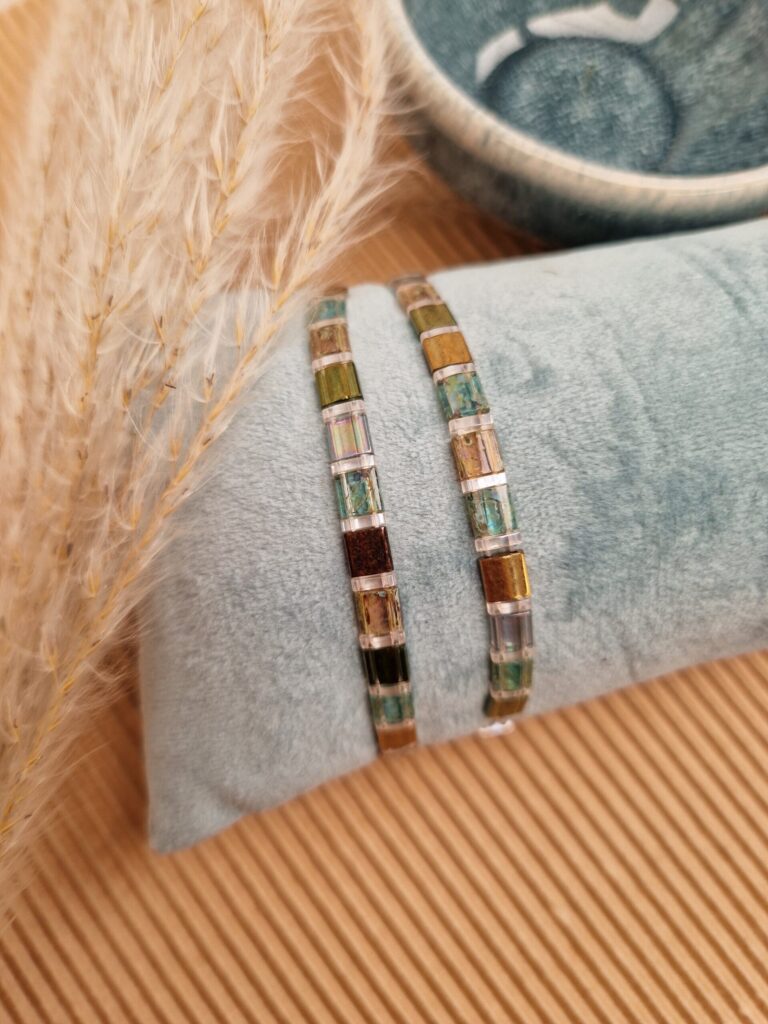
For the bracelets in this picture we used:
- Miyuki quarter tila – 365 (light shell luster pink)
- Miyuki tila – 4506 (transparant sea foam picasso)
- Miyuki tila – 4501 (transparant picasso light topaz)
- Miyuki tila – 306 (gold luster olive)
- Miyuki tila – 457 (transparant green picasso)
- Miyuki tila – 1881 (transparant luster silver gray gold)
- 0.4mm nylon elastic wire
- Big eye needle
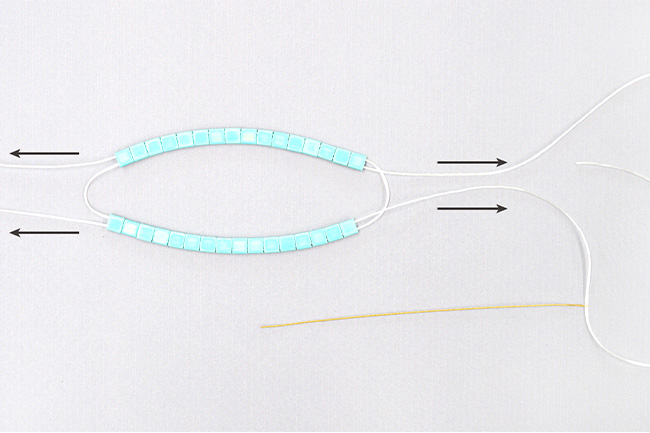
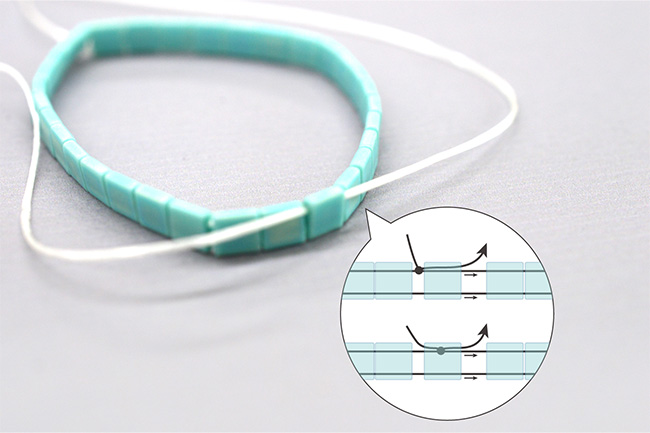
By stringing the beads as shown below, finishing the elastic is much easier because you don’t have four strands of beads right next to each other.
Instructions:
Step 1)
Thread the needle onto your spool of elastic and string the tilas until your bracelet is long enough. We use about 17 cm of elastic.
Make sure there’s about 10 cm of elastic left on the left and right sides of the beads for easy knotting, and cut the elastic off.
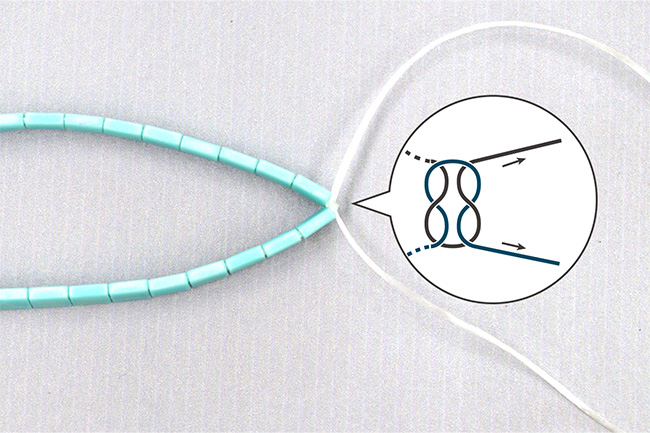
Step 2)
Insert the needle halfway through your threading and thread it from left to right.
Once you reach the end, go to the left side of your threading and thread it from left to right again. Leave about 10 cm of elastic on each side and cut it off.
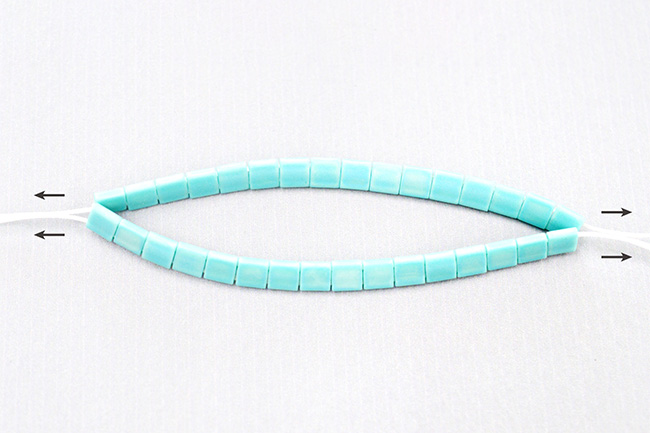
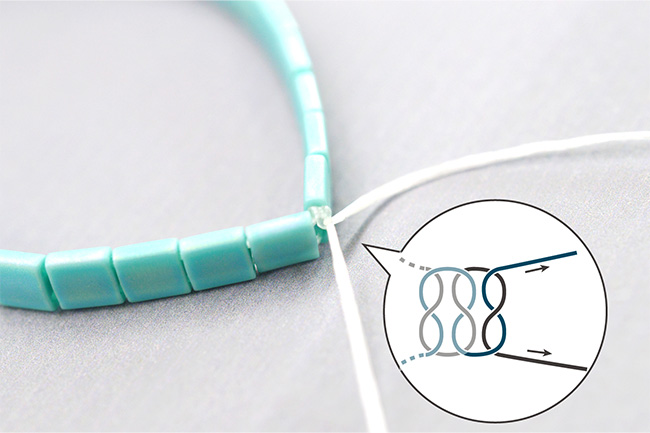
Step 3)
Tighten the elastic so the beads hang neatly.
If necessary, pull the elastic a little harder to remove any excess stretch.
Step 4)
Tie a double knot at one end.
Tighten it tightly; you’ll often eventually feel a “click” as if the knot has closed tightly.
Step 5)
Tie a double knot on the other side.
Let the bracelet hang and check if it hangs straight. If it hangs a bit crooked, one of the elastics is pulled tighter than the other. Try to loosen the tighter part or tighten the looser part. If necessary, you can untie the knot and try again.
Step 6)
Tie another knot on each side. Pull the knots tight until you feel a click.
Step 7)
Stretch the bracelet so you can see the knot and trim the remaining elastic a few millimeters from the knot. Apply a small amount of nail polish to the knot to further reduce the risk of it slipping loose. Glue will also work, but try to keep it thin so the knot can still fit through the beads.
Don’t let the nail polish or glue dry and immediately slide the knot into the tila. This will help the knot stay hidden inside the tila.
Do this on both sides.
Your bracelet is done!