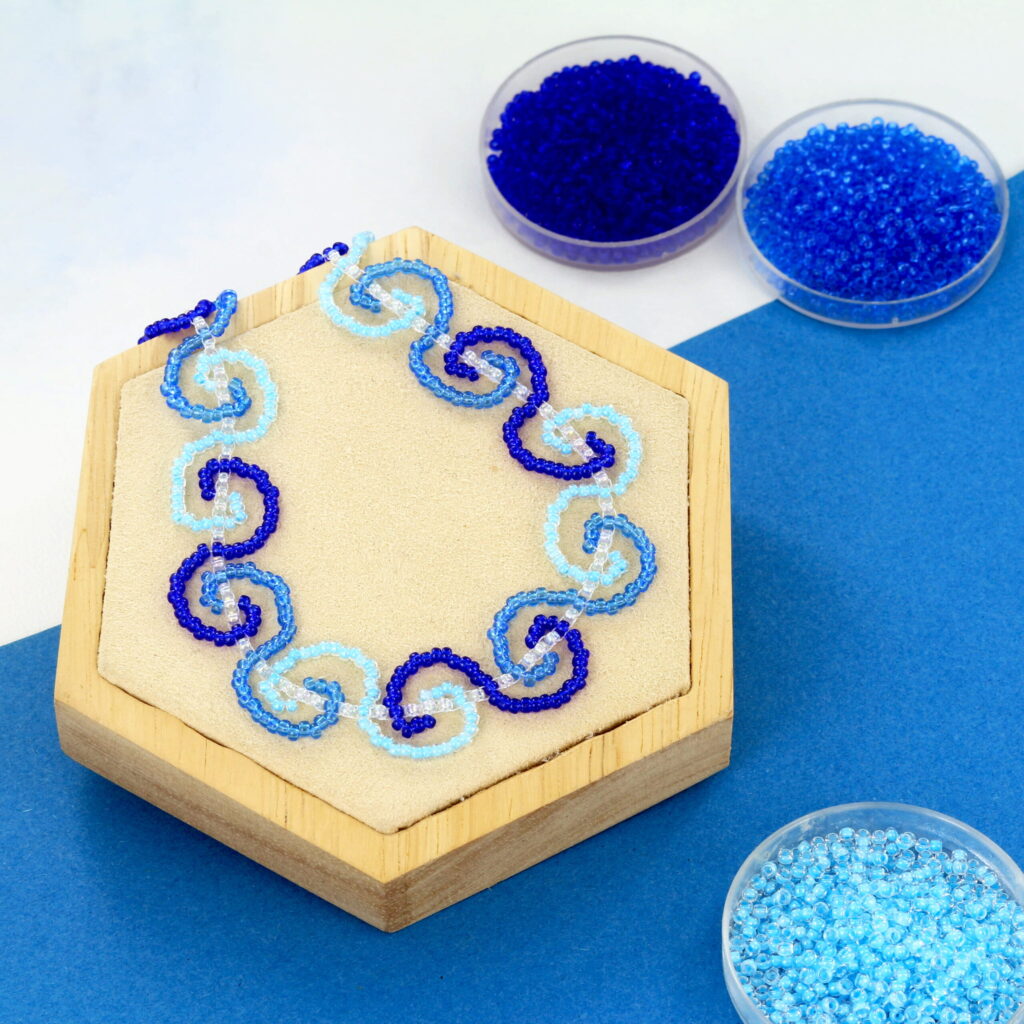
Are you ready to dive into summer with a fresh, handmade look? This adorable Wavy Choker Necklace is the perfect accessory for sunny days, beach outings, or just to add a playful touch to your daily outfit. The “wave” effect gives it a unique, organic feel that stands out from standard beaded chains.
In this blog, we’ll show you exactly how to create this wavy design yourself using Miyuki seed beads. Let’s get started!
What you’ll need:
To recreate the look from our example, you will need the following materials:
- Miyuki seed beads:
11-250 (crystal ab)
11-4300 (luminous turqoise)
11-2431 (silverlined dark cornflower blue)
11-151 (transparent cobalt) - Thread: Fireline (0.12mm) for strength and durability.
- Needle: Size 11 or 12 beading needle.
- Findings: 1 lobster clasp, 1 extension chain, and 2 jump rings (5mm).
Before you begin:
For this design, we used a transparent bead and three different shades of blue. Feel free to pick your own favorites, but we recommend choosing three colors for the waves to make the pattern pop. If you choose different colors, it’s helpful to decide on their order beforehand.
In this example, we used 0.12 mm Fireline to help the waves hold their shape. If you prefer a firmer feel, you can use 0.15 mm, but keep in mind that you’ll need to pass through some beads three times, which can be tricky with thicker thread.
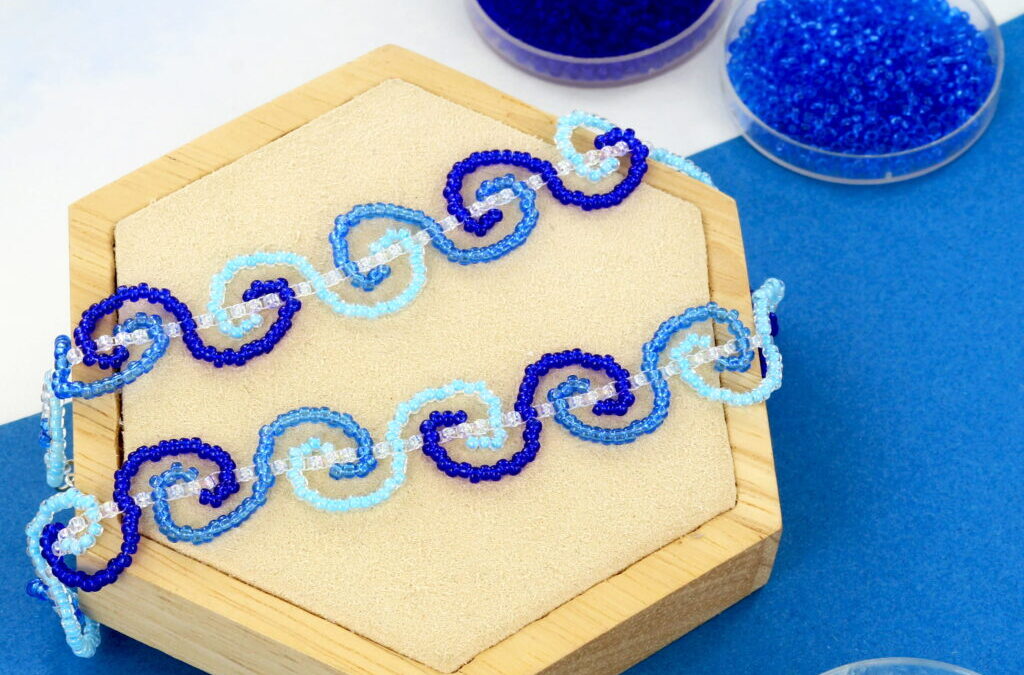
First, determine the length of your necklace. Since this is a choker, it should sit quite snugly. For this tutorial, we based the size on a neck circumference of 30.5 cm. To allow for some movement, the beadwork itself is 29.5 cm. We used about 1 meter of thread for this.
By adding the clasp and extension chain, you can decide exactly how tight you want it. For a beautiful finish, try to end the pattern symmetrically; we started with half a wave, so ending with half a wave looks best.
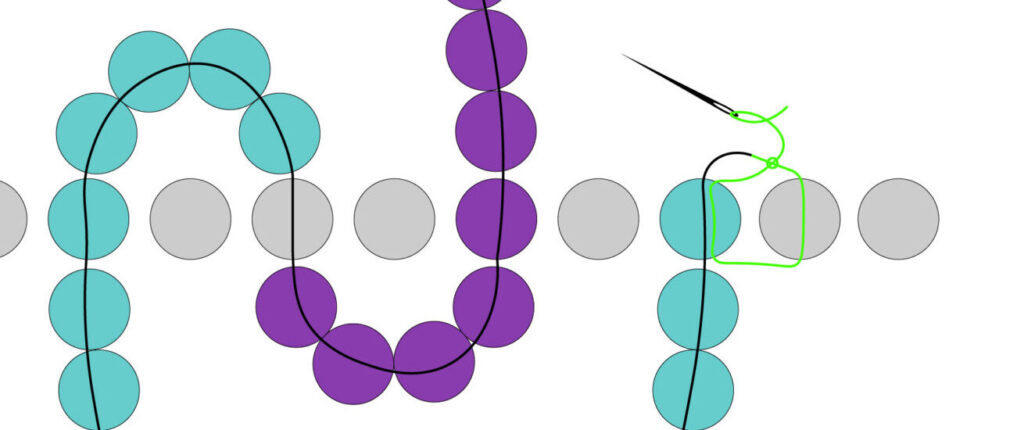
Step 1:
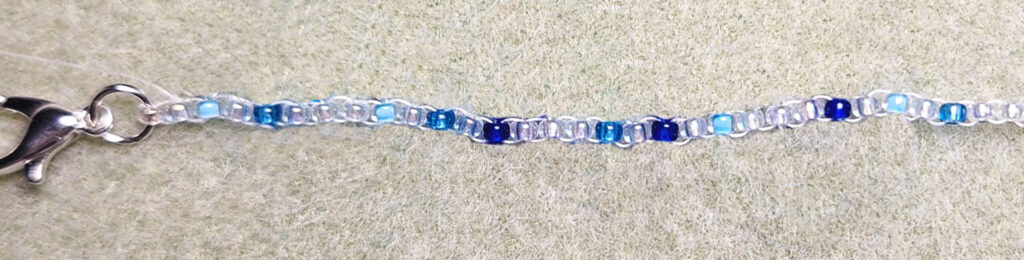
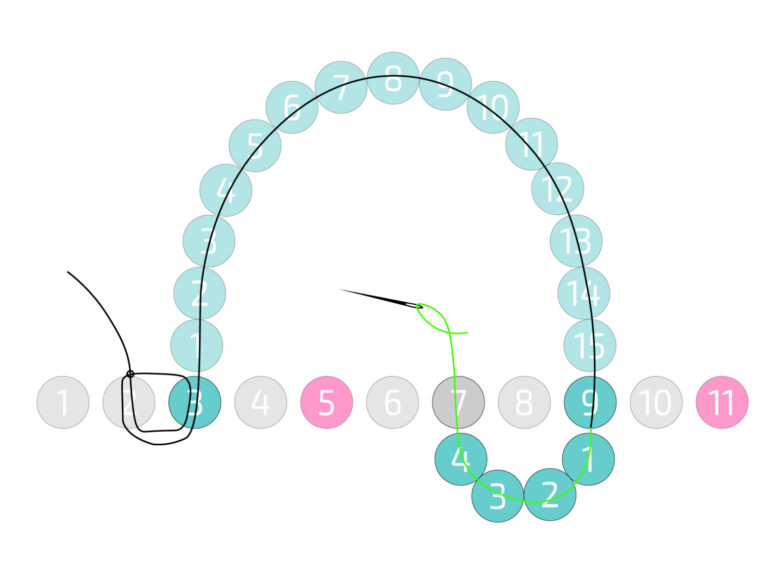
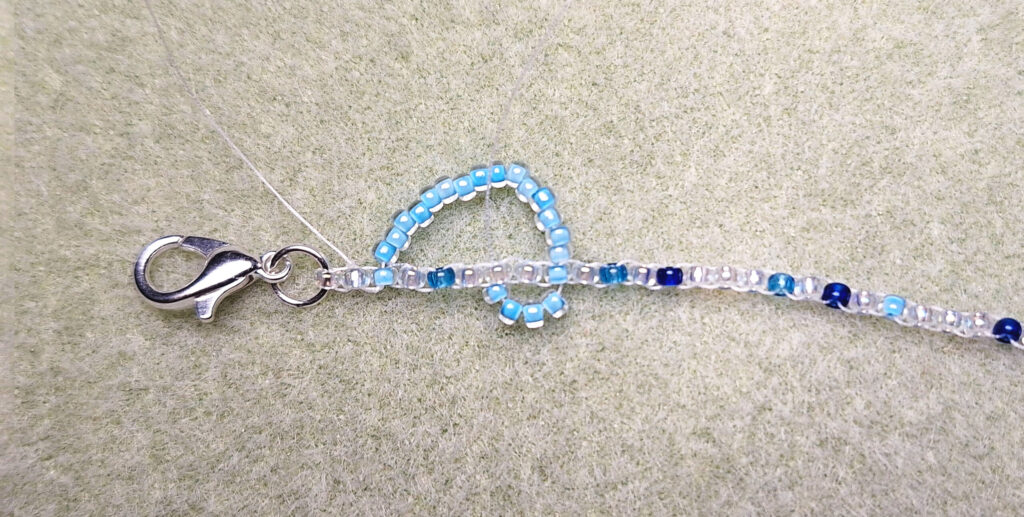
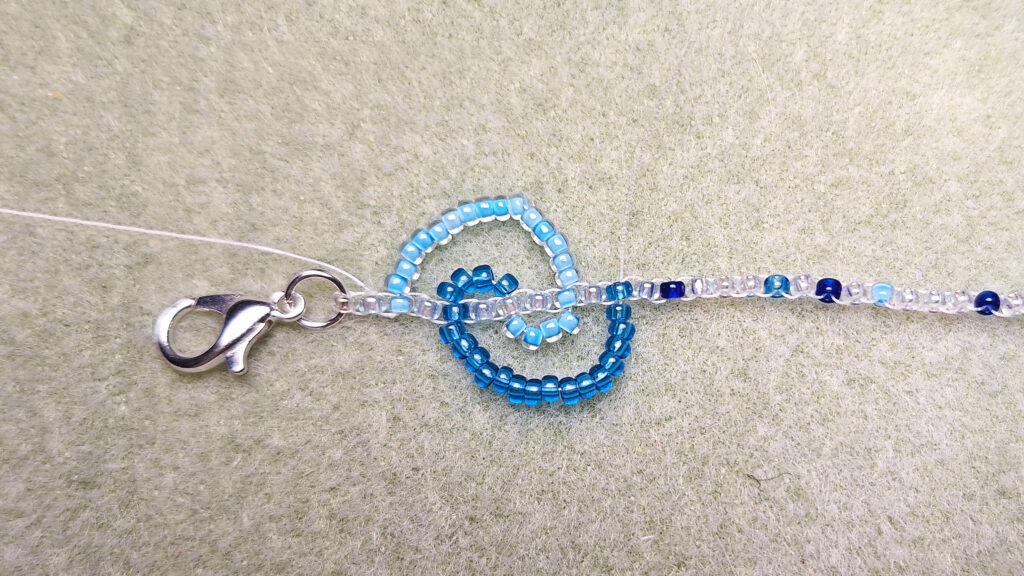
To start the necklace, we begin with a row of beads that sit crosswise against each other. Thread a needle onto both ends of your thread. Pick up one transparent bead and move it to the center of the thread.
You can make this part easier by immediately attaching a jump ring and the lobster clasp to this first bead. You can then pin the clasp to your beading mat to keep everything in place while you work.
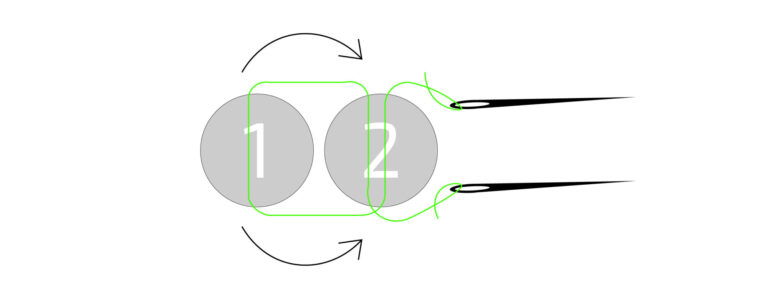
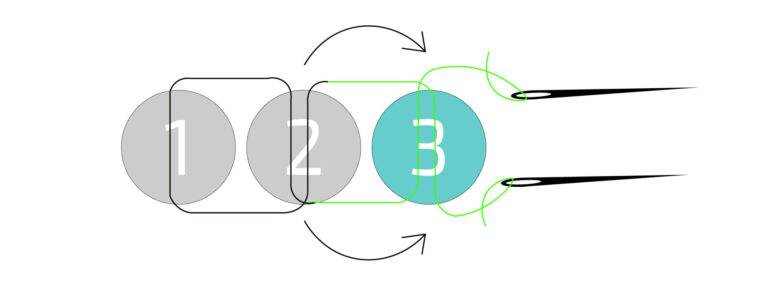
Step 2:
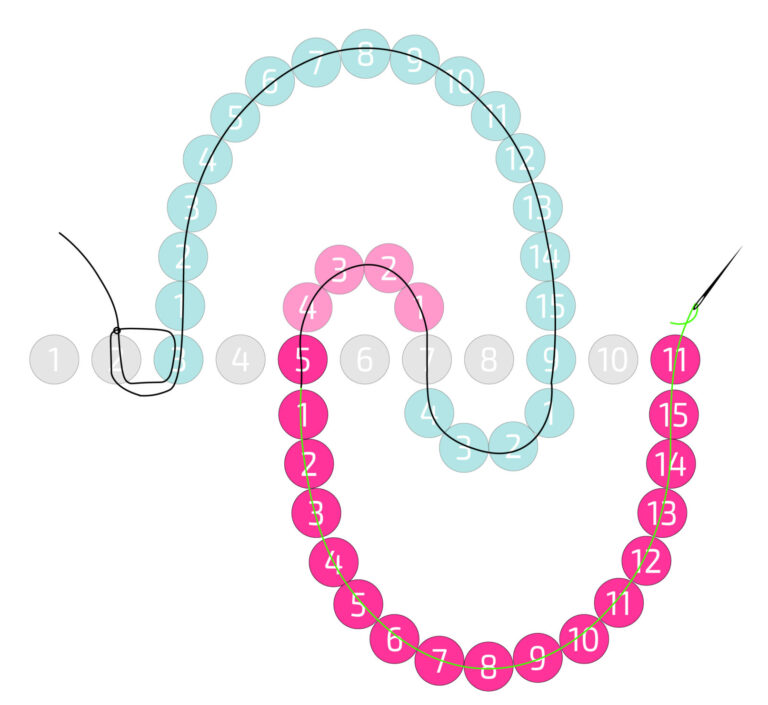
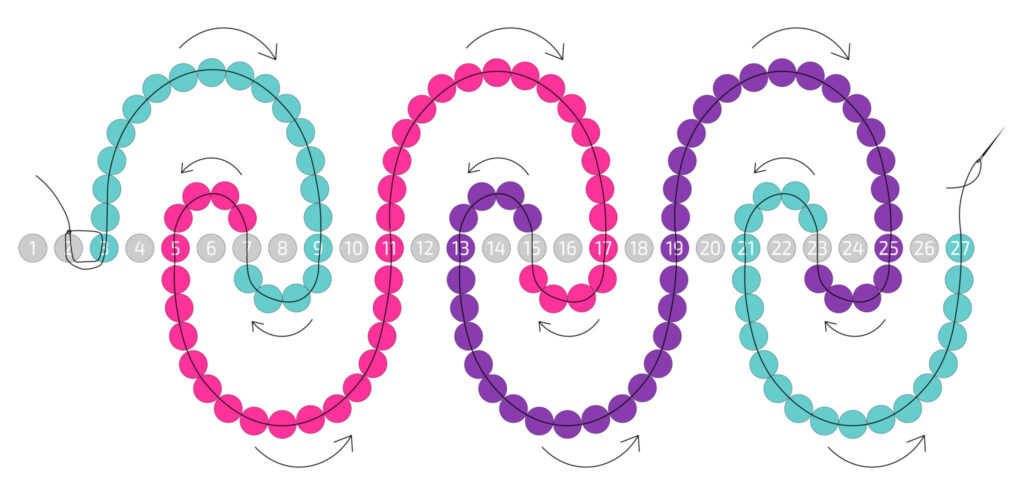
Pick up the next bead with one of the needles. Then, pass the other needle through that same bead in the opposite direction. Pull tight so the beads sit snugly against each other. Continue following the pattern below.
In our example, light blue is 11-4300, medium blue is 11-2431, and dark blue is 11-151. If you are using the same colors, follow the photo. If not, follow the color sequence shown in the diagram.
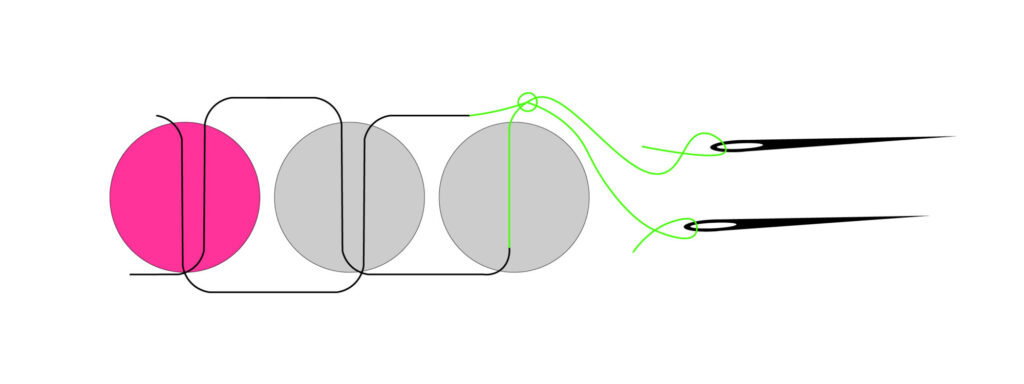
Step 3:
Once you reach bead number 26, restart the pattern from bead 2. As you approach your desired length, make sure to end with half a wave (check the photo for reference). Finish with an extra transparent bead, just like at the start. You can then attach a jump ring and the extension chain here.

Step 4:
Once the necklace is at the correct length, finish with a few secure knots. You can add a tiny drop of glue or clear nail polish to ensure the knot stays put.
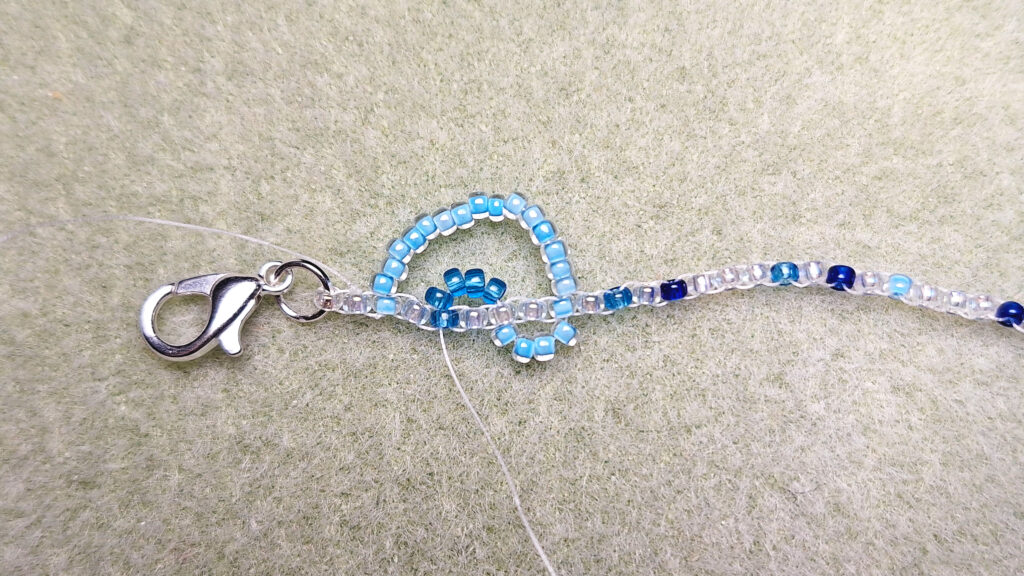
Step 5:
For the next step, start with a new piece of Fireline. For a 30 cm necklace, we used about 1.20 meters of thread.
Thread down through bead 2, up through bead 3, and tie a few knots to secure the thread. Pass down through bead 2 and up through bead 3 again.
Now, string 15 beads of the color you just exited. Then, thread down through the next bead in the base row that has the same color (bead 9).
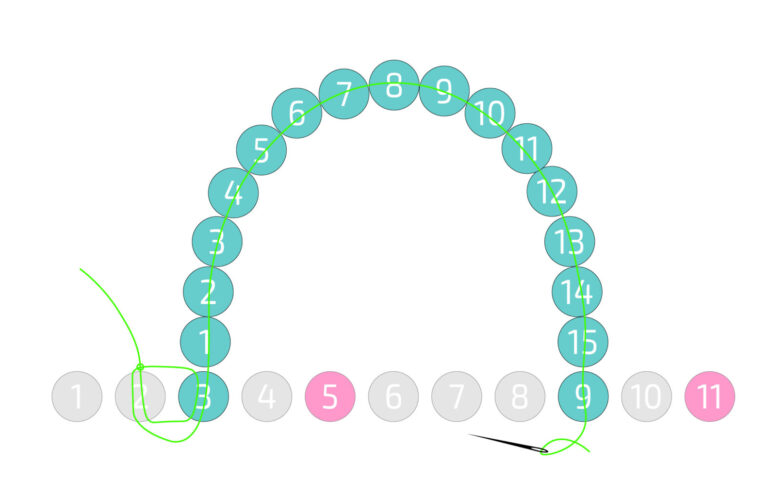
Step 6:
String 4 beads of that same color. Skip one bead and thread through the next bead (7).
Step 7:
Now move on to the next color (the same as bead 5). String 4 beads of this new color and thread down through bead 5.
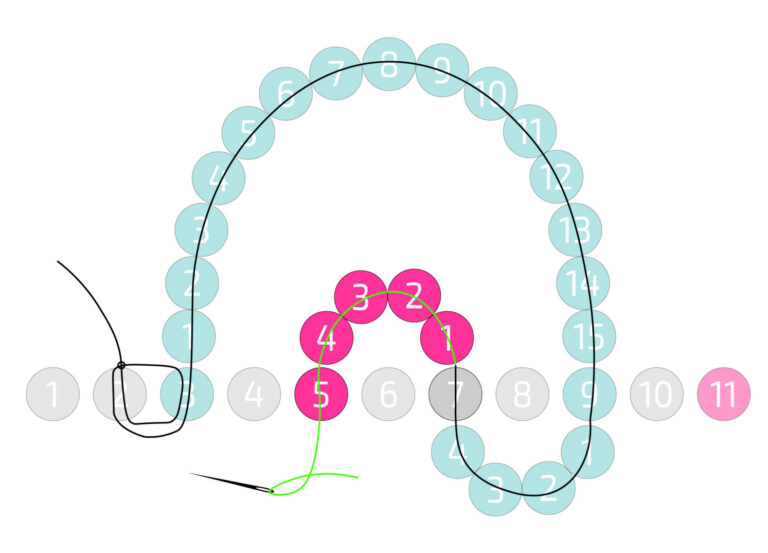
Step 8:
String 15 beads of this same color and thread up through bead 11.
Step 9:
Now that you’ve mastered the basics, continue the same way to finish the rest of the necklace.
Step 10:
Once the final half-wave is complete, go through the next (transparent) bead and back through the last colored bead you finished with. Tie a few knots and add a bit of glue or nail polish at the beginning and end of your work for extra security.
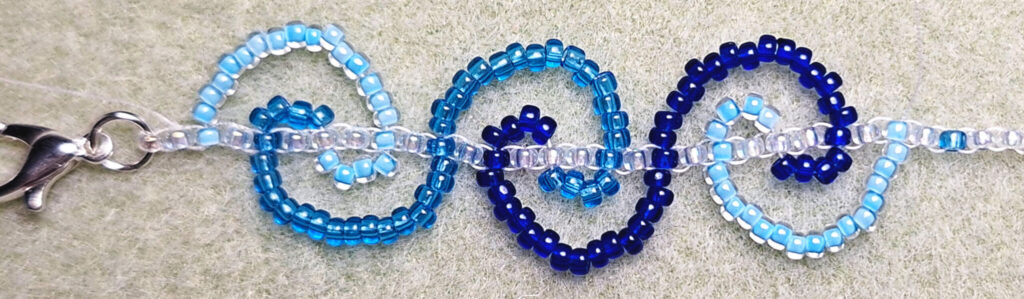
Your necklace is finished!
Tip: Want a complete set? You can easily make a matching bracelet using the same technique!