
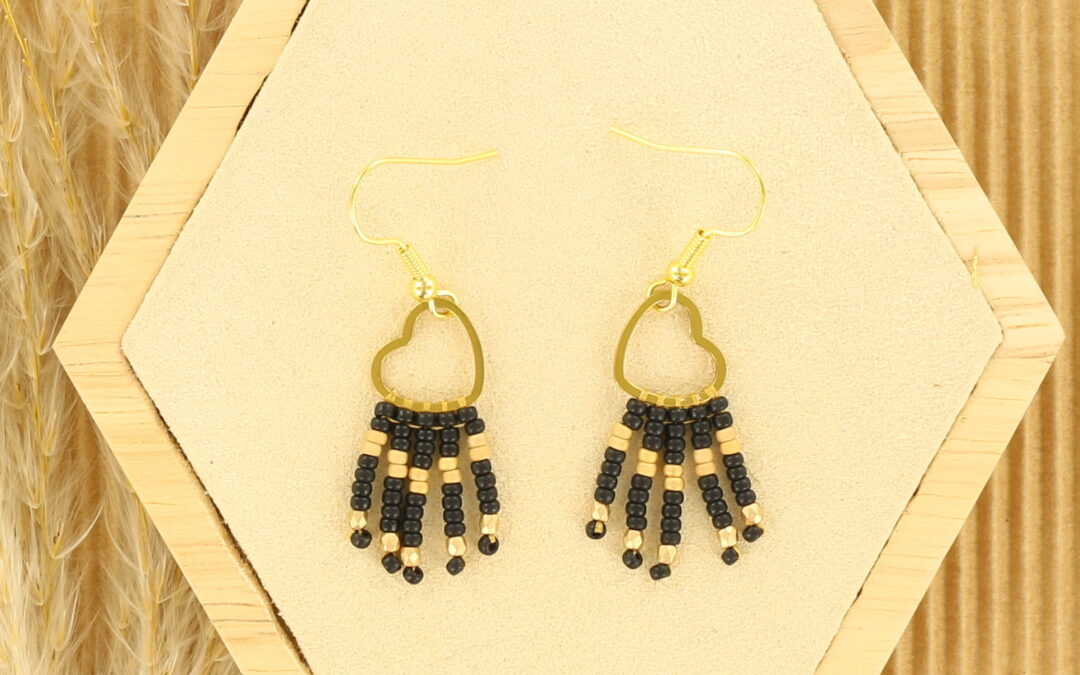
Do you also love those fringe earrings, but find them a bit too big? Then these DIY heart fringe earrings might be perfect for you! Not only are they fun to make, but you can also wear them for any occasion!
Needed supplies:
- Miyuki seed beads 11-401SF (opaque semi frosted black)
- Miyuki seed beads 11-193F (matte 24kt gold light plated)
- Czech facet 2 mm pale bronze gold
- Earhooks
- Heart rings 11 mm color gold
- Beading thread
- Needle
- Scissors
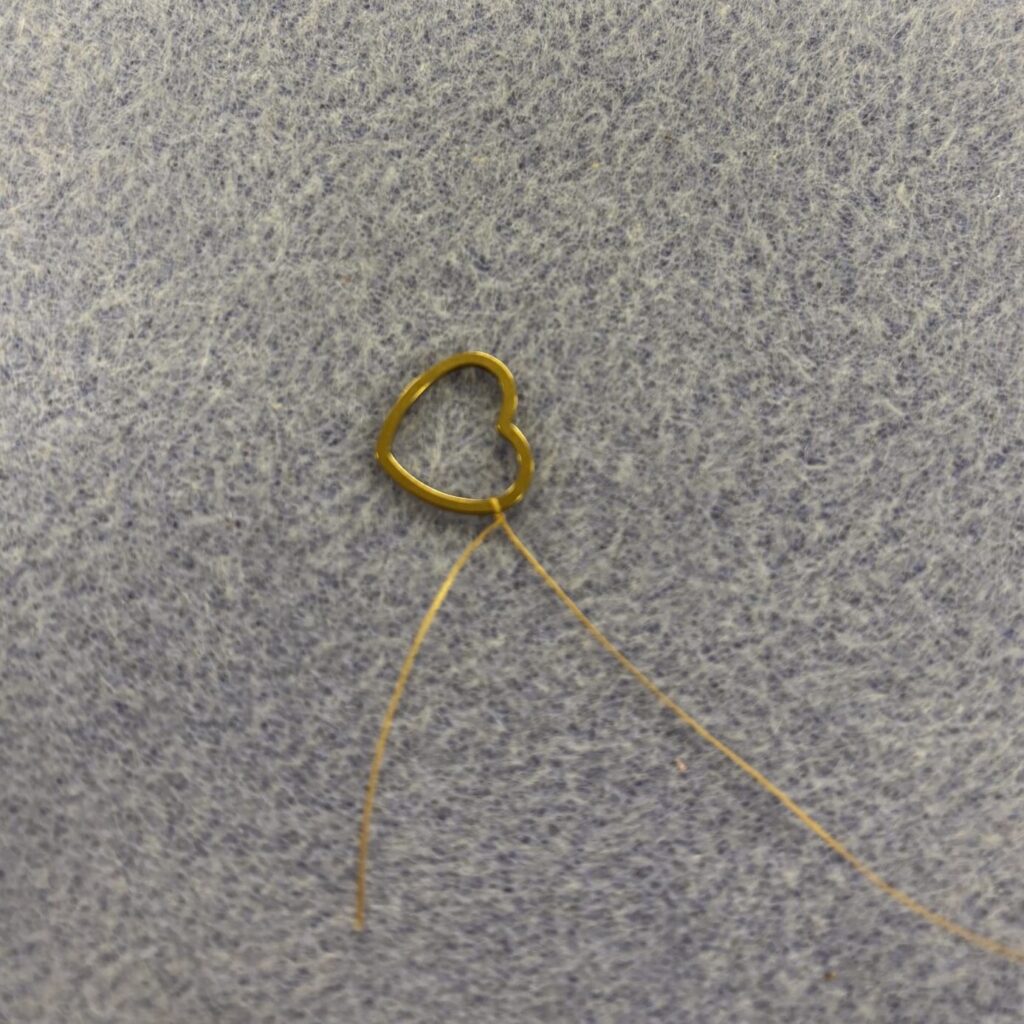
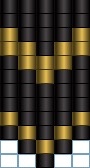
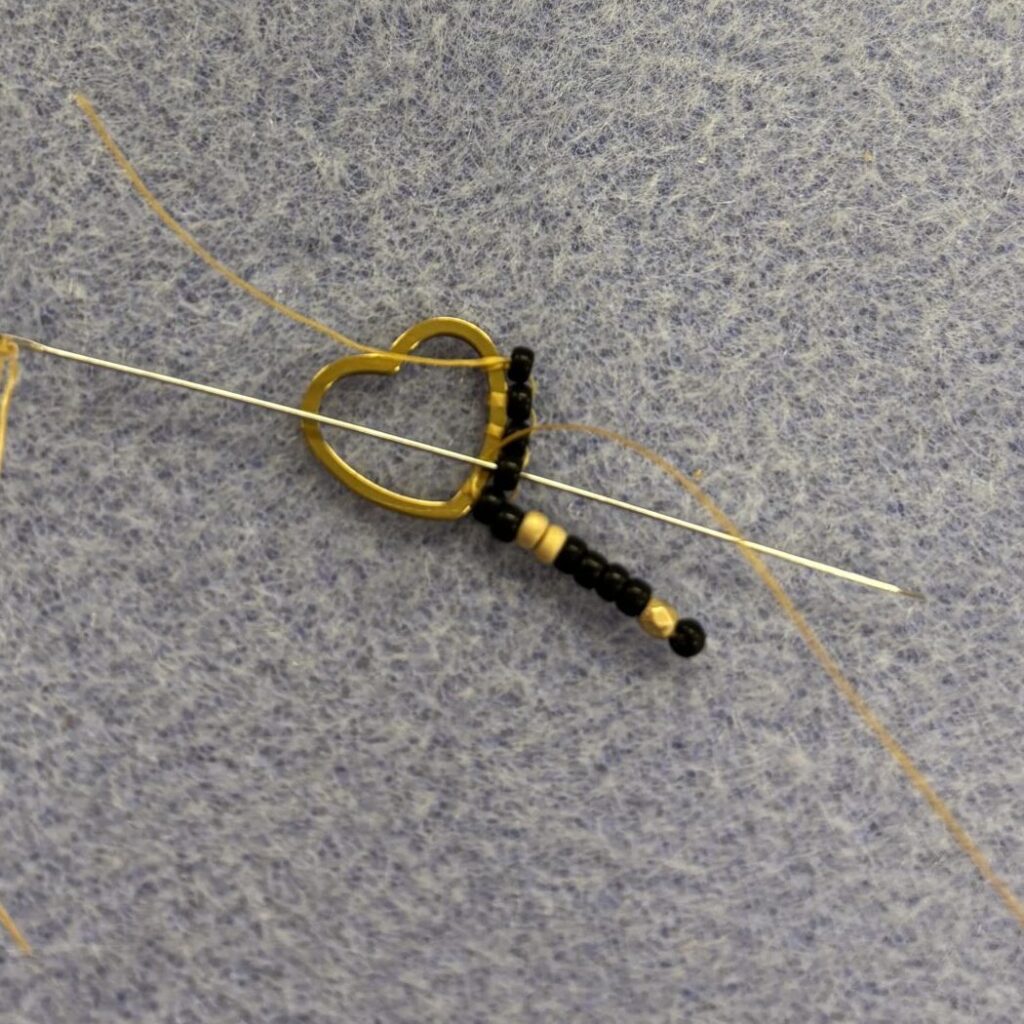
To create a sturdy base for the fringe, begin with a row of five beads secured using the brick stitch technique. The following photos show how to apply the brick stitch technique to the heart. Begin with a secure double knot to secure the (approximately 70cm) wire and string the beads as follows:
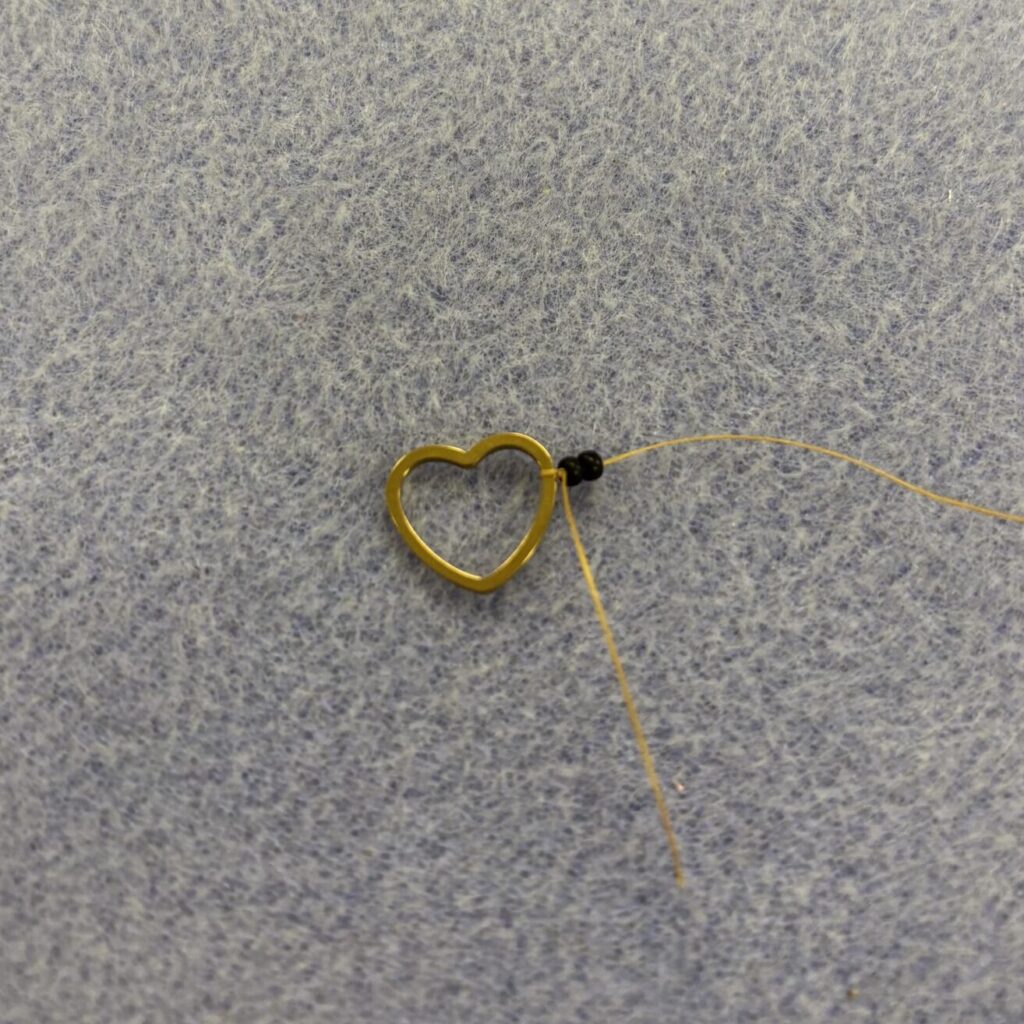
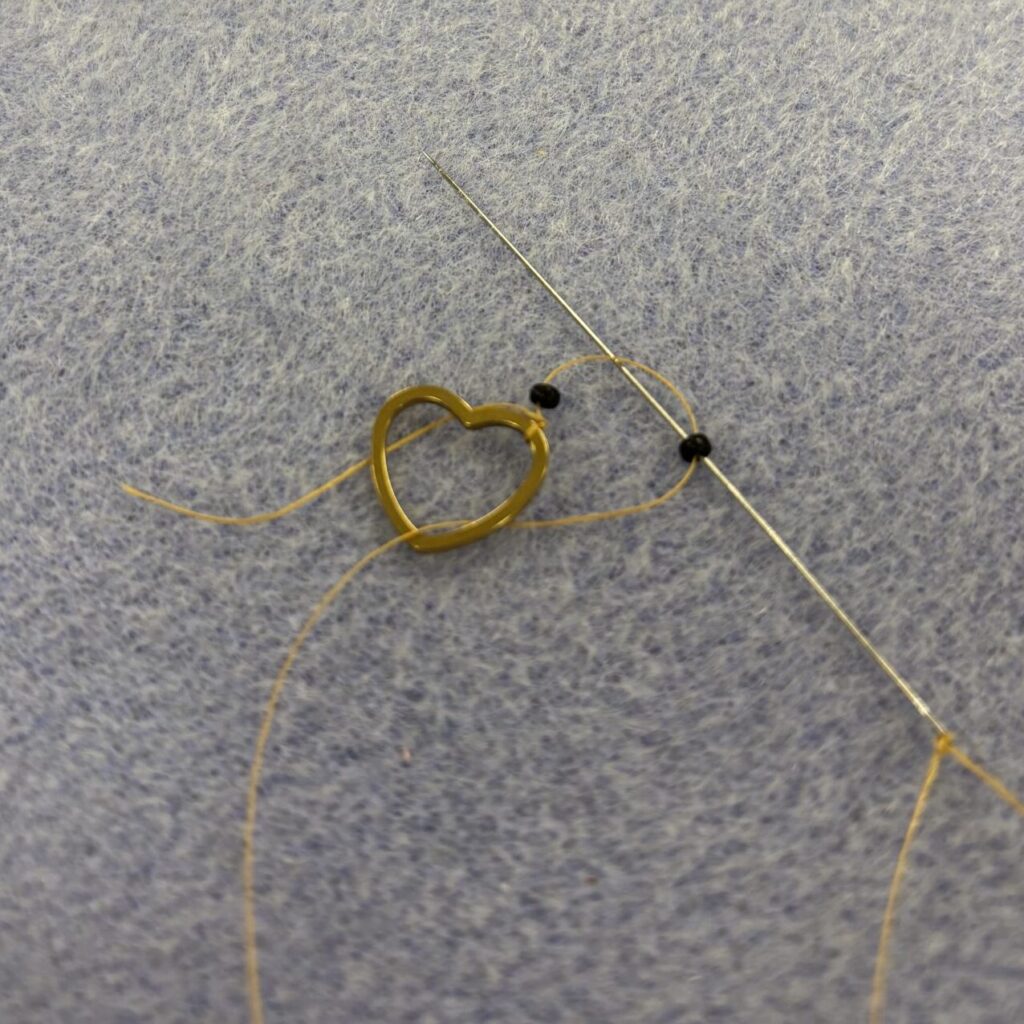
Thread two beads, then pass the needle under the ring and thread it back up through the bottom of the bead. Pull the thread taut so the two beads sit neatly next to each other.
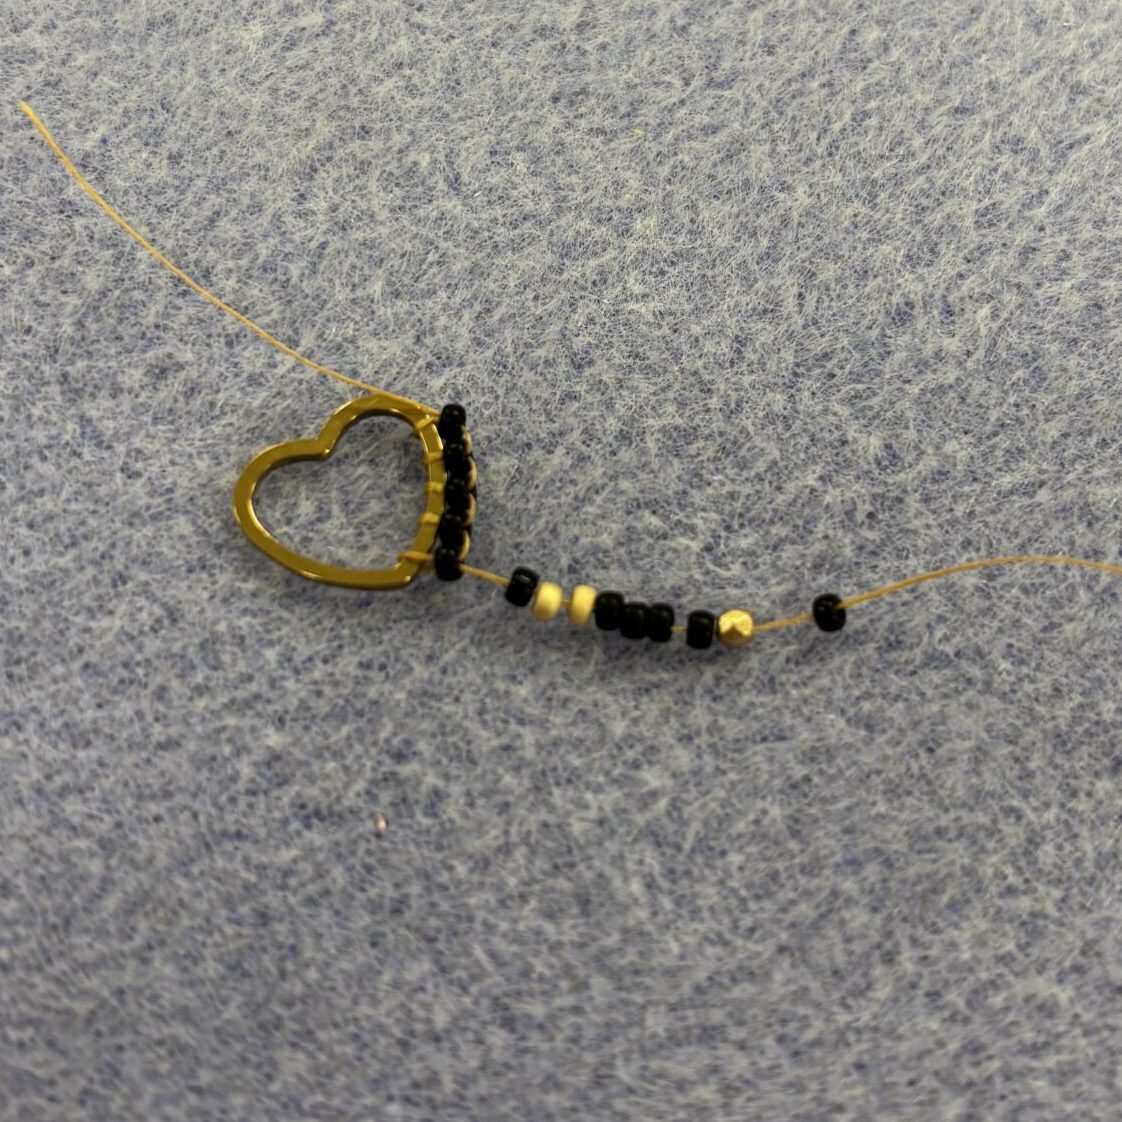
Once you have five beads in a row, you can begin the fringe pattern. I always start with the outer edges so I can string the entire earring with one strand.
This is the stringing pattern for the fringe. Note that the first row of beads is the brick stitch row; you don’t need to string it again. So, you string 1 black bead, 2 gold beads, 4 black beads, 1 gold bead, and 1 black bead again.
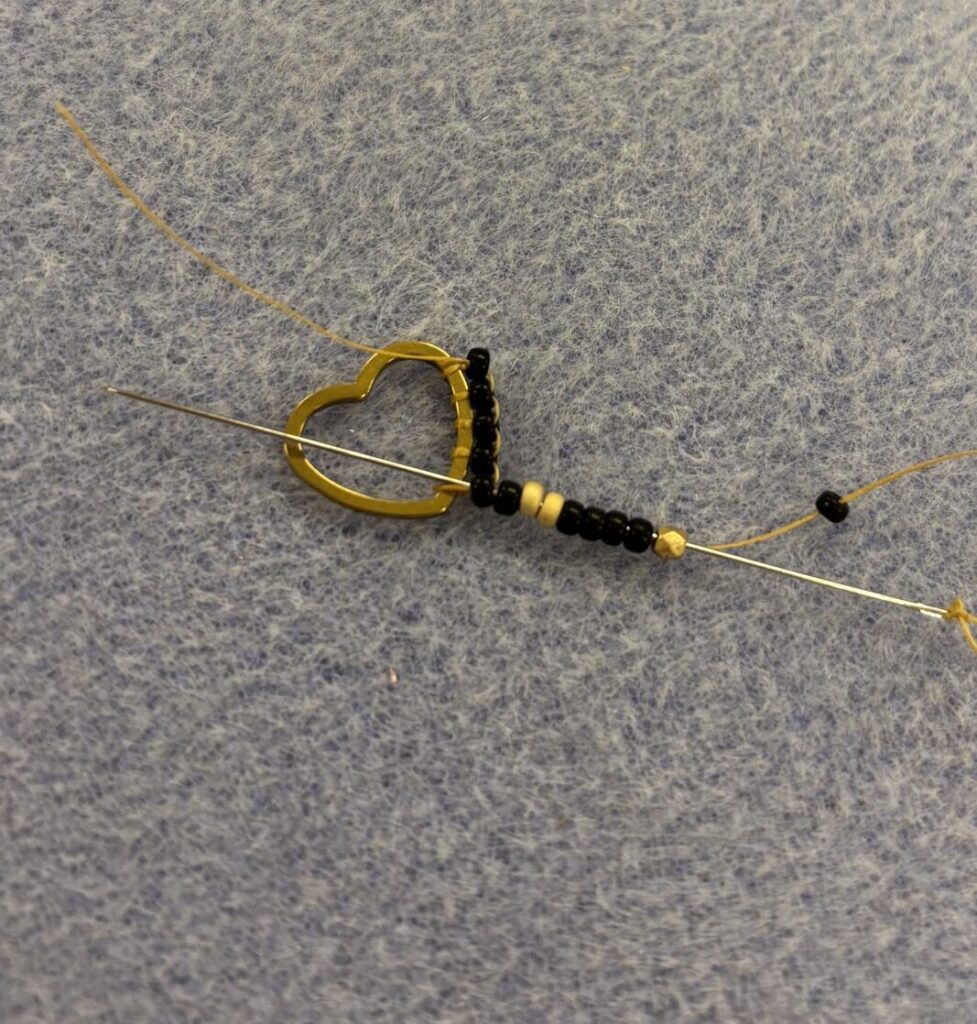
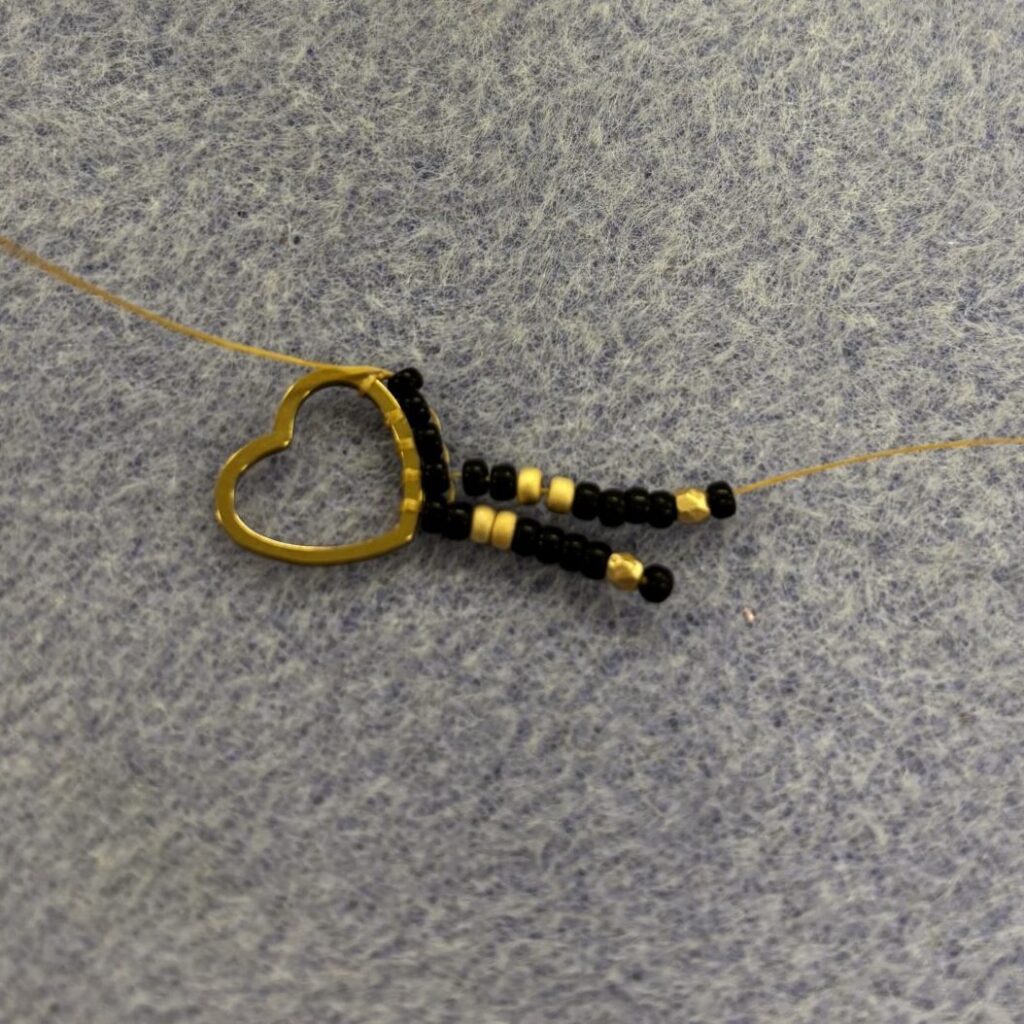
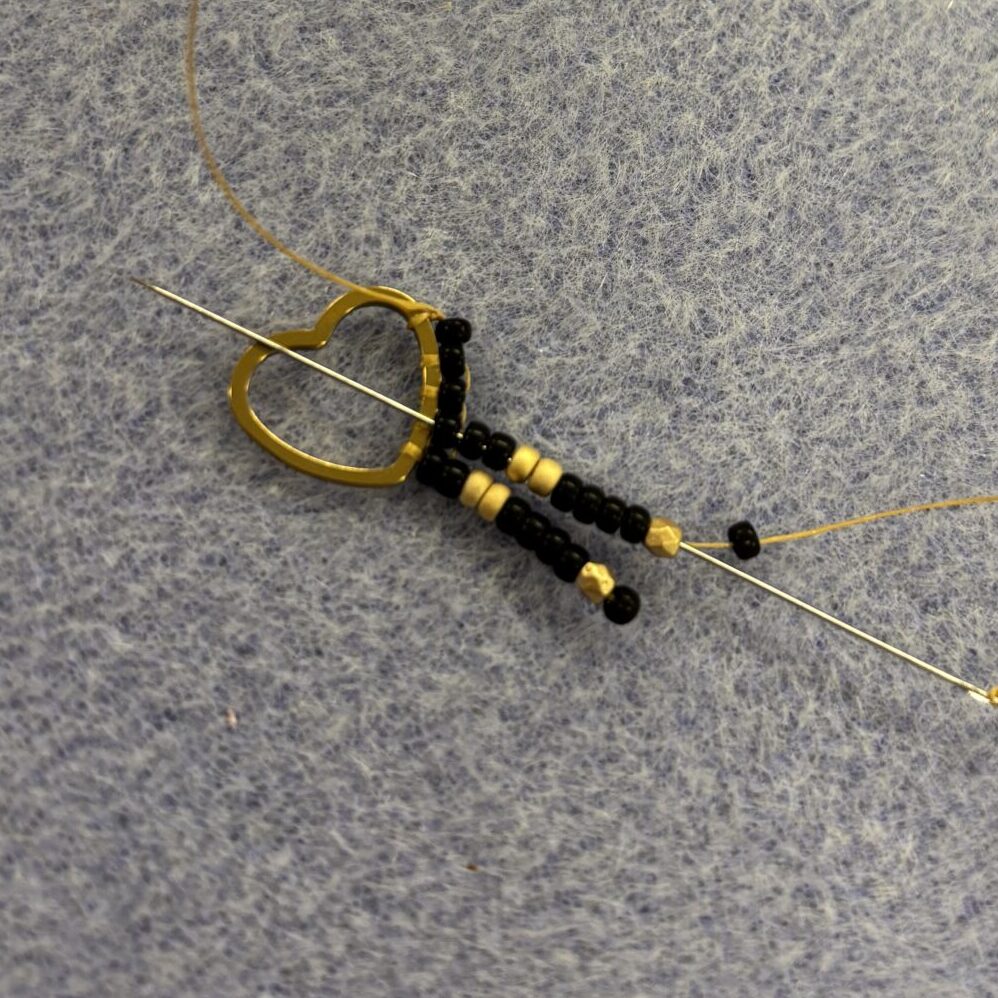
String all the beads of the first fringe as indicated in the pattern. To string back up through the beads, skip the first bead. This way, your fringe will hang nicely.
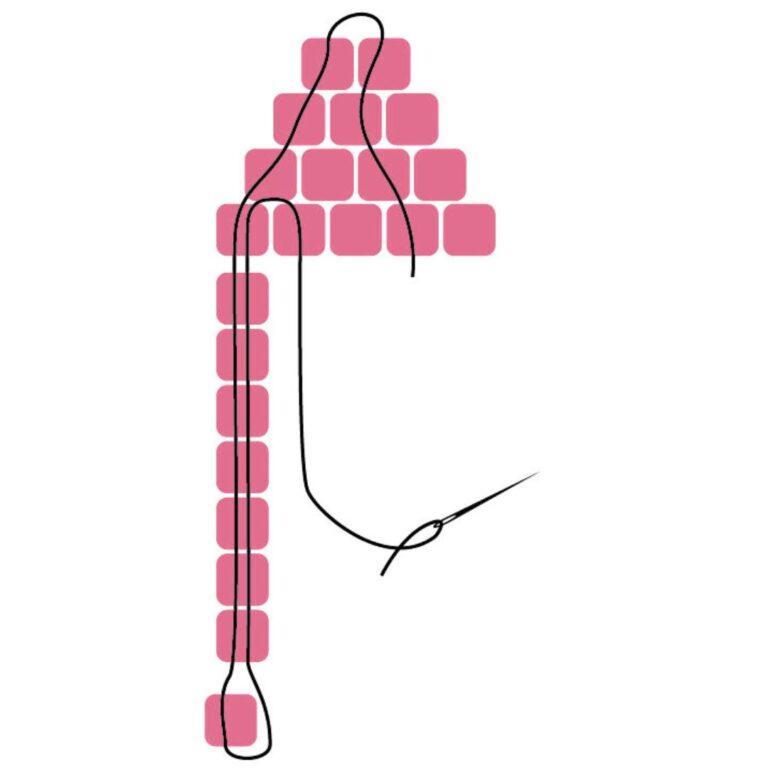
To continue with your second fringe, first thread it through the second brick stitch bead. You don’t need to tie it off; you can simply keep threading. Now thread the pattern of the second fringe and complete the rest of the fringe pattern in this way until the earring is finished.
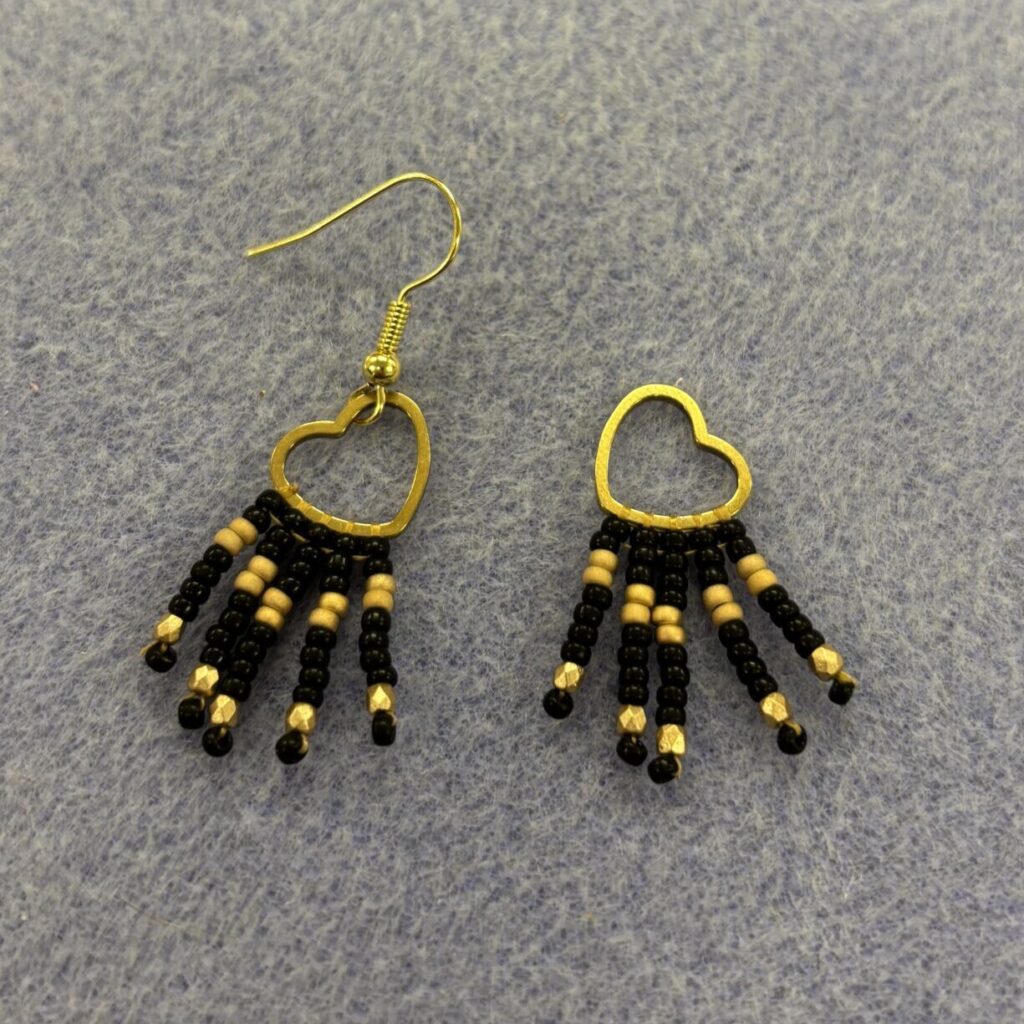
Your pattern is now finished, and it’s time to attach the stud. Carefully open the jump ring on the stud and hang the earring from it. Now carefully bend the jump ring back.
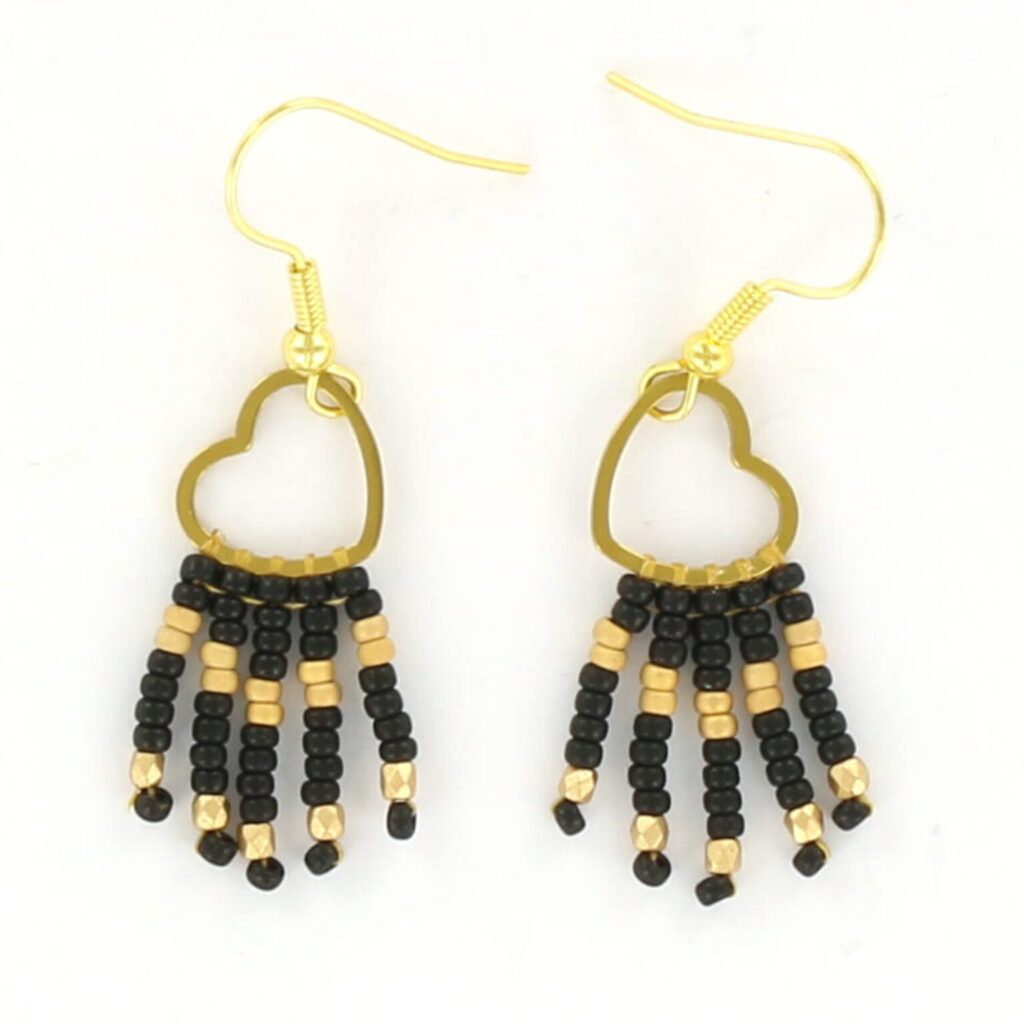
This is the end result of super cute heart fringe earrings!