

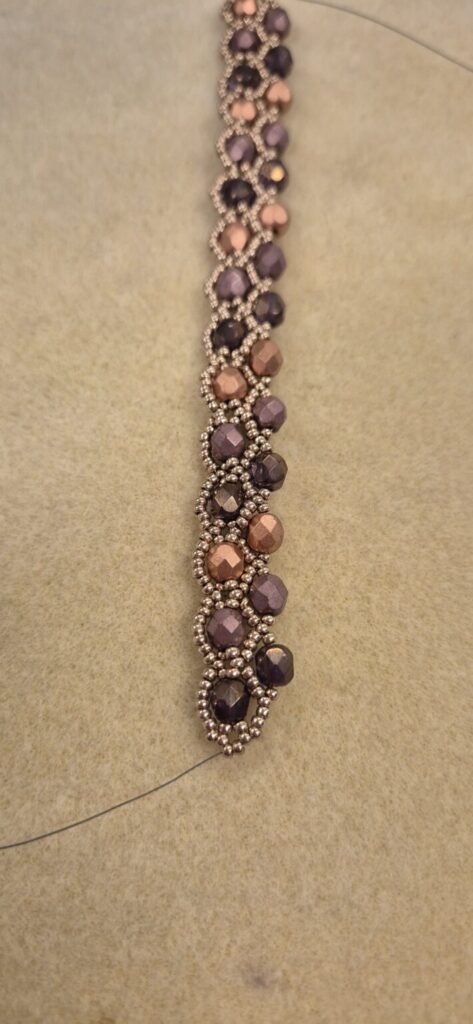
It’s always fun to create something special that looks complicated, but is surprisingly easy to make thanks to the technique. For example, I made this bracelet using only faceted beads, Miyuki seed beads, FireLine, and a clasp.
I chose three different faceted colors, but you can, of course, choose other colors or string a different pattern.

Needed supplies:
- Facet beads 6mm (43 in total)
- Miyuki seed beads 11/0
- FIreline 0.15 (You can also make this bracelet with beading thread, but it won’t be as sturdy as with Fireline wire)
- Lobster clasp with extension chain
- Open rings
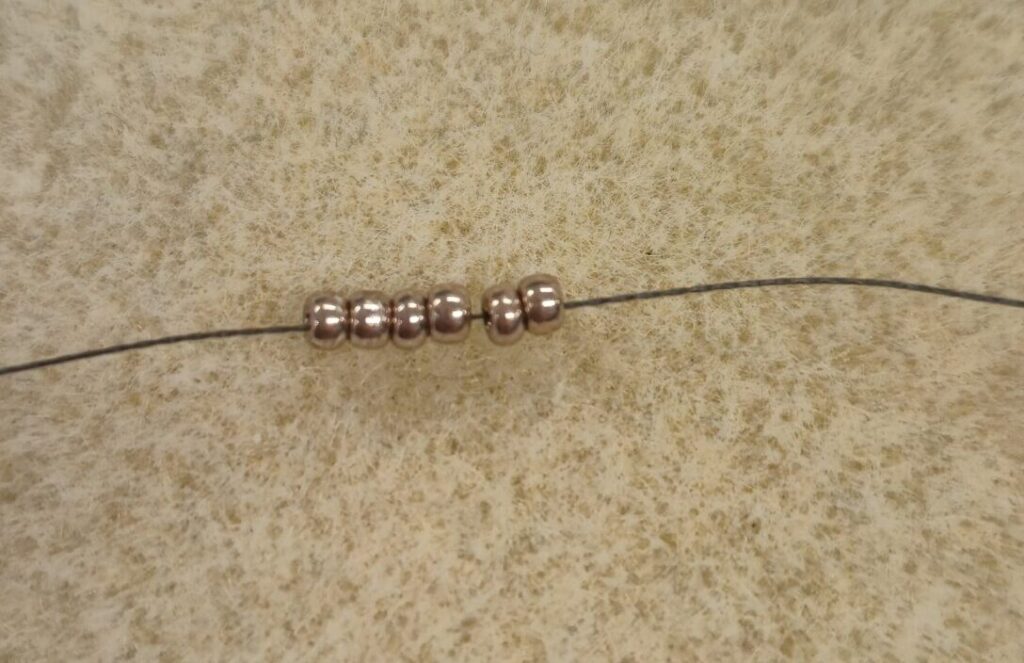
Step1)
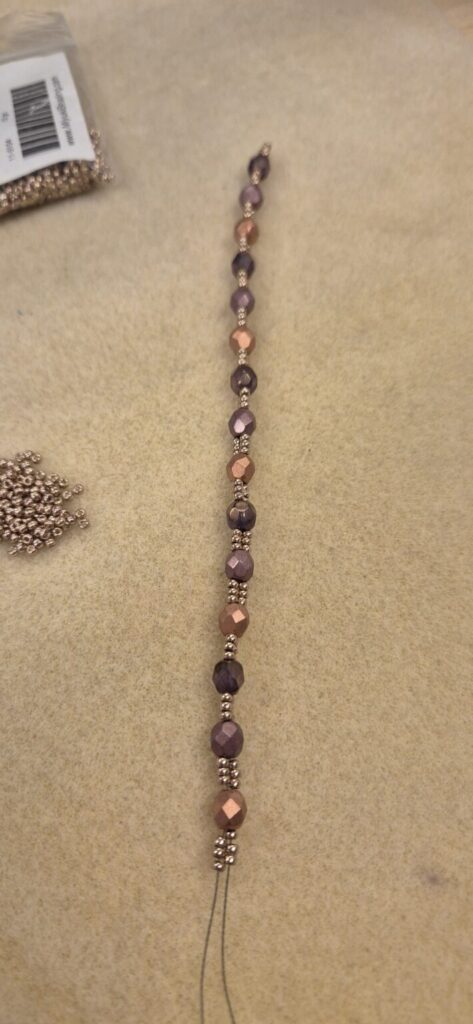
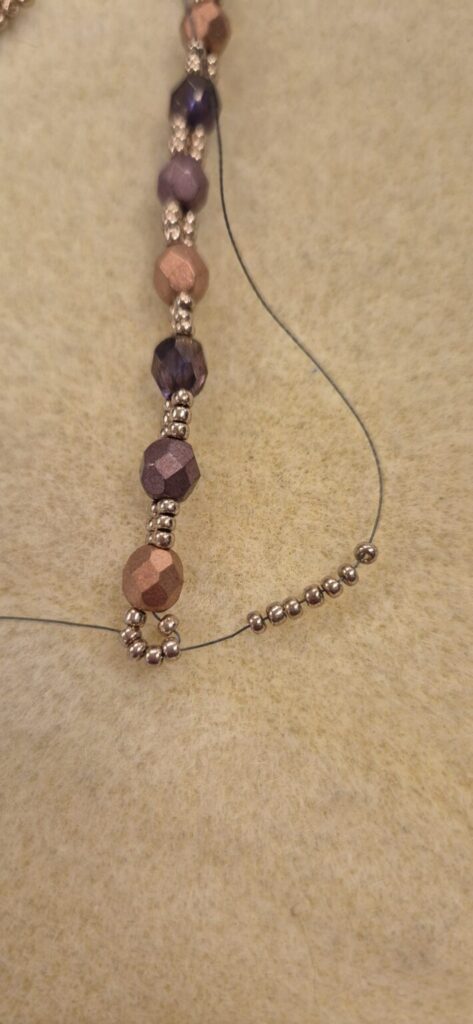
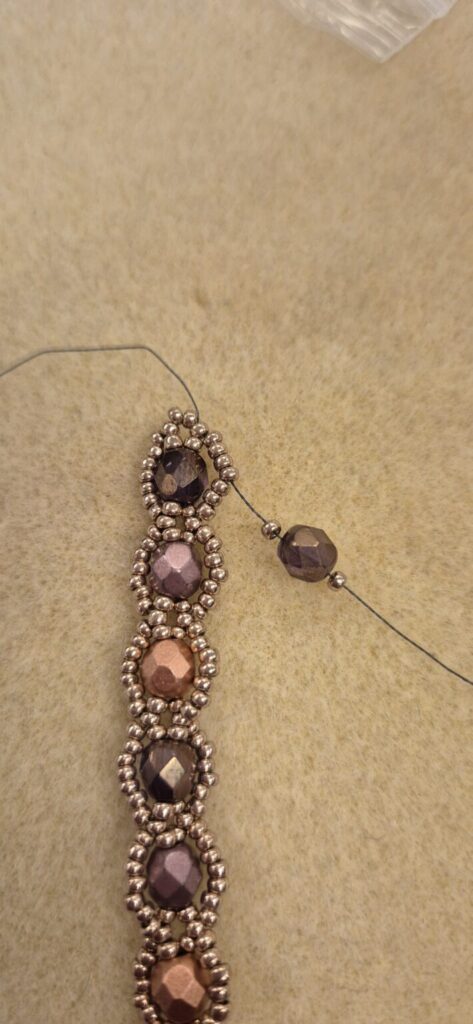
Cut a length of wire about 120 cm long. Then string six beads onto the wire and slide them through to the center. Start in the middle of the bracelet and then continue stringing with the left wire to the right, and the right wire to the left. Make sure there are three beads on each side: three on the left and three on the right.
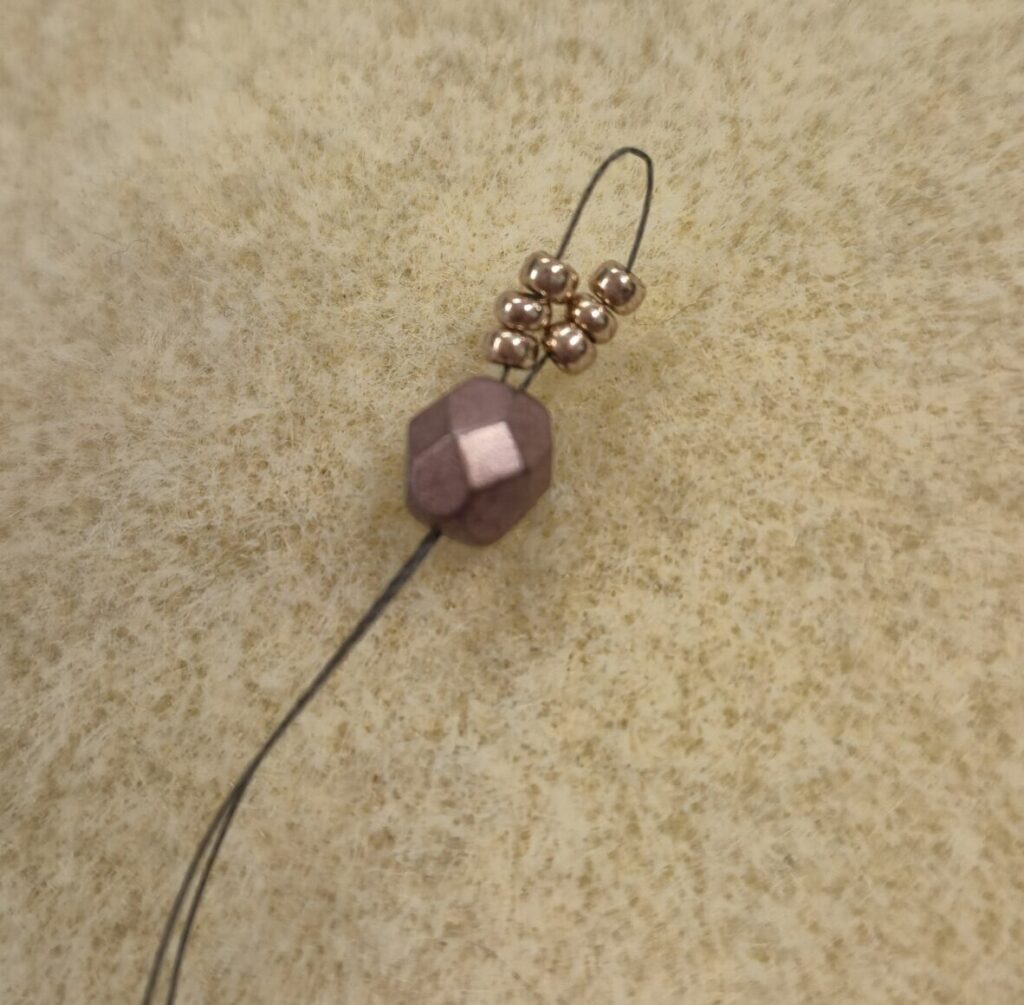
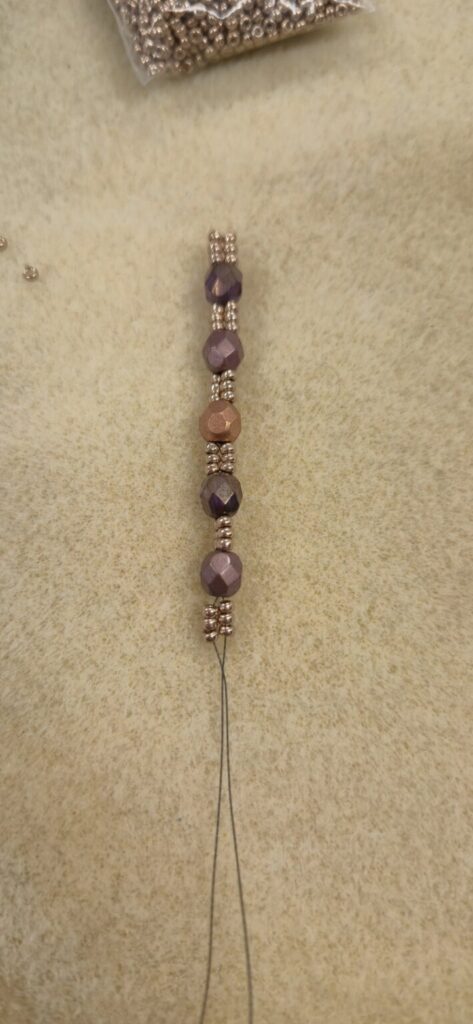
Step 2)
First, string one faceted bead onto both wires simultaneously. Then, string three seed beads onto both wires simultaneously. Repeat this pattern until you have strung a total of fifteen faceted beads, ending with three seed beads on each wire.
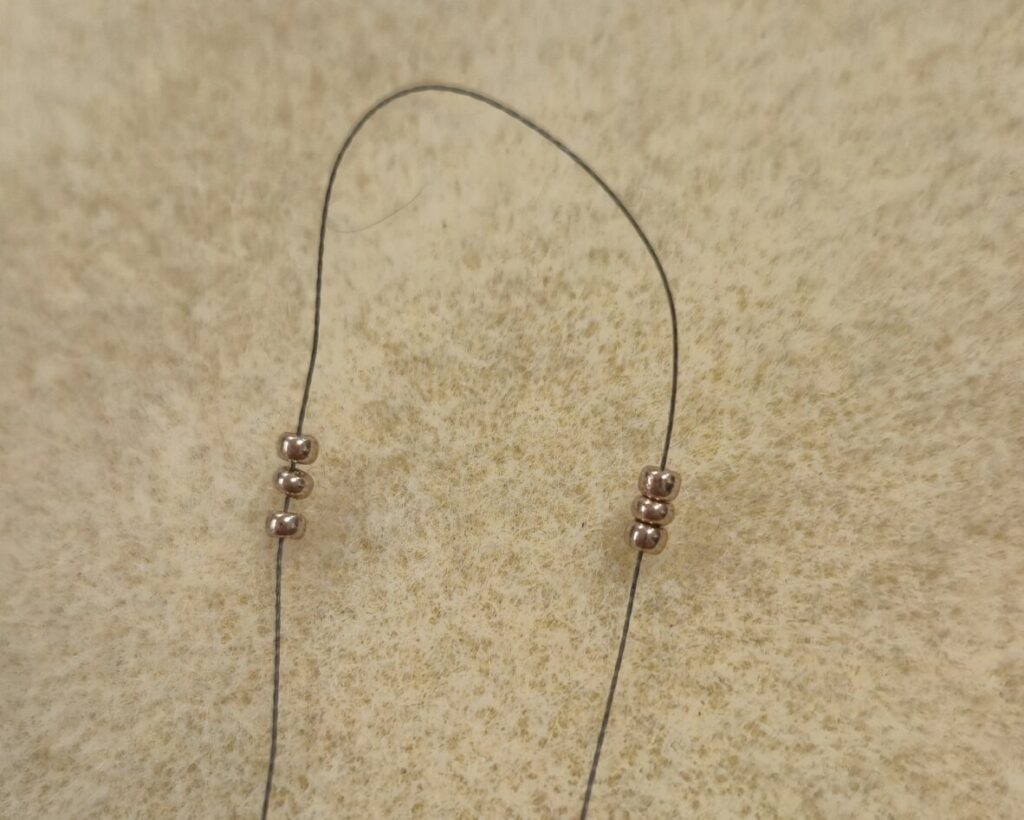
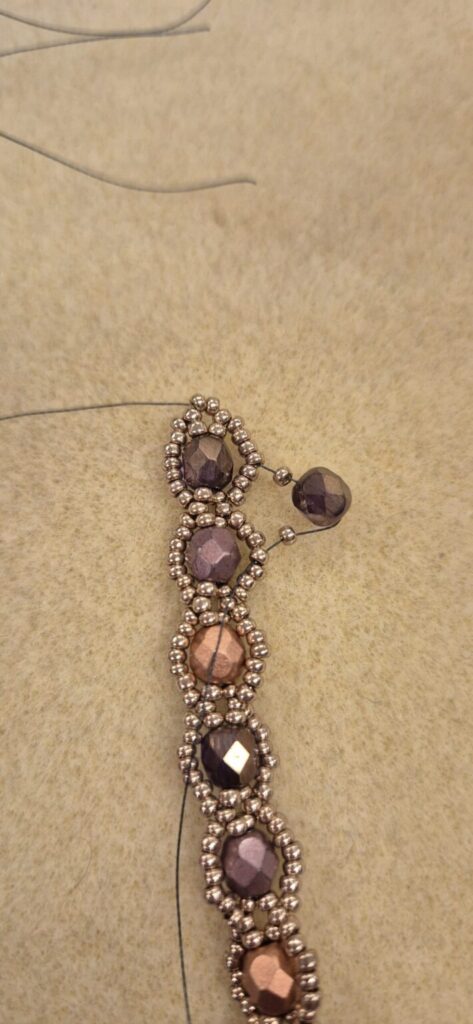
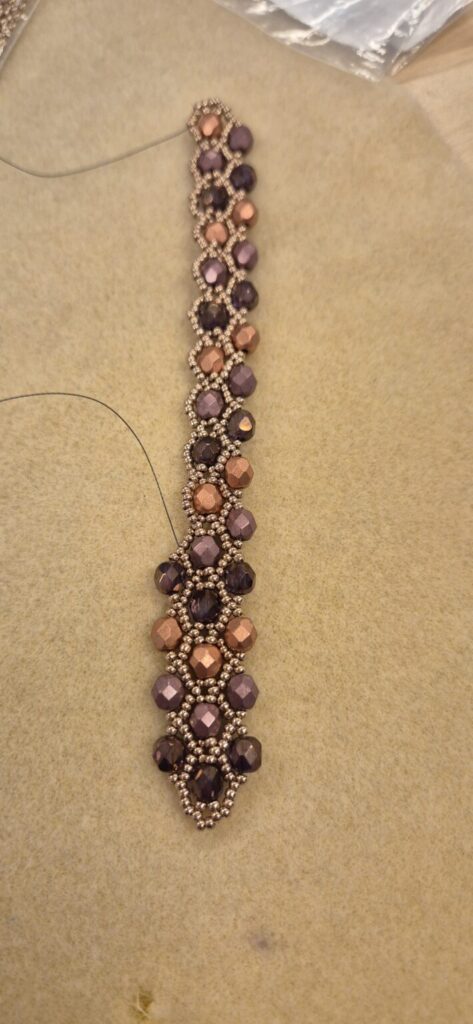
Step 3)
Thread the right wire through the first two beads on the left and the left wire through the first two beads on the right.
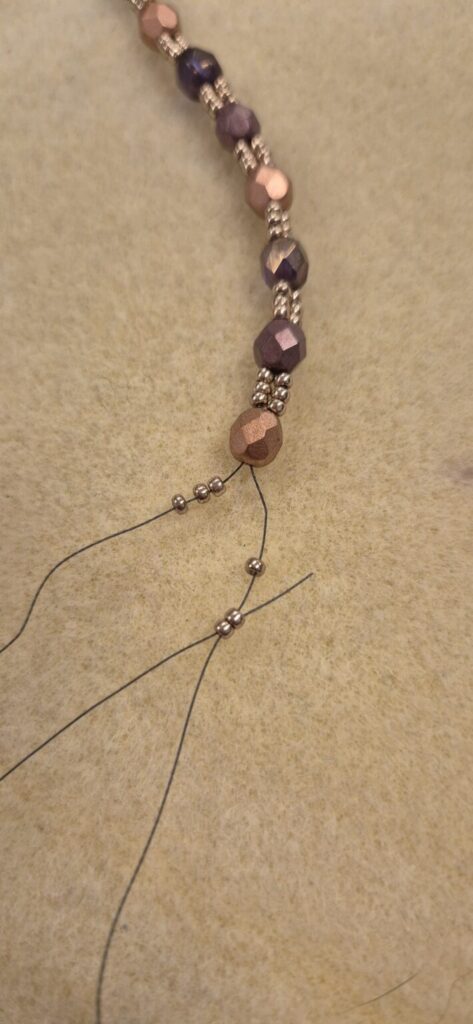
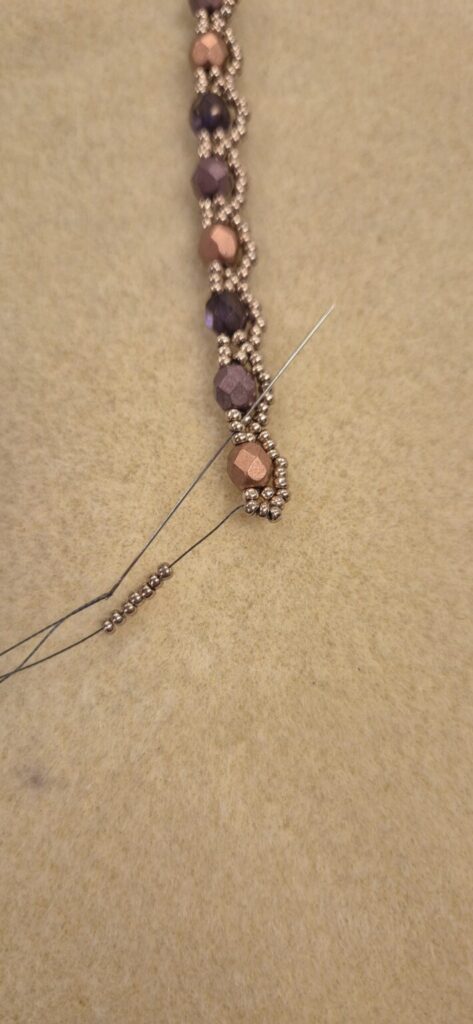
Step 4)
Whether you continue stringing on the left or right side of the bracelet doesn’t really matter; we’ll follow the same pattern on both sides. Start by stringing six seed beads and then insert your needle through the middle seed bead between the first two faceted beads. Then, string another six seed beads onto your needle and pass through the next middle seed bead between the second and third faceted beads. Repeat this until you can string no more.
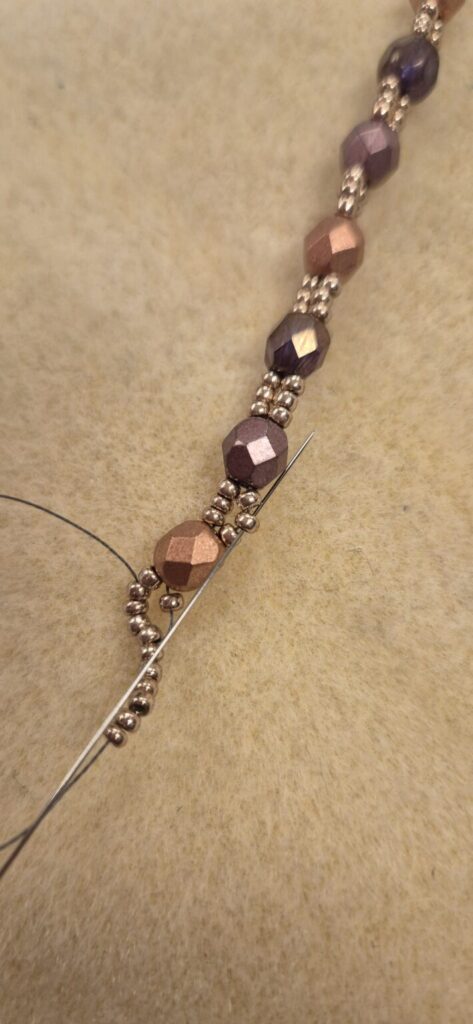


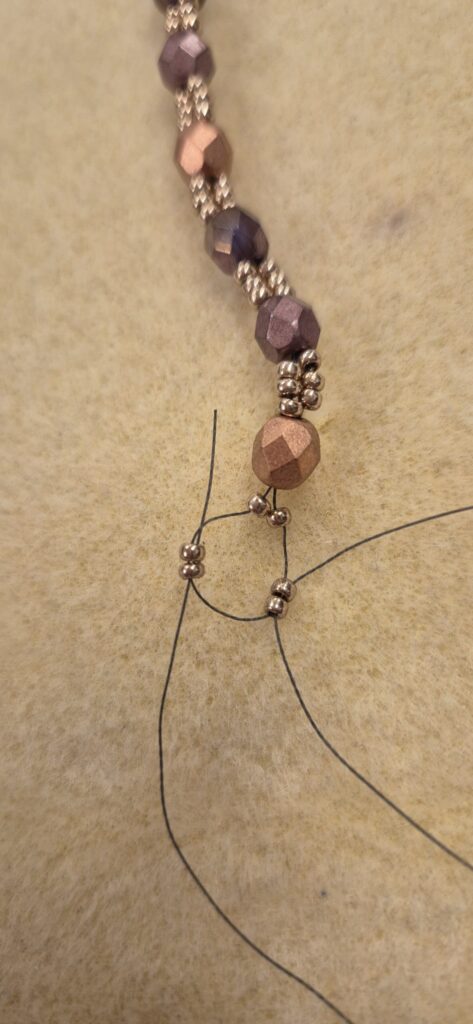
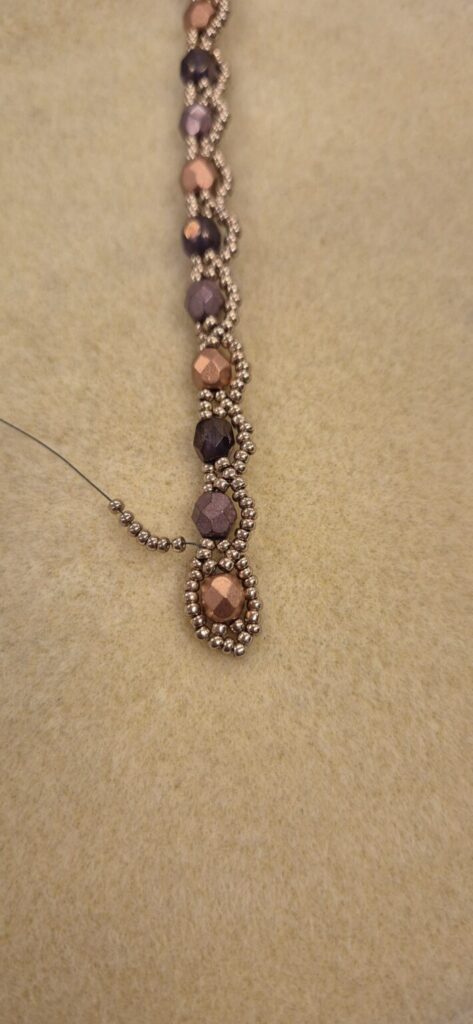
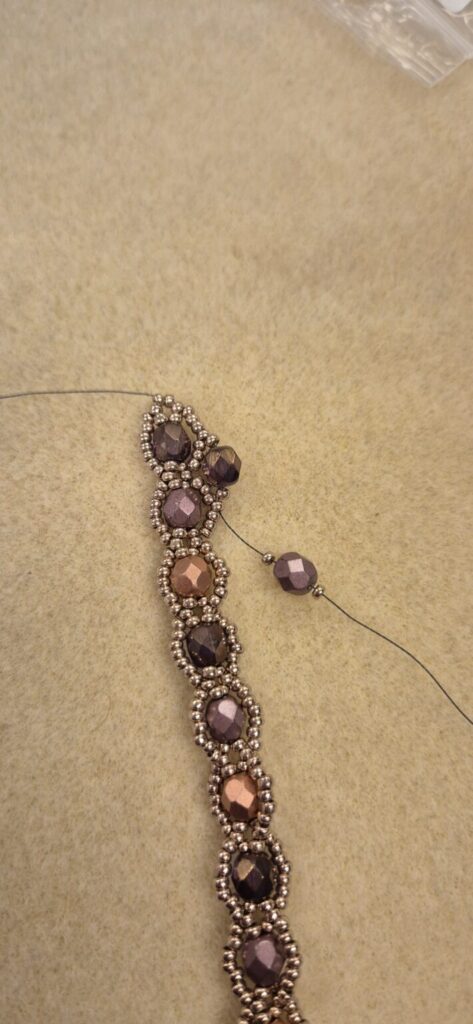
Step 5)
Now take the other thread, as we’re continuing with the other side first. String six seed beads and place them between the first and second facets through the center seed bead, just as you did on the other side. Continue this pattern until you can’t go any further.
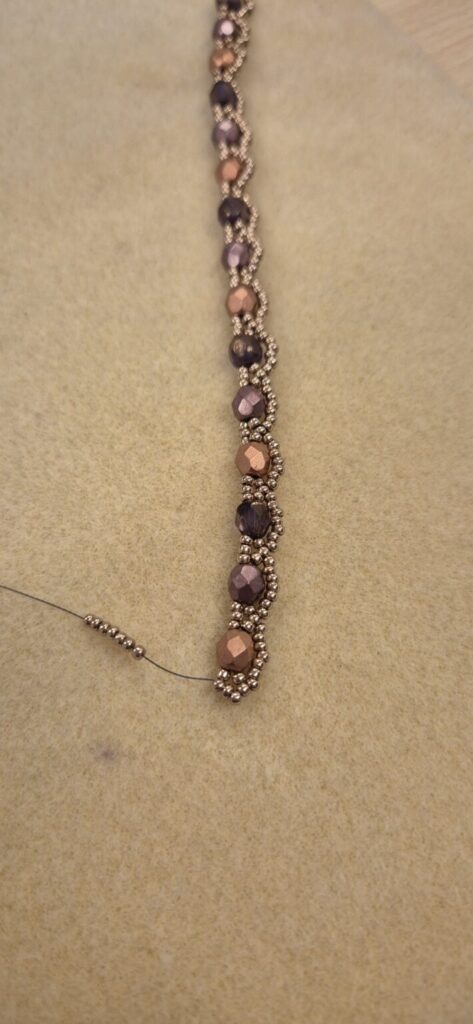
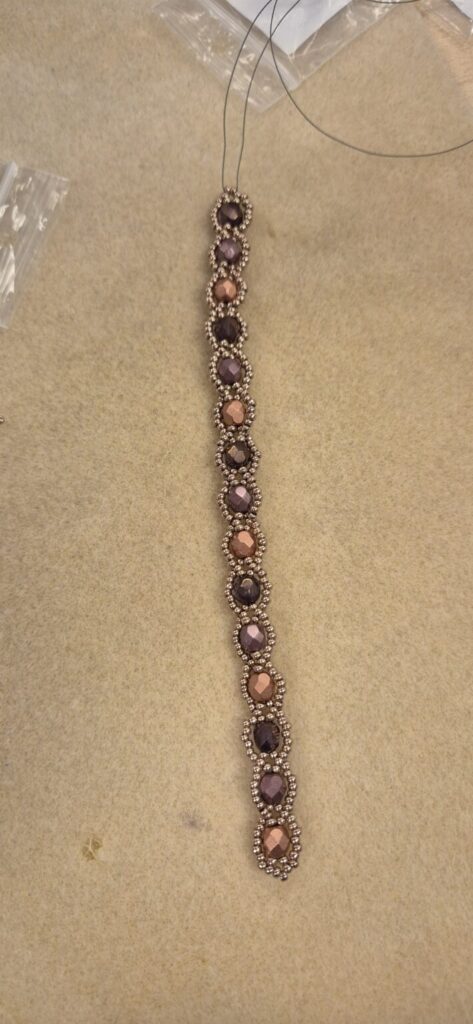
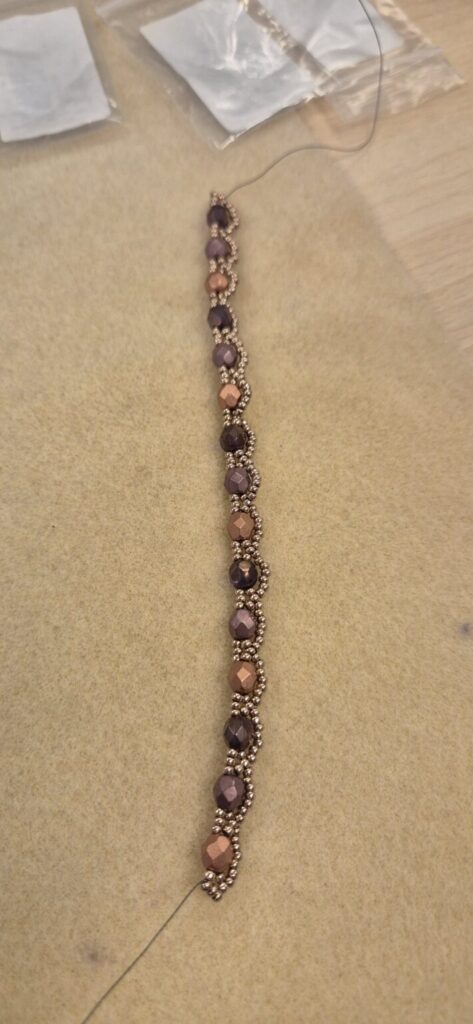
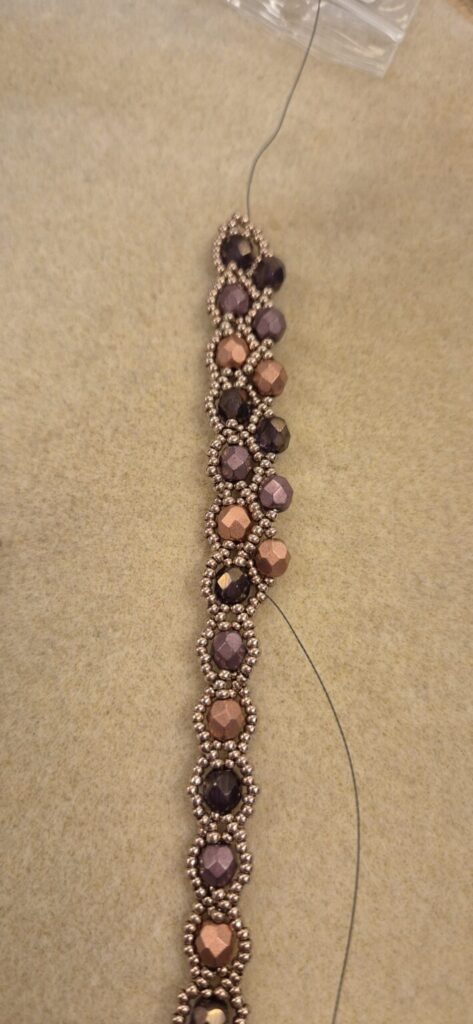
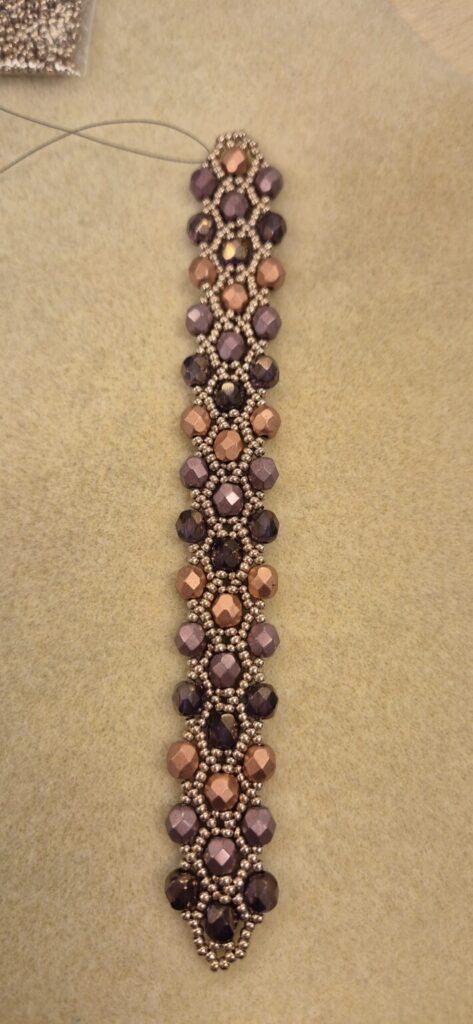
Step 6)
You can now choose a thread again, because we’re going to string the same thread on both sides again. Make sure you continue stringing the left thread on the right side and the right thread on the left side. Take the 6 beads you just strung and thread them through the first 3 beads, so that you end up in the middle of the row. Then string a seed bead, a faceted bead, and another seed bead onto your hook. Then skip 6 seed beads, so that you end up in the middle of the next 6 seed beads again. Repeat this pattern until you can string no more.
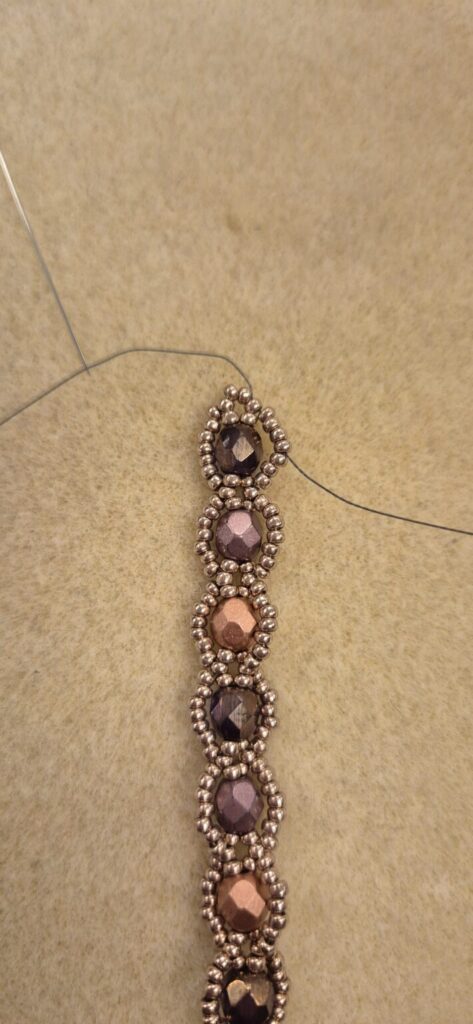
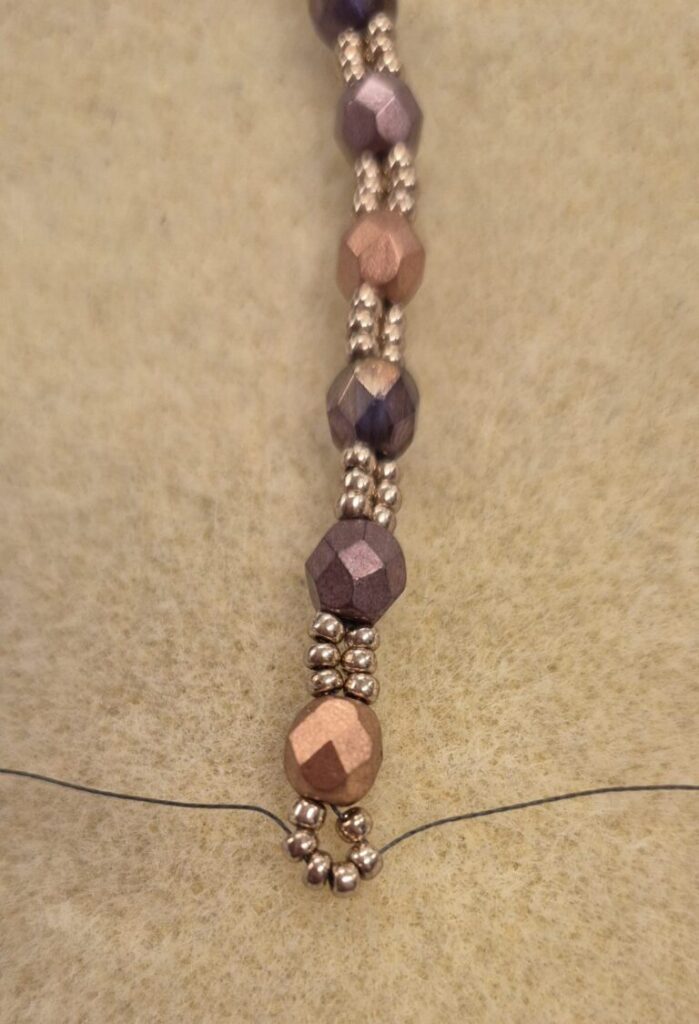
Step 7)
We’ll repeat this on the other side with the other thread. Your bracelet is now finished, so you can tie the threads securely between the beads. If necessary, you can backthread a bit for extra security at the knot.
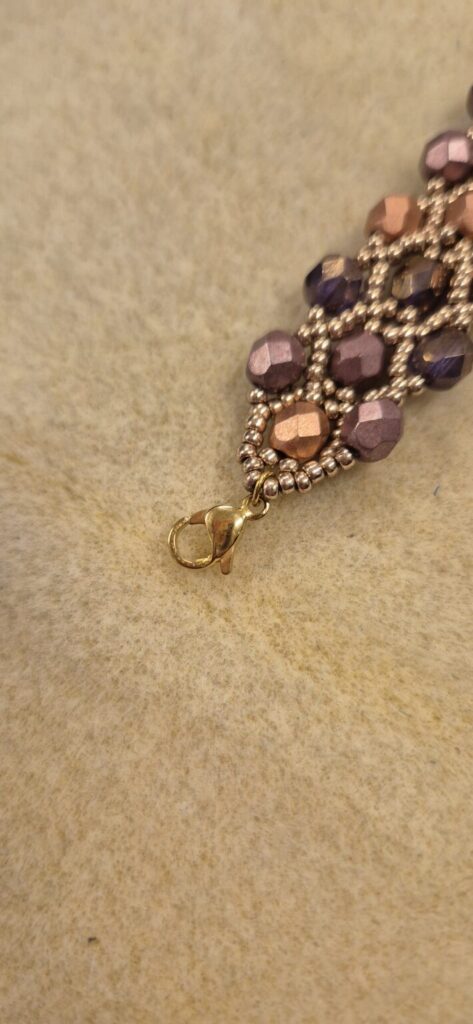
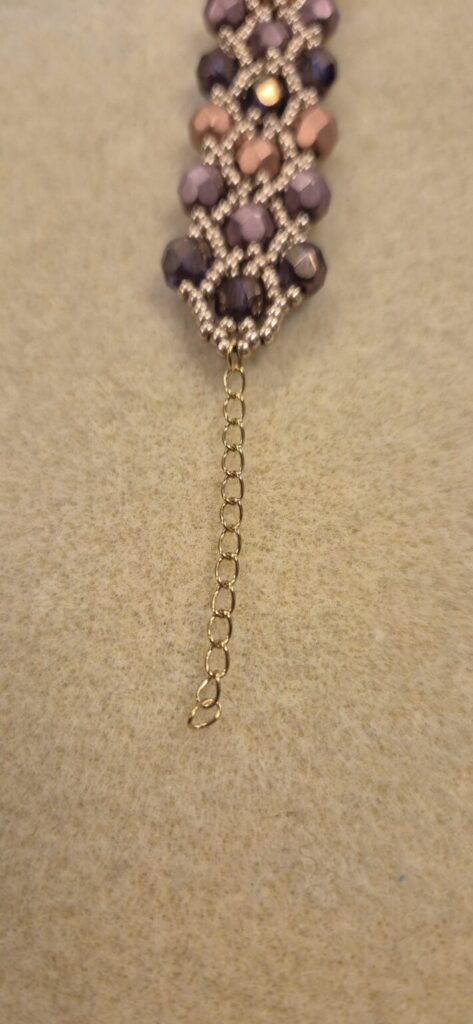
Step 8)
Your bracelet will also need a clasp, of course. I chose a lobster clasp with an extension chain. You can attach the lobster clasp and the extension chain with an open jump ring. Squeeze the jump ring firmly to prevent the wire from slipping through. If you want more security, choose a split ring; these resemble the ring on your key ring and should be attached to the wire, just like your keys.
Now your bracelet is all finished!
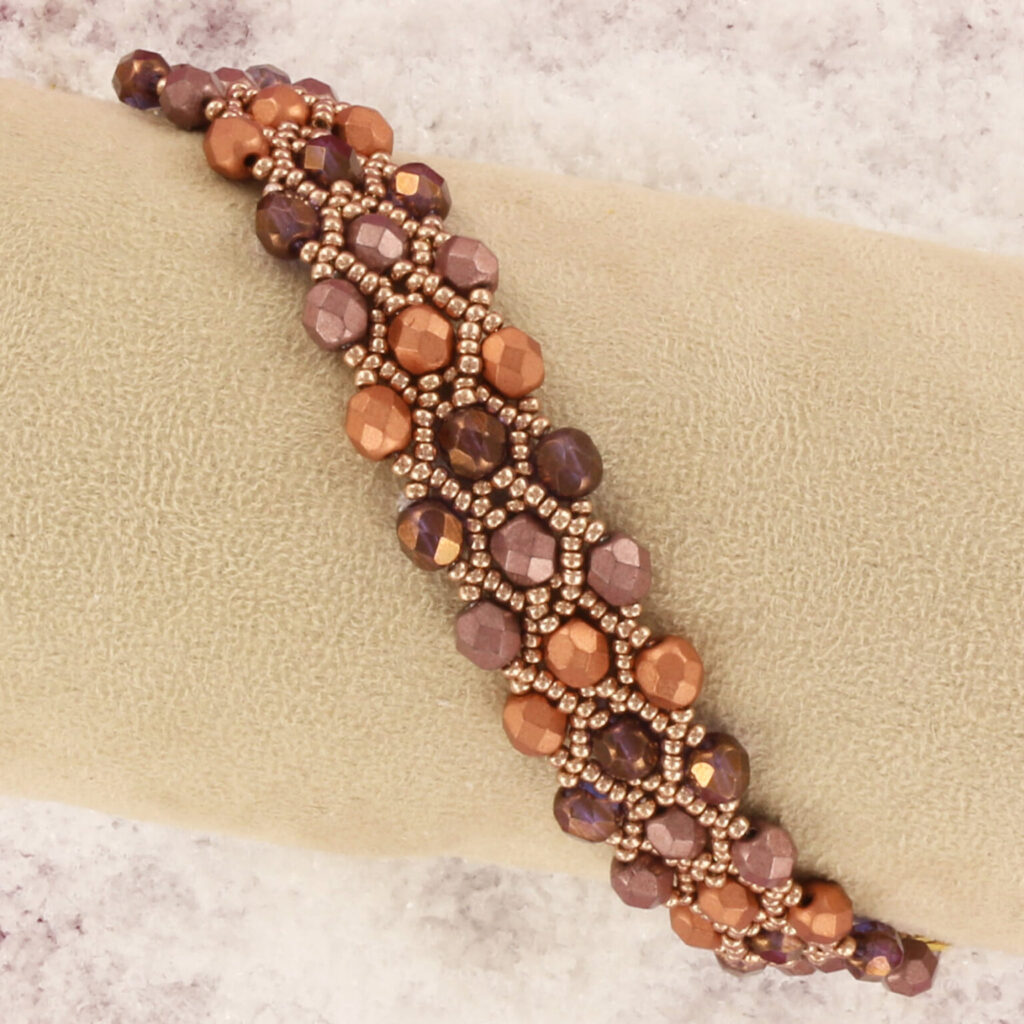
Very beautiful