
Making fruit bracelets is easy and fun! You only need a few materials, and once you’ve mastered the stringing technique, they’re quick and easy. On this page we’ll explain step-by-step how to easily string a fruit, bee, and flower bracelet.
Supplies:
Miyuki elastic cord
Happy colors Miyuki seed beads size 11
Miyuki seed beads size 8 (for the fruit in the fruitbracelet)
Miyuki needle (makes it a lot easier)
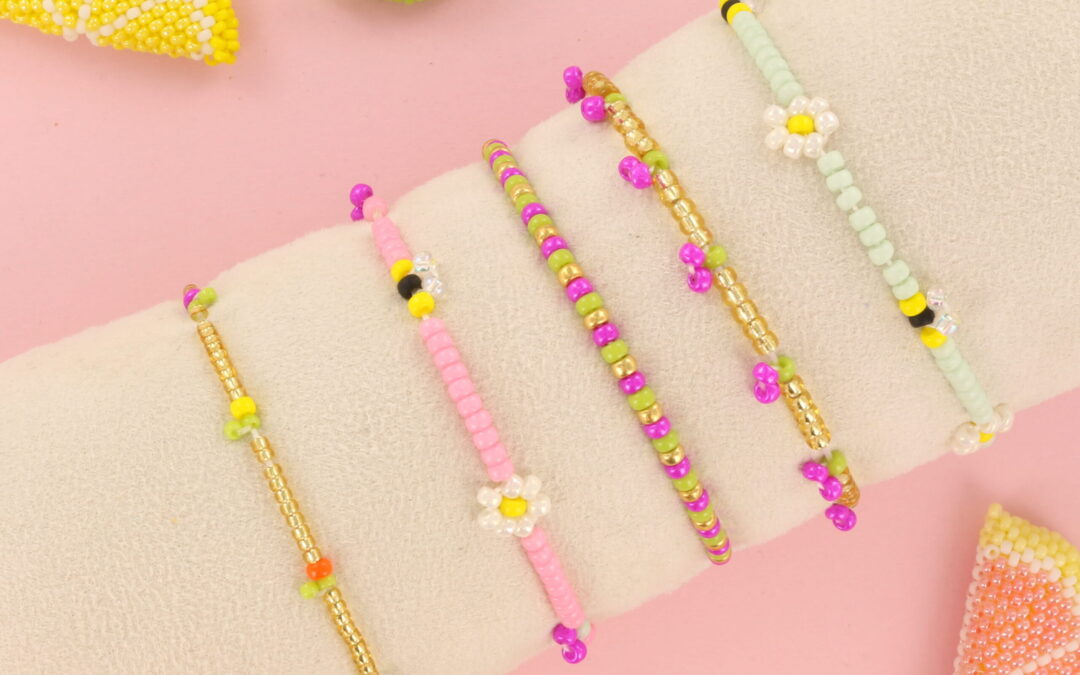
Stringing bee

String 8 beads; these will be the beads between the flower and the bee. Also string a yellow and a black bead.

Thread two clear beads onto your needle for the bee’s wings. Thread the needle in the opposite direction of the thread through the black bead. Pull the elastic tight, and the wings are done!

Now string one more yellow bead, and your bee is finished! String another 8 between the beads, and then we’re ready to string the flower.
Stringing flower

Thread 4 white beads and 1 yellow bead. Using the needle in opposite directions, thread through the first white bead and tighten the elastic. Then thread 3 white beads and thread them through the white bead as shown in the image on the right. Tighten the elastic again, and your flower is finished!

Herhaal deze stappen en je hebt een vrolijk bijen en bloemetjes armbandje!
Stringing fruitbracelet

Thread 10 gold beads, these will be the beads between the fruit. Now thread 2 green beads to create the fruit leaves.

Now thread it back through the first green bead in the opposite direction and pull the elastic tight. The leaves are now finished.

Now string a fun colored bead with a size 8/0 Miyuki bead. String another 10 gold beads. After the 10 gold beads, you can repeat the steps above to string your next fruit piece. Use lots of different colors; this makes the bracelet extra cheerful and fruity!
Stringing cherries

String 5 gold beads, followed immediately by 1 green bead and 2 pink beads.

Thread your needle back through only the green bead in the opposite direction. Make sure you pull the thread tight and push the beads firmly together to prevent gaps in your bracelet.
Repeat these steps until you reach the desired length of your bracelet. Then tie a secure double knot in the bracelet, preferably with an extra knot to ensure it’s secure. Cut the thread, and your adorable cherry bracelet is all done!
