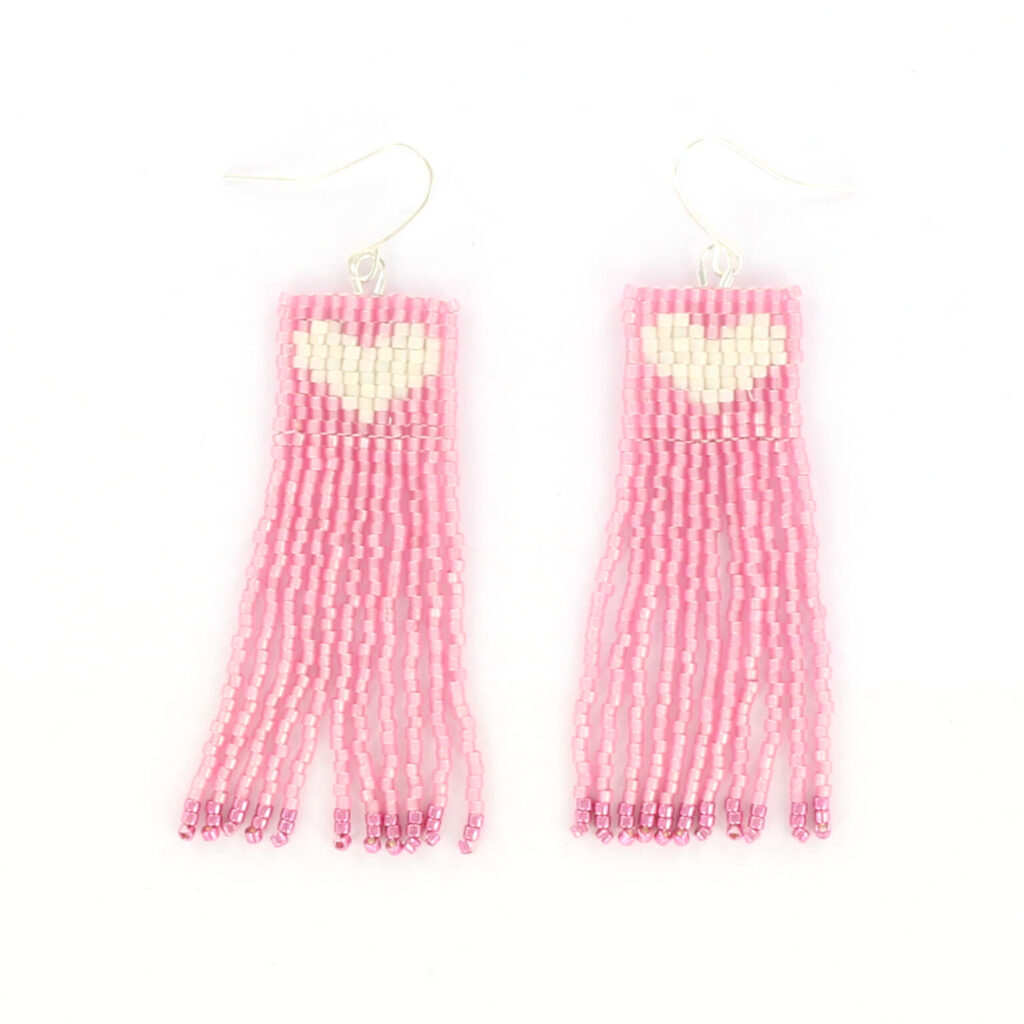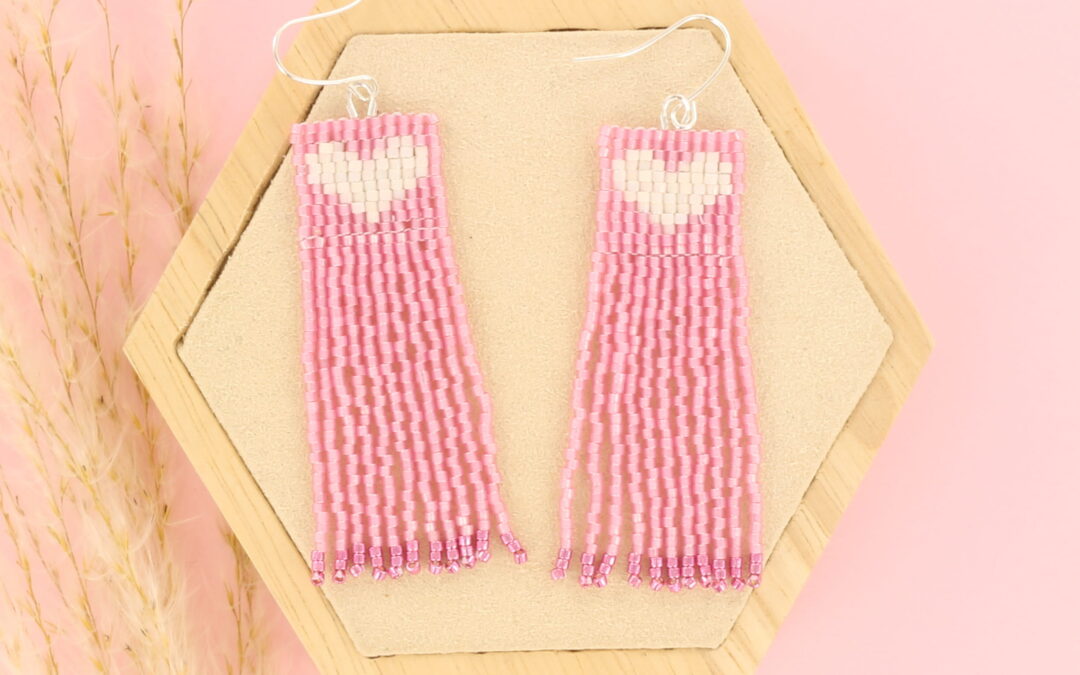
Want to make these fun square stitch earrings yourself? On this page you’ll find all the steps you need to create your own unique piece of jewelry! It’s a really fun and easy technique.
Supplies:
Miyuki delica beads
DB-625
DB-1840
DB-203
Ear hooks
Wire protector
Miyuki beading thread
Miyuki needles
1 stop bead
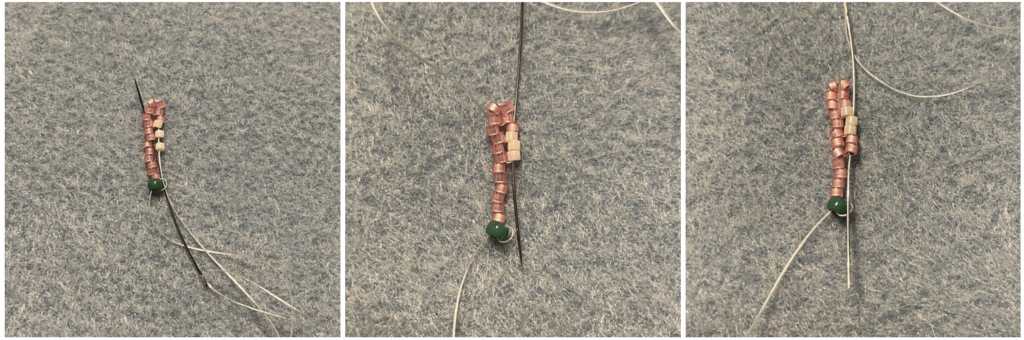
You start with a long piece of beading thread: you’ll often have to go up and down, so you’ll need quite a bit. I used about 2 meters of beading thread. If this isn’t comfortable, you could also make the “mat” first and then attach the fringe with a new strand. I personally prefer to work by folding the thread double in the first strand and gradually moving the needle further along. To make things a bit easier, I start with a stop bead. This is simply a slightly larger bead in any color that you thread through once to prevent your work from sliding off the thread. Then, start by threading 12 pink delica beads. After this, thread two more delica beads and insert the needle through the first two delica beads from bottom to top. Pull the work tight.
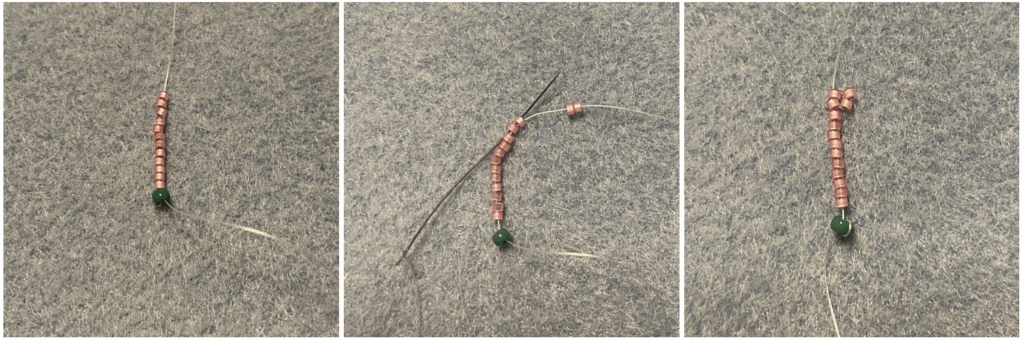
Then, go back through the first two beads and string two more beads. In this case, because we want to make a heart, one pink and one white. Now insert the needle back up into the first 4 beads of the first row. Then go back through the 4 beads of the second row and tighten the work again.
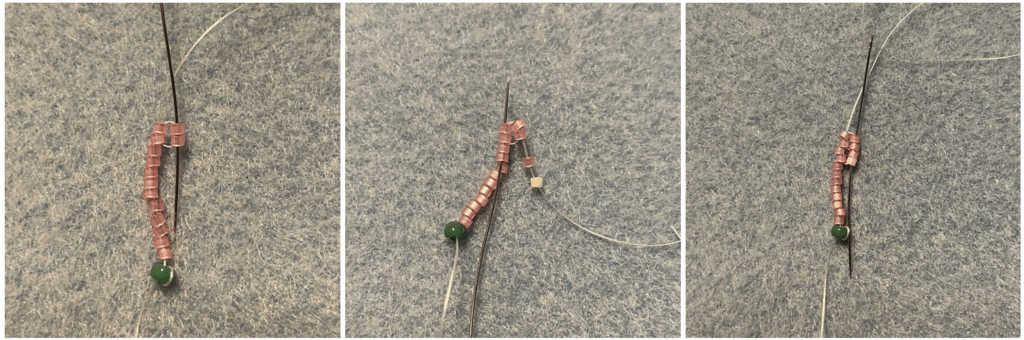
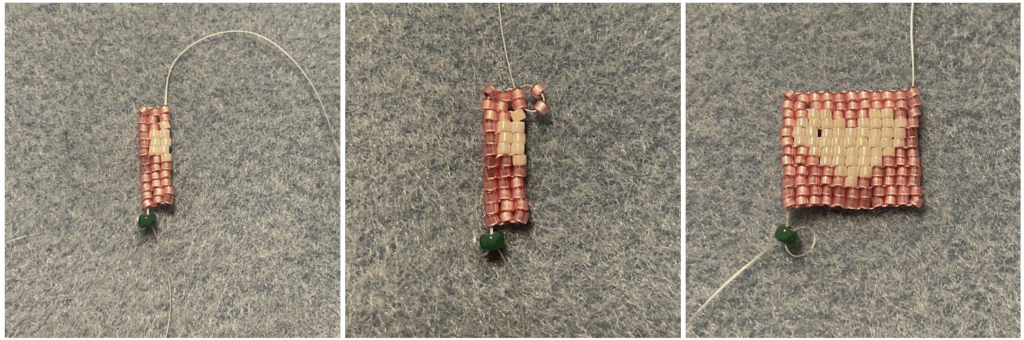
Next, we’ll string on two more beads, this time two white ones. Then, insert your needle through the bead next to it in the first row and the three above it, for a total of four. Then, go down through the four adjacent beads in the second row. Tighten your work. Now, we’ll string on two pink beads again. Insert your needle through the bead next to it in the first row and go up four beads again. Insert your needle back through the four adjacent beads in the second row. Tighten your work.
Keep repeating these steps until you’ve finished the row. Then, move on to the next row. Again, string two pink beads and thread them back through the two adjacent ones. Then back up again. Tighten your work.

Now we’re going to string on two more beads and back through the four adjacent beads. Then, we’ll go up through the four beads in the third row. Keep repeating this. So, string on two beads, through the four beads in the adjacent row, either up or down (depending on how you’re holding your work), and then back through the four adjacent beads to string on two more beads. Unless you’re starting a new row, you’ll be stringing on two beads at each step. Ultimately, you’ll have made 11 rows for this pattern. Also, pay close attention to the pattern to determine which color to string on and when. Also, keep your work pulled tight to keep it nice and straight.
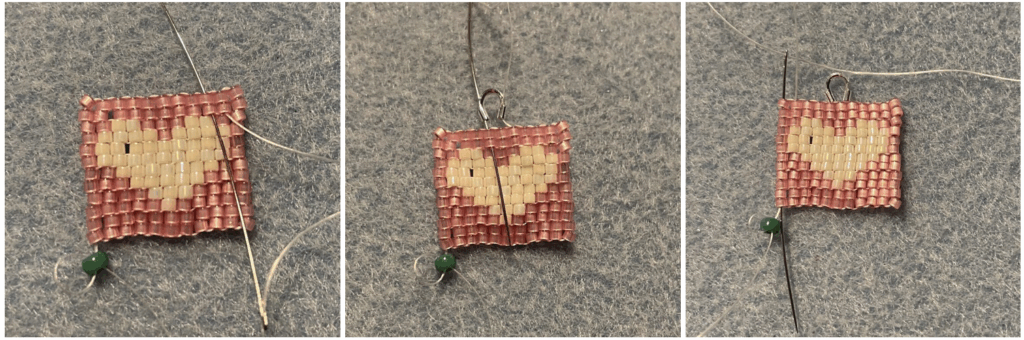
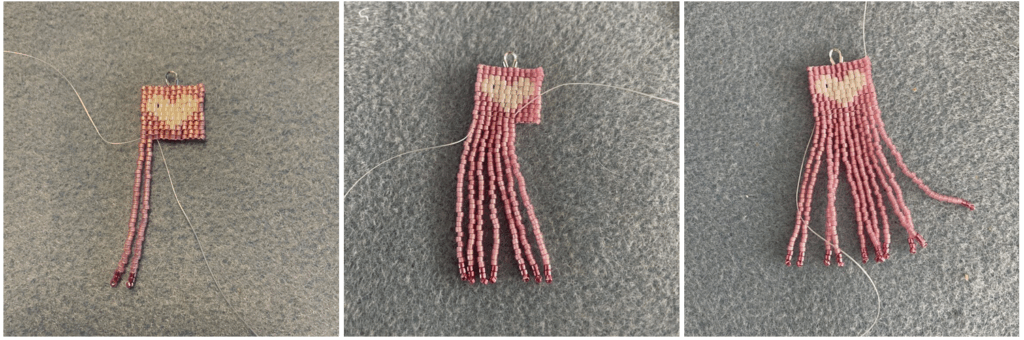
You’ll now be working your way to the top. Then, zigzag through two beads each time to the 5th row of the mat. This will allow you to attach the thread protector. You’ll then use it to attach the earring back later. Then, zigzag through to the first row and insert your needle all the way through to the bottom. Now we’ll start the fringe section.
For these earrings, I strung 30 pink delica beads and then 3 more pink metallic delica beads. Then, skip a bead and thread back up through the 32 delica beads. You’ll now come out at the first bead of the mat.
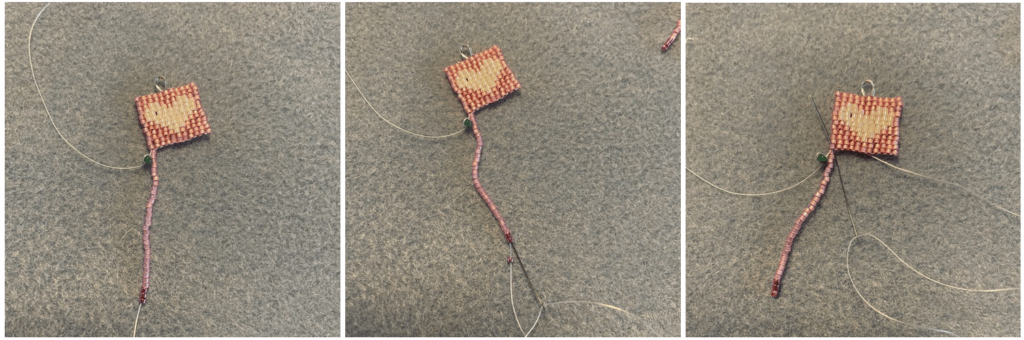
Next, insert the needle into the second bead down and string another 30 pink delica beads and 3 metallic delica beads. Skip one and thread it back through all the beads and the first bead on the mat. Now insert the needle into the next bead down again. Continue this process until you’ve made all the fringes.
You can now easily remove the stopper bead and thread both wires through the mat a few more times in a zigzag pattern. I always like to tie a small knot somewhere, just to be safe. Then you can cut the wire. Attach an earring hook to the wire protectors, and your earring is ready!

The pattern for the earrings.