

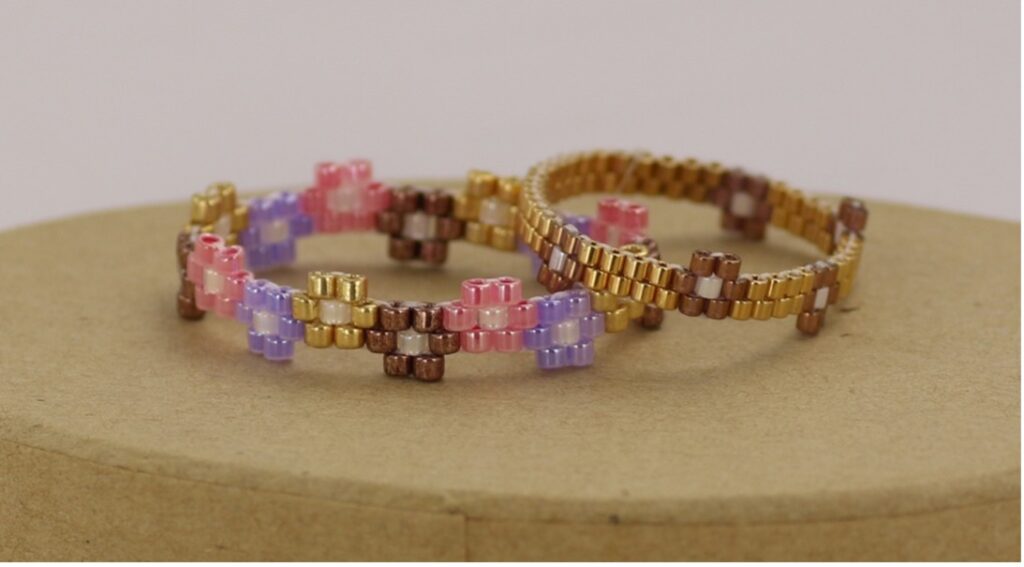
With the peyote stitch, you can create flowers that are really fun to make!
In this example, we’re working with two colors. Color 1 is the color that appears between the flowers, and color 2 is the color of the flowers themselves.
To get started on these cute flowers, it’s helpful to know how to make the peyote stitch.
You can check out this page for the basic instructions for the peyote stitch.
Below, you can read the instructions and follow along. This tutorial is all about making the peyote stitch flower bracelet!

In this example we are working with 2 colors. Color 1 is the color that is in between the flowers and color 2 is the color of the flower.
Start with peyote (even number), 2 beads per row. Pick a diffrent color for beads 5,6,8 and 9.
Tip: Bead number 7 will be the heart of the flower. It’s also a nice variantion to pick a 3rd color for the heart of the flower.

Thread back through bead 6 and 7. Now string 2 beads of the second color onto the thread (bead 10 and 11). These beads form the last 2 petals of the flower.

To secure the petals, thread back through bead 7 and 8. Now you can continue with peyote.
In this example there is a space of 2 rows of beads between the flowers. You can adjust this to your liking, but keep the rows in an even number so that the flowers will alternate in their position.

Repeat from step 1.
TIPS, INSPIRATION AND VARIATION
- You can make this with space in between the flowers or without any space.
- You can make it wider. To do this, start with 5 rows of beads.
- If you choose Fireline thread, it will be more compact and sturdy. If you want to keep it really supple, you can choose Miyuki beading thread.
Good luck and enjoy!